
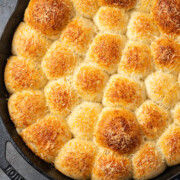
This no-knead Rosemary Garlic Bread makes you feel like a baking pro without the hassle. With only 5 simple ingredients, this campfire favorite delivers bakery-worthy results, perfect for pairing with soups, stews, or enjoying as a cheesy, satisfying snack around the fire.
Craving for more easy bread recipes? Check out our Cast Iron Garlic Bread or Raspberry Bread, next!
Quick Look at the Recipe
- ✅ Recipe Name: Rosemary Garlic Bread Dutch Oven
- 🕒 Ready In: 10 minutes prep + 2 hours to rise (can skip if camping) + 20 minutes to cook
- 👪 Serves: 15
- 🥣 Main Ingredients: Frozen bread rolls, butter, garlic salt, rosemary or basil, parmesan cheese
- 📖 Dietary Info: Vegetarian, contains dairy and gluten
- ⭐ Why You'll Love It: Soft and fluffy pull-apart bread with a buttery garlic crust that bakes up golden and irresistible
Summarize and Save the Recipe
Jump to:
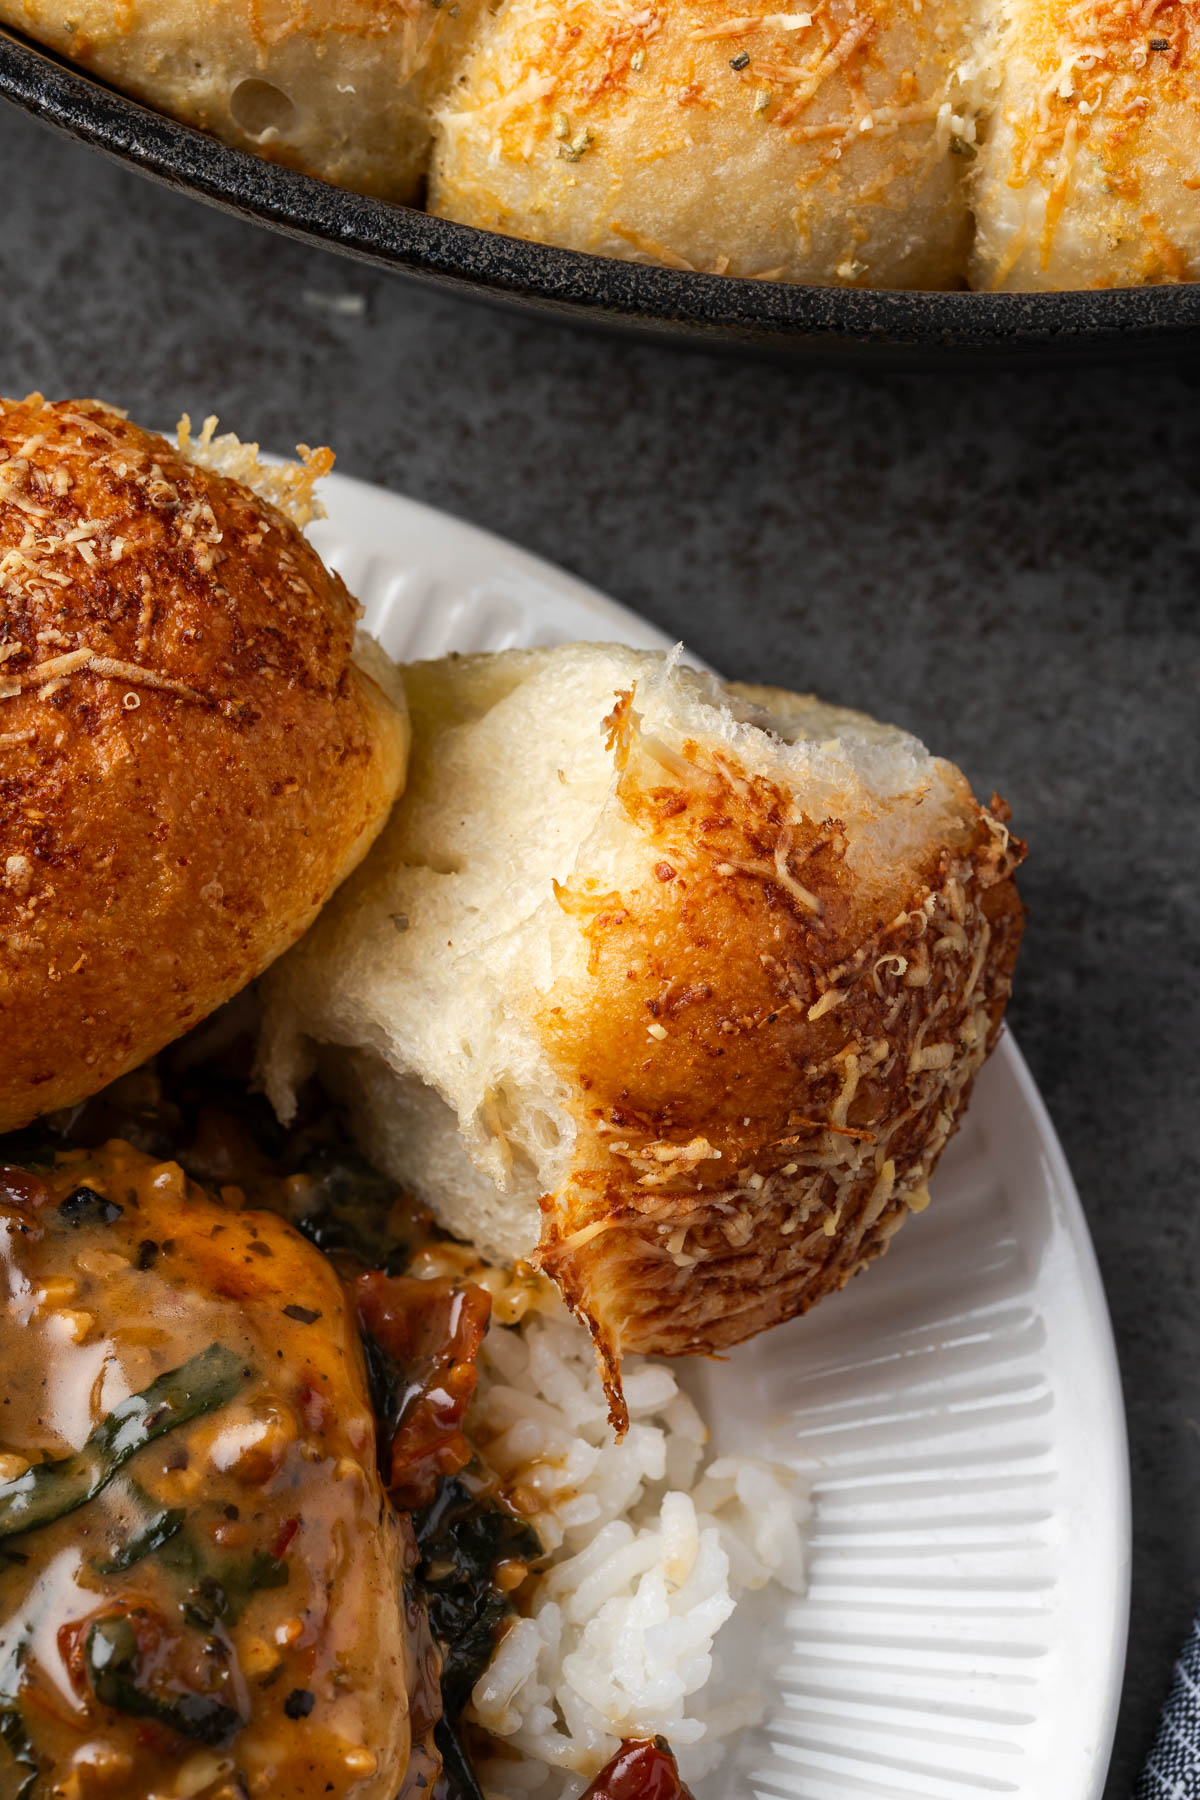
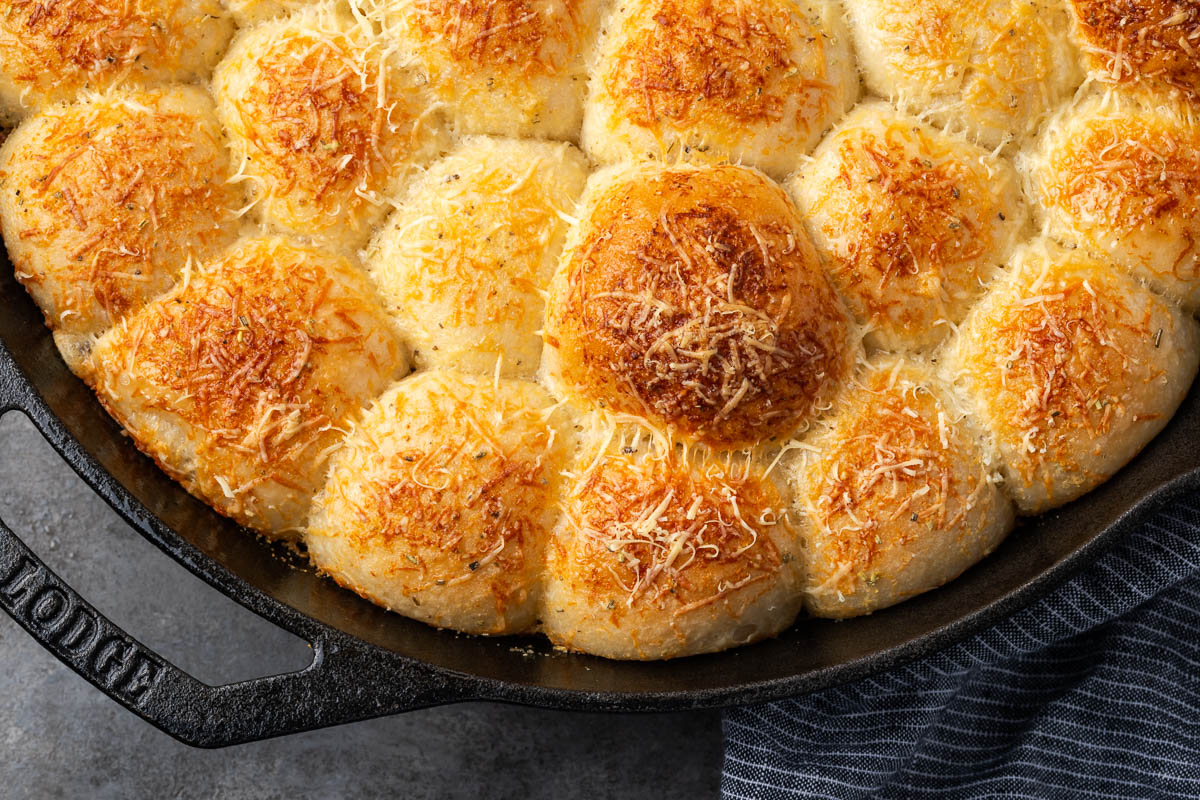
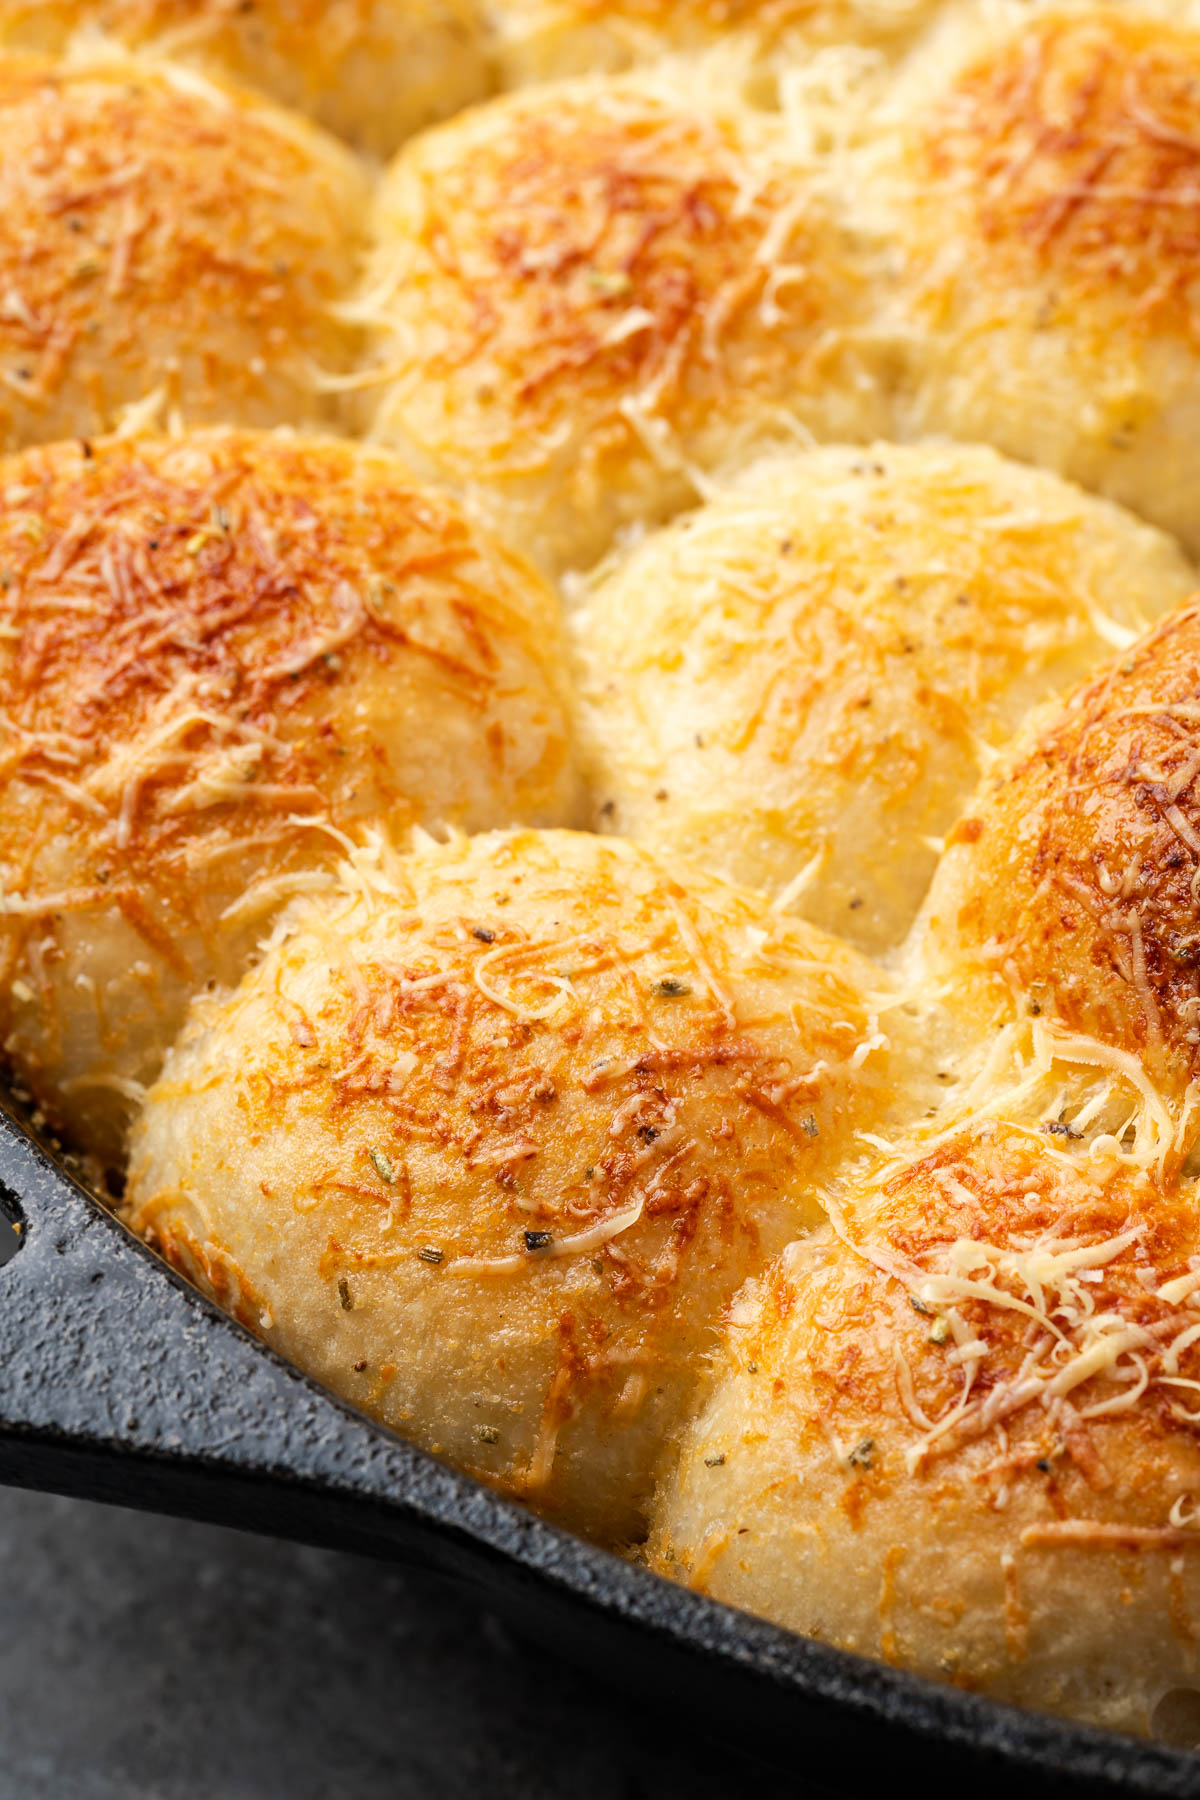
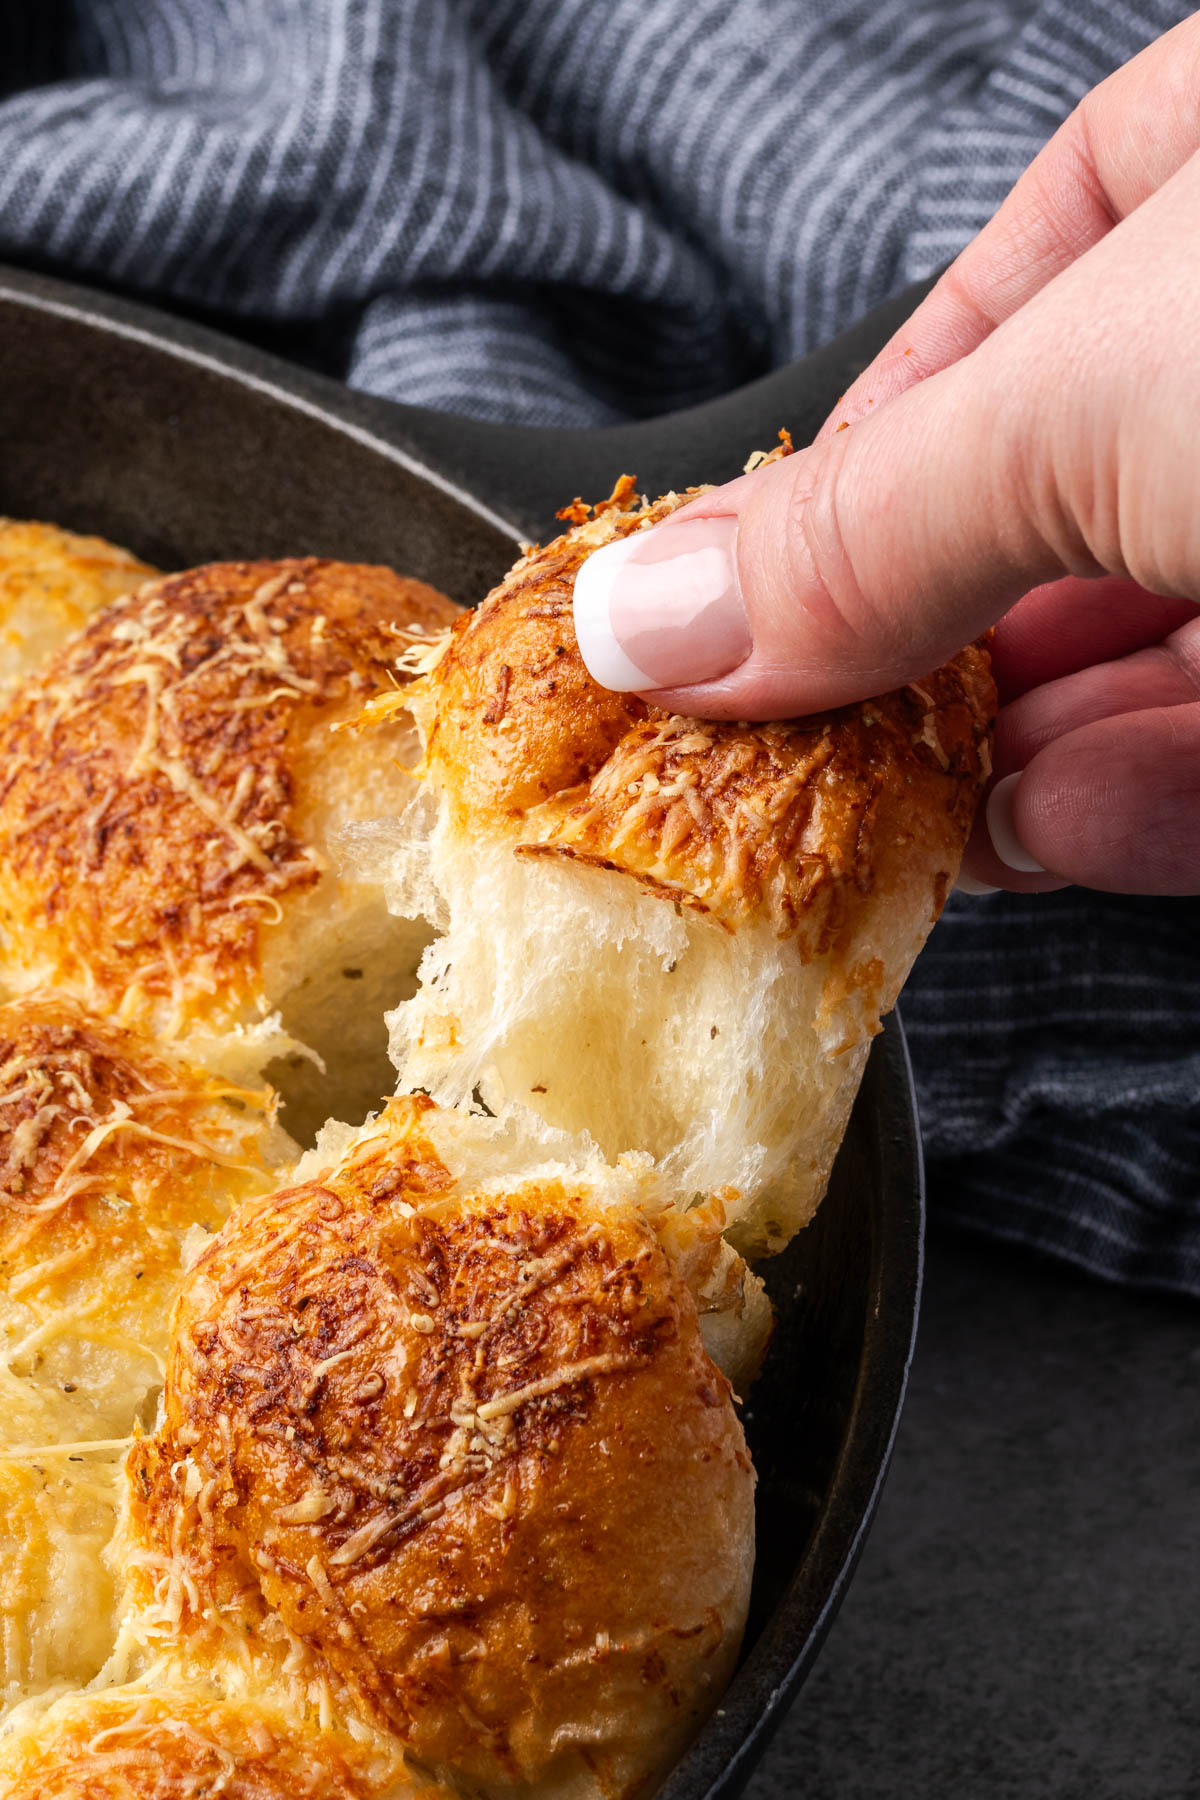
Picture pulling warm, golden rolls of cheesy goodness out of your Dutch oven while gathered around a cozy fire. Crispy on the outside, pillowy on the inside, this rosemary garlic bread is packed with earthy, garlicky flavor.
Using frozen bread rolls, butter, garlic salt, rosemary, and parmesan, you’ll be amazed at how simple it is to bake this camping bread recipe that rivals your favorite bakery. It's perfect whether you're camping under the stars or staying cozy at home, especially paired with family favorites like this baked manicotti.
Why You’ll Love This Recipe
- No Kneading Needed: Perfect for bakers of all levels, this recipe keeps it simple with minimal effort. The Dutch oven method creates a crispy crust and soft, chewy interior that’s hard to beat.
- Campfire-Ready: This versatile recipe works over campfire coals, on an open flame, or in your kitchen oven. Whether you're camping, hosting a bonfire, or cooking at home, it’s an easy way to bake artisan bread.
- Irresistible Flavor Pairing: Rosemary and garlic are a classic duo, delivering an aroma and taste that elevates this bread to gourmet status—even if you're baking outdoors.
Ingredients

- Bread Rolls: Use frozen bread rolls that have been thawed. Rolling them in melted butter, garlic salt, and rosemary infuses them with a rich, comforting flavor. Try these chicken pillows made with crescent roll dough for easy prep.
- Butter: Melted butter adds richness and prevents the bread from drying out as it bakes.
- Cheese: Everything tastes better with cheese and this garlic rosemary dutch oven bread is no exception! Parmesan creates a crispy, cheesy crust that makes this bread so irresistible. Try these garlic Parmesan pull aparts next!
- Herbs & Seasoning: Fresh rosemary and garlic salt are the stars here. Rosemary adds an earthy, fragrant touch, while garlic salt provides depth to the rosemary garlic dutch oven bread.
See the recipe card below for exact ingredient amounts, nutritional information, and detailed instructions.
Variations
- Make it Herby: Mix in thyme, oregano and basil for more layers of flavor. They complement the garlic and parmesan cheese too!
- Cheesy Overload: Swap parmesan for cheddar, mozzarella, or a sharp blue cheese to add unique creaminess to the rosemary bread recipe, just like in our cheesy pull aparts recipe.
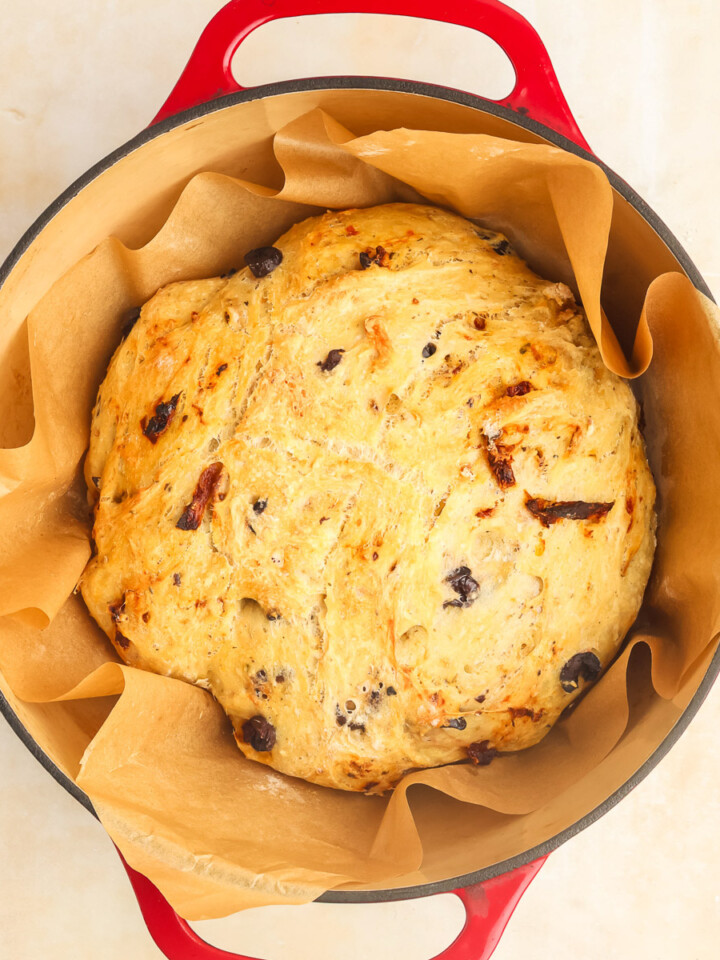
- Nutty or Fruity: Sprinkle with walnuts, pecans, or almonds to add a satisfying crunch to this garlic bread recipe, or chopped dried apricots, raisins, cranberries, or sun-dried tomatoes for a chewy twist.
- Spice it Up: Add red pepper flakes or hot sauce to the melted butter to amp up the heat!
How to Make Rosemary Garlic Bread Pull Aparts
Making this campfire garlic bread is quick and easy—ready to bake in just 10 minutes. No 'knead' to worry! Grab your 12” Dutch oven or cast iron skillet, preheat to 350°F, or fire up the campfire.
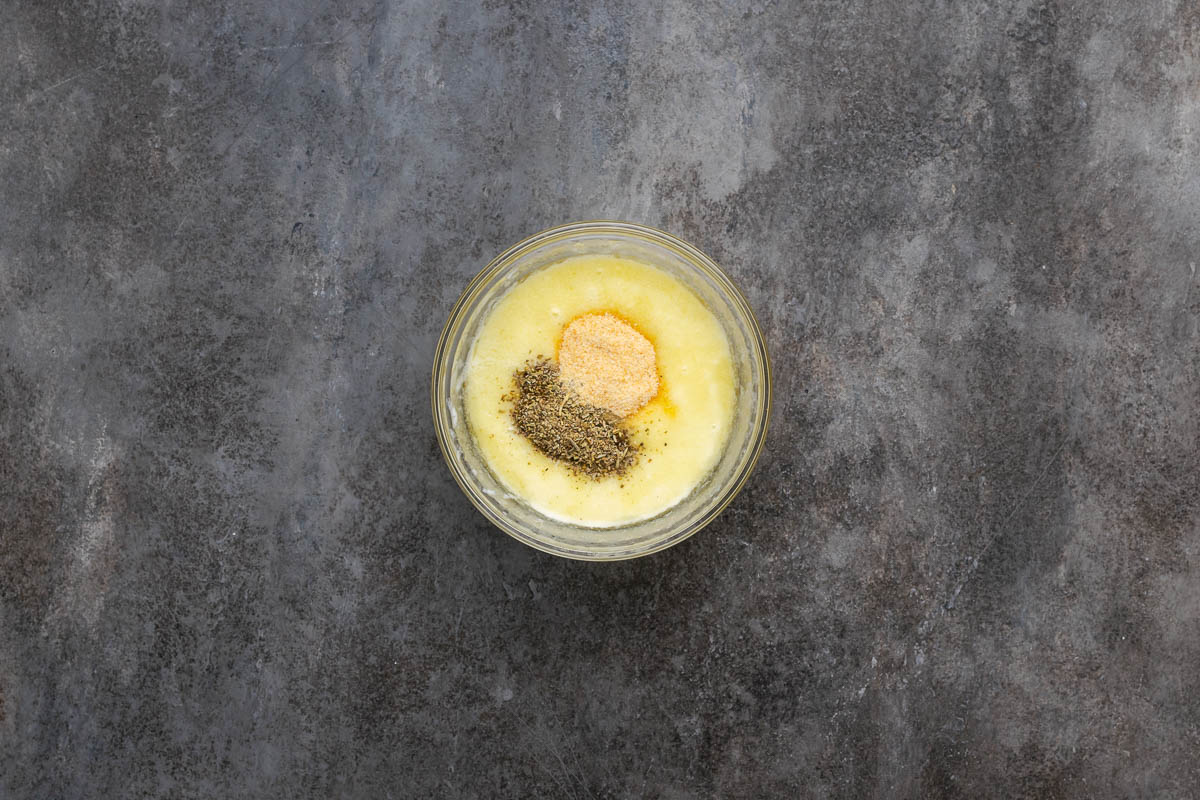
- Step 1: Create the Mixture. Mix the melted butter, garlic salt, and rosemary or basil together in a mixing bowl.
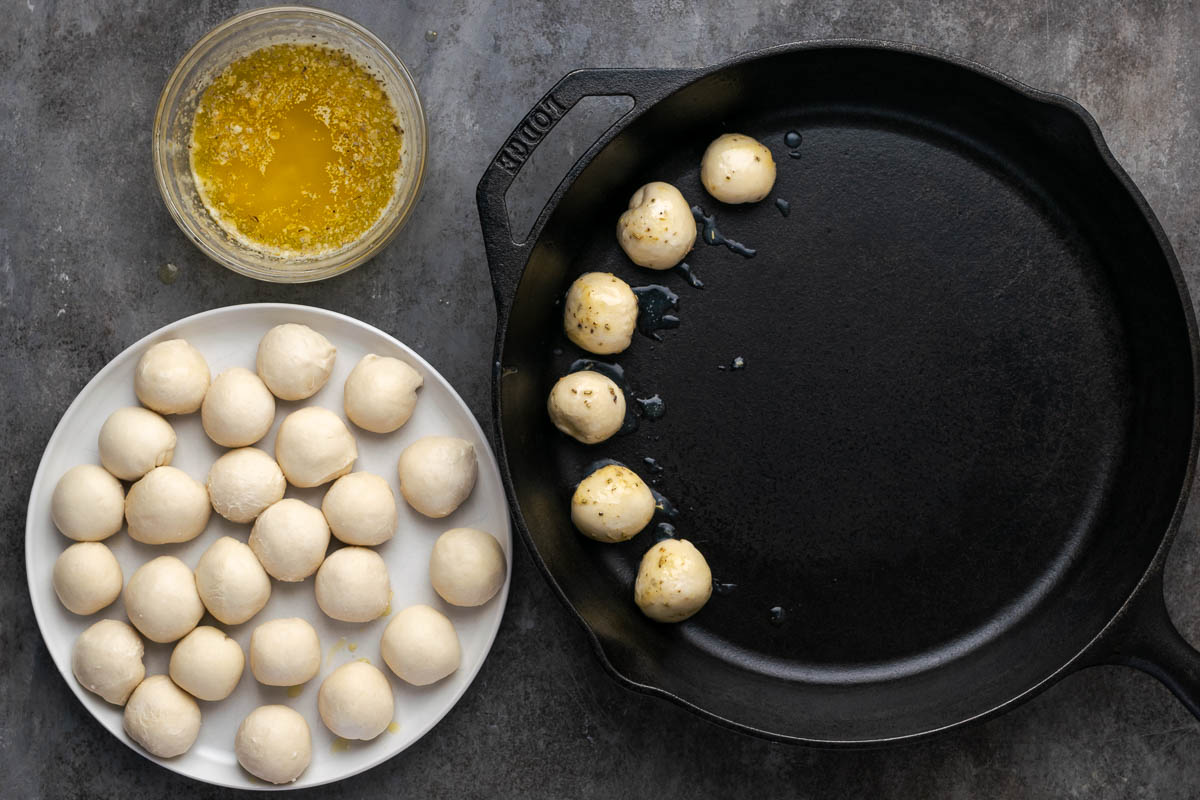
- Step 2: Roll the Rolls. Take each and roll them individually in the butter mixture to get a good coating on them.
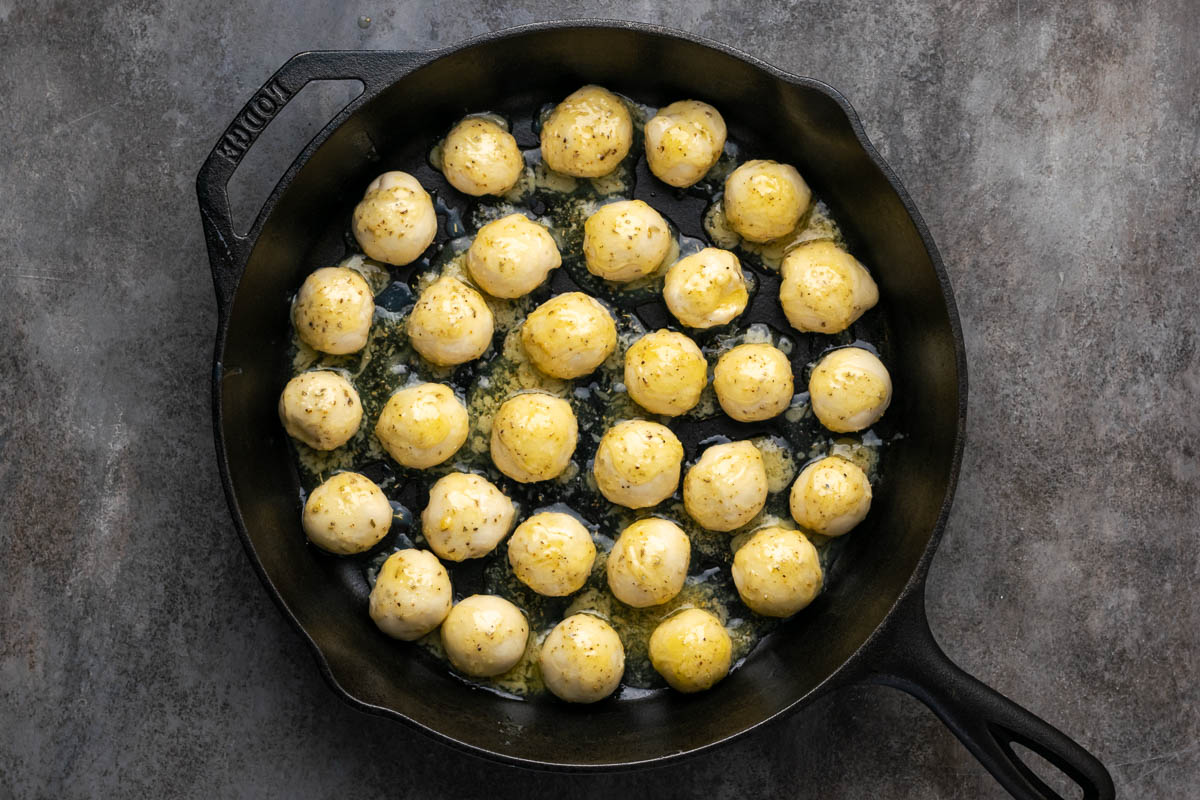
- Step 3: Arrange the Rolls. Place the rolls into a 12” Dutch oven in a single layer.

- Step 4: Set the pan aside and allow the rolls to double in size, about 2-3 hours. Sprinkle the Parmesan cheese over the top.
- Step 5: Bake and Serve. Bake the garlic bread over a campfire or in the oven at 350°F for 15-20 minutes. Pull apart and serve! They're great with our skillet Italian meatballs!
Expert Tips
- Don’t skimp on the garlic butter: Fully coating each roll means maximum flavor and a tender, buttery bite throughout.
- Arrange snugly: Place the rolls close together so they bake into a pull-apart loaf with just enough space to rise.
- Grab frozen rolls for an easy win: They cut down prep time and bake up soft and fluffy every single time.
- Storing: Once your garlic bread on the campfire is cooled, wrap leftovers in plastic wrap or store in a resealable bag for up to 5 days, or freeze individual portions for up to 3 months.
Serving Suggestions
Once your campfire foil garlic bread is baked, it’s time to dig in! Here are my favorite ways to enjoy this versatile bread, whether by the fire or fresh from the oven:
- Dip it in a hearty bowl of chicken noodle soup or pumpkin chili for a way to warm up on a chilly night.
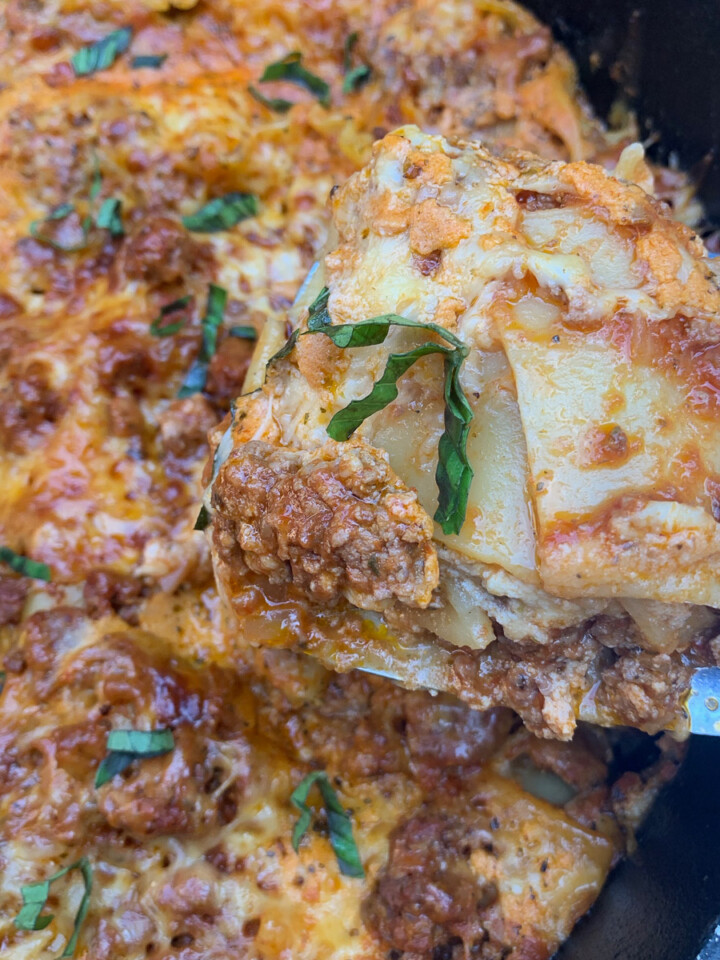
- Serve it around the campfire with this Dutch Oven lasagna or sausage peppers and rice skillet for a delicious and filling meal.
- Make it for a family gathering or a fun addition to a buffet table alongside jalapeño poppers and this Italian zucchini tart.
Rosemary Garlic Bread Recipe FAQs
For the best results, reheat your rolls wrapped in foil at 350°F for 7-8 minutes and then unwrap to heat for an additional 3-5 minutes. This method works to restore the crusty outside and warm, soft center. If frozen, thaw before reheating.
Absolutely! Assemble the rolls up to 24 hours in advance and refrigerate overnight. They will slowly proof under refrigeration. When ready to bake, let the dish sit at room temperature for 30-60 minutes before baking as directed.
This recipe is easily adaptable to cooking for a camping meal. I like to use a foil pan for easy cleanup. Prep the rolls as indicated and cover with foil. I usually skip the proof and just place the pan directly in the campfire coals once they're in the pan. Cook until the rolls are done and enjoy!
More Delicious Camping Recipes

If you tried this Rosemary Garlic Bread or any other recipe on my blog, please leave a 🌟 star rating and let me know how it went in the 📝 comments below. Thanks for visiting!
Get the Recipe
Rosemary Garlic Bread
Equipment
- 12" Dutch Oven
Ingredients
- 15 bread rolls thawed (I used Rhodes Rolls)
- 8 tablespoon butter melted
- 1 teaspoon garlic salt
- 1 teaspoon rosemary or basil
- ¼ cup parmesan cheese
Instructions
- Add melted butter, garlic salt, rosemary or basil to a small bowl and mix together.
- Cut rolls in half and roll into 1 inch balls.
- Dredge each ball in the butter mixture and place in skillet (be sure to place them close together). Once you have filled the skillet pour remaining garlic butter over the top of the balls. Set them aside to rise for 2-3 hours.
- Preheat oven to 350°F.
- Sprinkle with Parmesan cheese. Place in oven and cook for 20 minutes.
- Remove from oven and enjoy.
Notes
- Be generous with the butter. Fully coating each roll means maximum flavor and a tender, buttery bite throughout.
- Place the rolls close together so they bake into a pull-apart loaf with just enough space to rise.
- Frozen rolls cut down prep time and bake up soft and fluffy every single time.
Nutrition
Dutch Oven Daddy is not a dietician or nutritionist, and any nutritional information shared is only an estimate. We recommend running the ingredients through an online nutritional calculator if you need to verify any information.
Noah says
This has become my go-to recipe for homemade bread because the texture is consistently excellent every time. The infusion of herbs gives it a gourmet touch that makes it feel much more special than a standard white loaf.
Chloe says
I was surprised at how easy it was to achieve a bakery-quality loaf using this straightforward cast iron method. The garlic flavor is subtle yet distinct, making it the ultimate side dish for a hearty soup or pasta.
Liam says
The aroma of fresh rosemary and garlic filled my entire house while this bread was baking in the Dutch oven. It came out with a perfectly crispy crust and a soft, airy center that paired beautifully with dinner.
Edward says
What an amazing recipe! I love how easy it was to make!
Cami says
These were so easy to do with the pre-made dough! Everyone loved them and they were gone so quickly!