
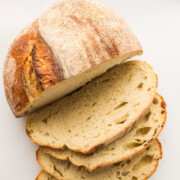
Get ready to bake the perfect Dutch Oven Sourdough Bread with a crackling crust and a soft, airy crumb! This easy sourdough bread recipe is beginner-friendly and uses just four simple ingredients and your trusty cast iron Dutch oven to create a homemade artisan loaf right at home. No kneading required.
Quick Look at the Recipe
- ✅ Recipe Name: Dutch Oven Sourdough Bread
- 🕒 Ready In: About 11-13 hours (mostly hands-off)
- 👪 Serves: 8-10 slices
- 🥣 Main Ingredients: Bread flour, water, sourdough starter, sea salt
- 📖 Dietary Info: Dairy-free, vegan, no added sugar, naturally fermented for easier digestion
- ⭐ Why You'll Love It: This loaf bakes up with a crisp crust and an open, chewy crumb - all thanks to the steam trapped inside your Dutch oven.
Summarize and Save the Recipe
There's something special about pulling a golden, crusty loaf of homemade sourdough out of your Dutch oven. The aroma fills the whole house, and cutting into that first warm slice is pure magic. This Dutch oven sourdough bread recipe is my go-to for weekends, and once you nail it, you'll never want store-bought bread again.
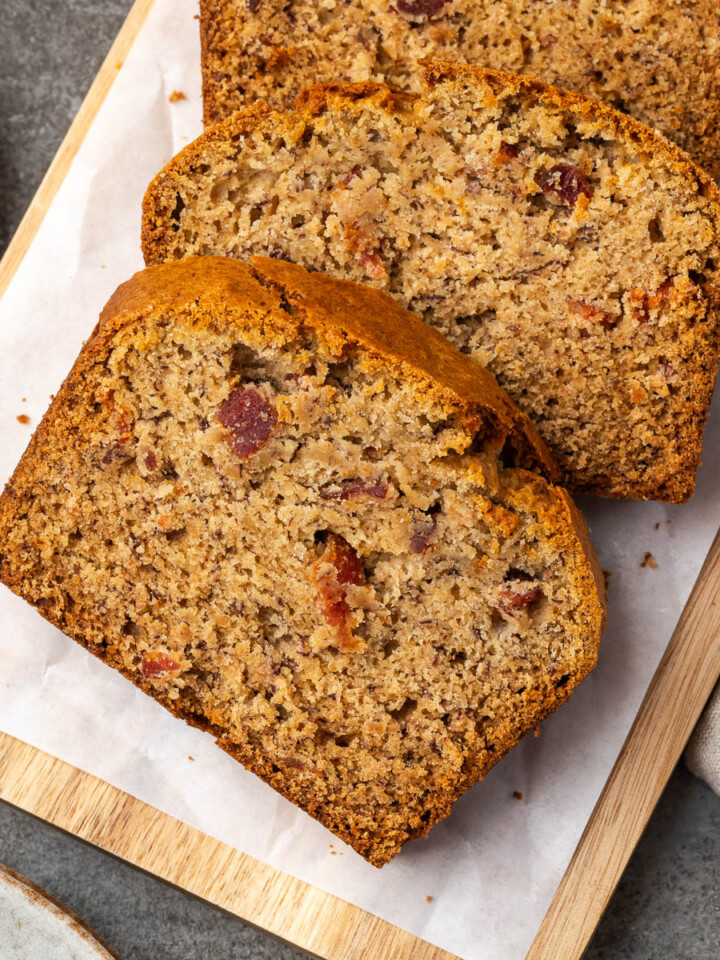
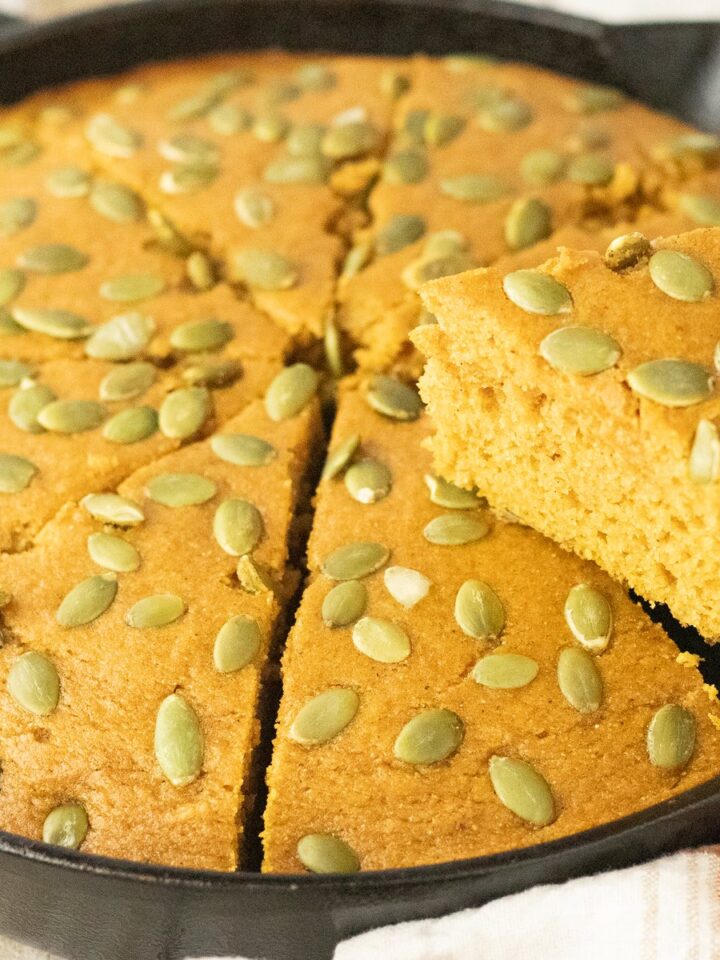
Whether you're a complete beginner or a seasoned baker, this easy sourdough bread delivers bakery-level results every time. If you enjoy baking from scratch, you'll also love my Southern Cornbread and Beginner-Friendly Dutch Oven Bread!
Why You’ll Love This Recipe
- Simple Ingredients: Just flour, water, starter, and salt - no yeast packets, no special equipment beyond your Dutch oven.
- Hands off: Most of the time is passive fermentation. You mix, fold a few times, and the dough does the rest overnight.
- Bakery-Quality Crust: The Dutch oven traps steam during baking, creating that signature crackly, golden crust you'd find at an artisan bakery.
- Incredible Flavor: Slow fermentation develops deep, tangy flavor that store-bought bread simply can't match.
- Easier to Digest: The long, natural fermentation process breaks down gluten and phytic acid, making sourdough gentler on your stomach compared to commercial breads.
- Versatile: Perfect for sandwiches, toast, soups, or just slathered with butter straight from the oven.
Jump to:
- Quick Look at the Recipe
- Why You’ll Love This Recipe
- Ingredients
- Health Benefits of Sourdough Bread
- Dutch Oven Sourdough Bread Variations
- How to Make Sourdough Bread in a Dutch Oven
- Expert Tips for Baking Sourdough Bread in a Dutch Oven
- Serving Suggestions
- Dutch Oven Sourdough Bread FAQs
- More Delicious Bread Recipes
- Get the Recipe
Ingredients
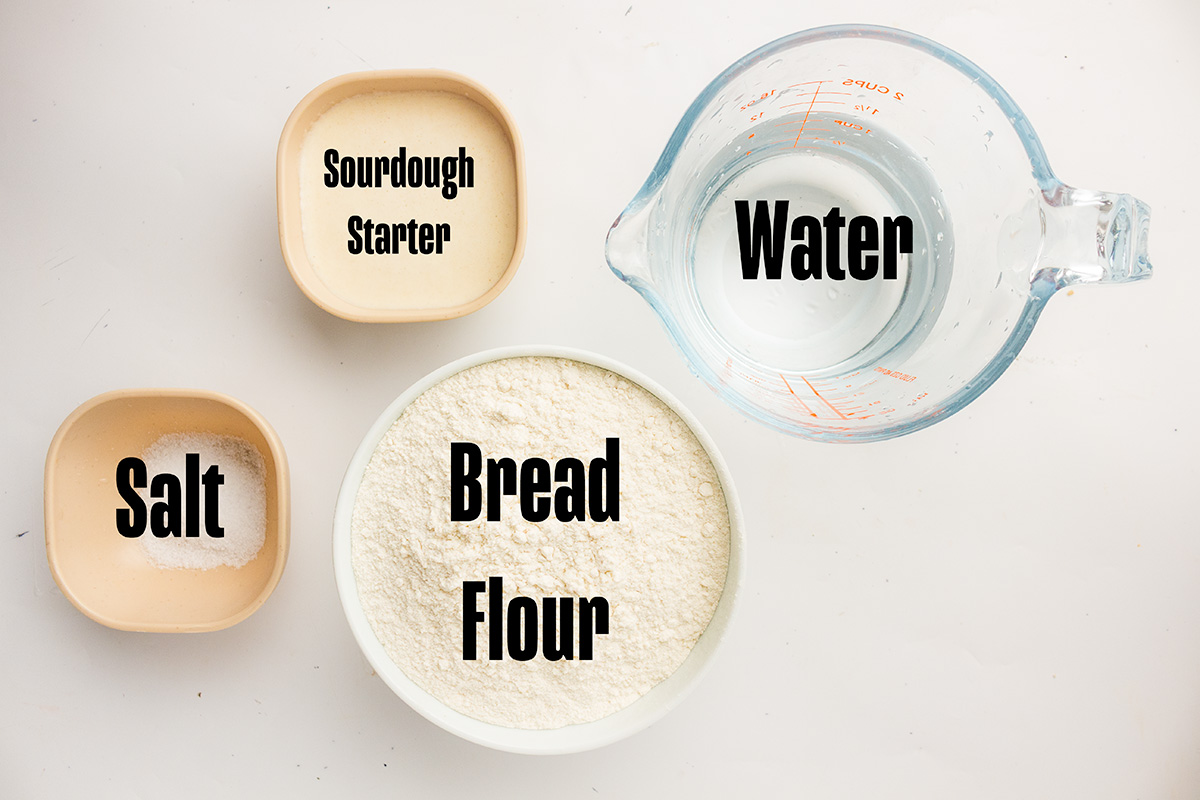
- Bread Flour: Bread flour gives this loaf its structure and chewy texture. Bread flour has a higher protein content than all-purpose, which means better gluten development and a more satisfying crumb.
- Water: Water hydrates the flour and activates the gluten network. Use filtered water at room temperature for the best results.
- Active Sourdough Starter: Bubbly active starter is the heart of this recipe. It provides the natural leavening and that signature tangy sourdough flavor.
- Fine Sea Salt: Fine sea salt strengthens the gluten, controls fermentation, and brings out the flavor of the bread.
See the recipe card below for exact ingredient amounts, nutritional information, and detailed instructions.
Health Benefits of Sourdough Bread
One of the reasons I love baking sourdough is that it's not just delicious, it's actually better for you than most store-bought breads. The long, natural fermentation process does a few important things. First, it breaks down phytic acid in the flour, which means your body can absorb more nutrients like iron, zinc, and magnesium. Second, fermentation partially breaks down gluten, making sourdough easier to digest for many people (though it's not gluten-free). Third, the natural lactic acid bacteria in sourdough act as a prebiotic, supporting gut health. And because this recipe has no added sugar, no preservatives, and no commercial yeast, what you're eating is just real, whole ingredients that have been transformed by time and fermentation.
Dutch Oven Sourdough Bread Variations
- Rosemary and Garlic Sourdough: Fold in 2 tablespoons of fresh chopped rosemary and 4 cloves of minced roasted garlic during the stretch and fold stage for a savory, aromatic loaf.
- Everything Bagel Sourdough: Top the scored loaf with everything bagel seasoning before baking for a crunchy, flavorful crust that's perfect for toast.
- Olive and Herb Sourdough: Add ½ cup of chopped Kalamata olives and a tablespoon of dried Italian herbs during the final fold for a Mediterranean-inspired loaf.
- Cheddar Jalapeño Sourdough: Fold in 1 cup of shredded sharp cheddar and 2 diced jalapeños for a spicy, cheesy twist that pairs perfectly with chili or soup.
- Seeded Sourdough: Mix in ¼ cup each of sunflower seeds, pumpkin seeds, and flaxseeds for added crunch, nutrition, and a rustic look.
How to Make Sourdough Bread in a Dutch Oven
Learning how to bake sourdough bread in a Dutch oven is easier than you might think. There's no kneading involved - just simple stretch and folds that build structure without any heavy work. The Dutch oven does the heavy lifting by trapping steam and creating the perfect baking environment for an incredible crust and crumb.
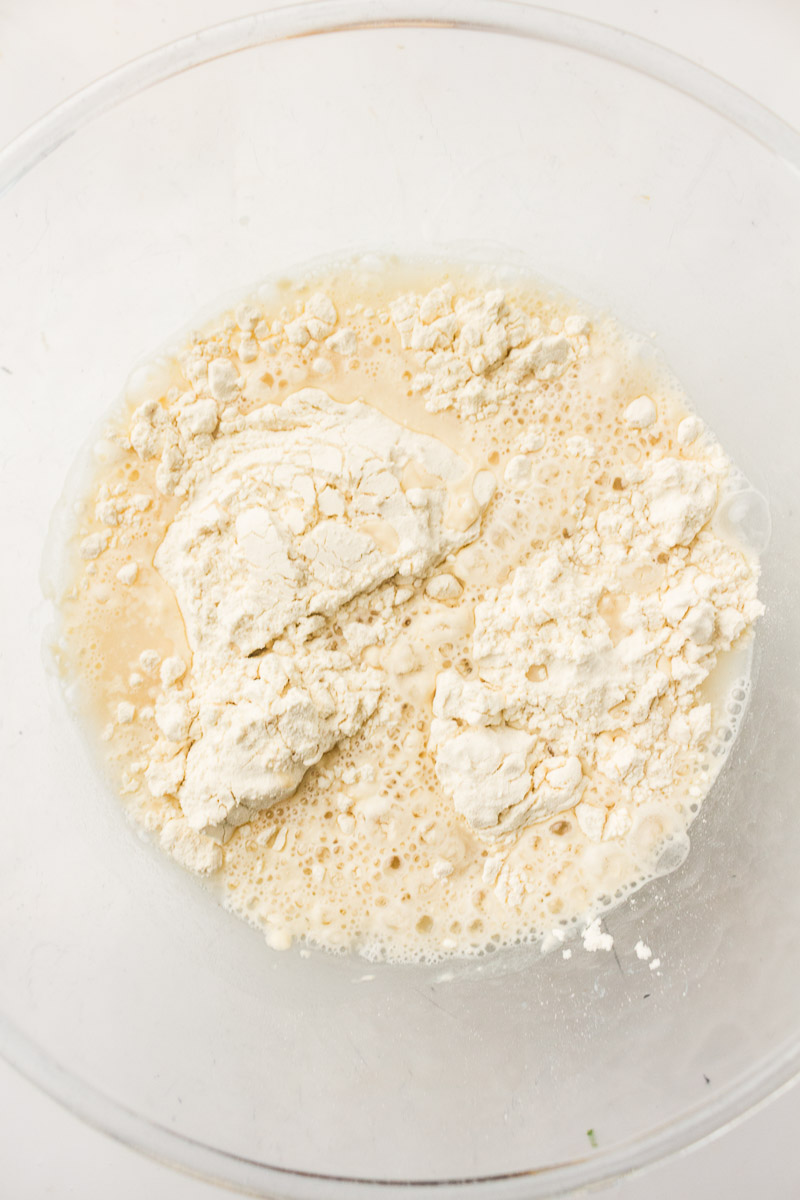
- Step 1: Mix the Dough. In a large mixing bowl, combine the bread flour and water. Mix until all the flour is hydrated and a shaggy dough forms. Cover the bowl and let the dough rest for about 30 minutes. This resting period is called autolyse, and it gives the flour time to fully absorb the water and begin developing gluten.

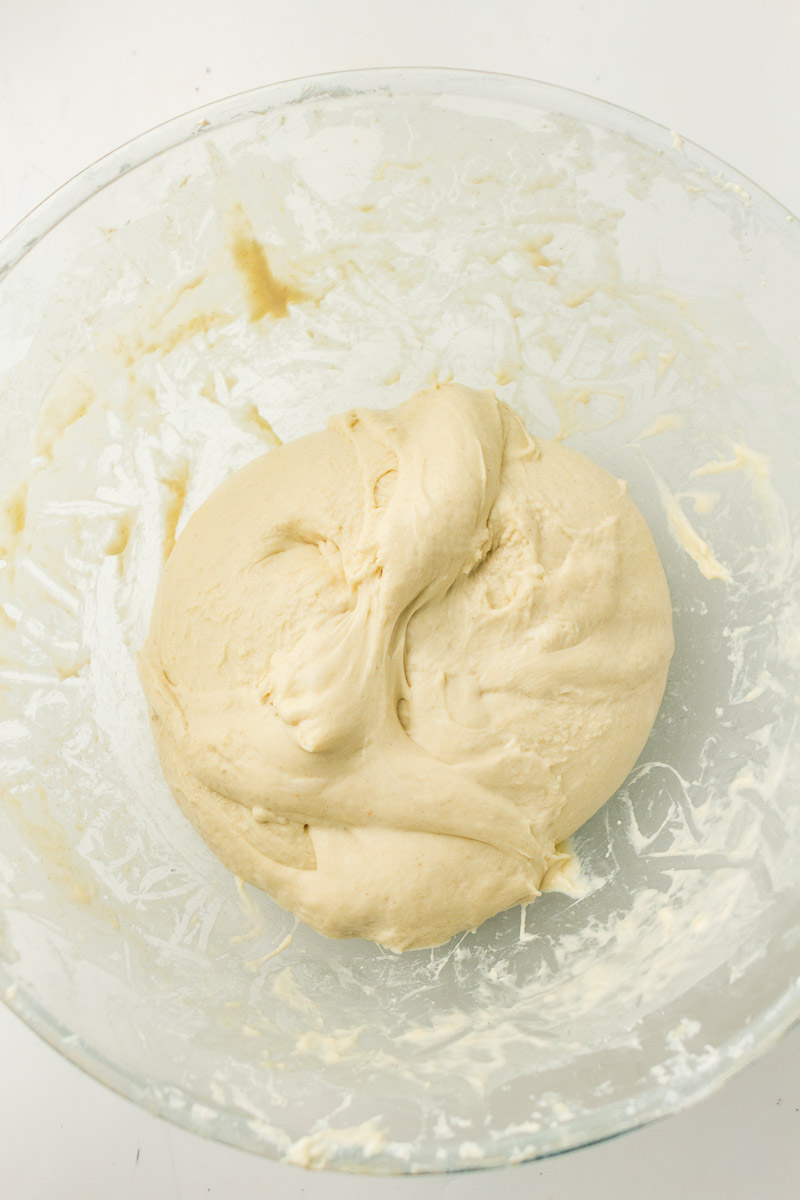
- Step 2: Add Starter and Salt. Add the active sourdough starter and salt to the dough. Mix thoroughly until everything is fully incorporated. The dough will feel sticky and a bit rough at this stage - that's completely normal.
- Step 3: Stretch and Fold. Over the next 2 hours, perform stretch and folds every 30 minutes. Gently stretch one side of the dough upward and fold it over the center. Rotate the bowl and repeat until all four sides have been folded. This builds strength in the dough without kneading.
- Step 4: Bulk Ferment. Cover the dough and allow it to bulk ferment at room temperature for about 6-8 hours (or overnight if your house runs cool). The dough is ready when it has risen noticeably, looks airy, and feels jiggly when you gently shake the bowl.
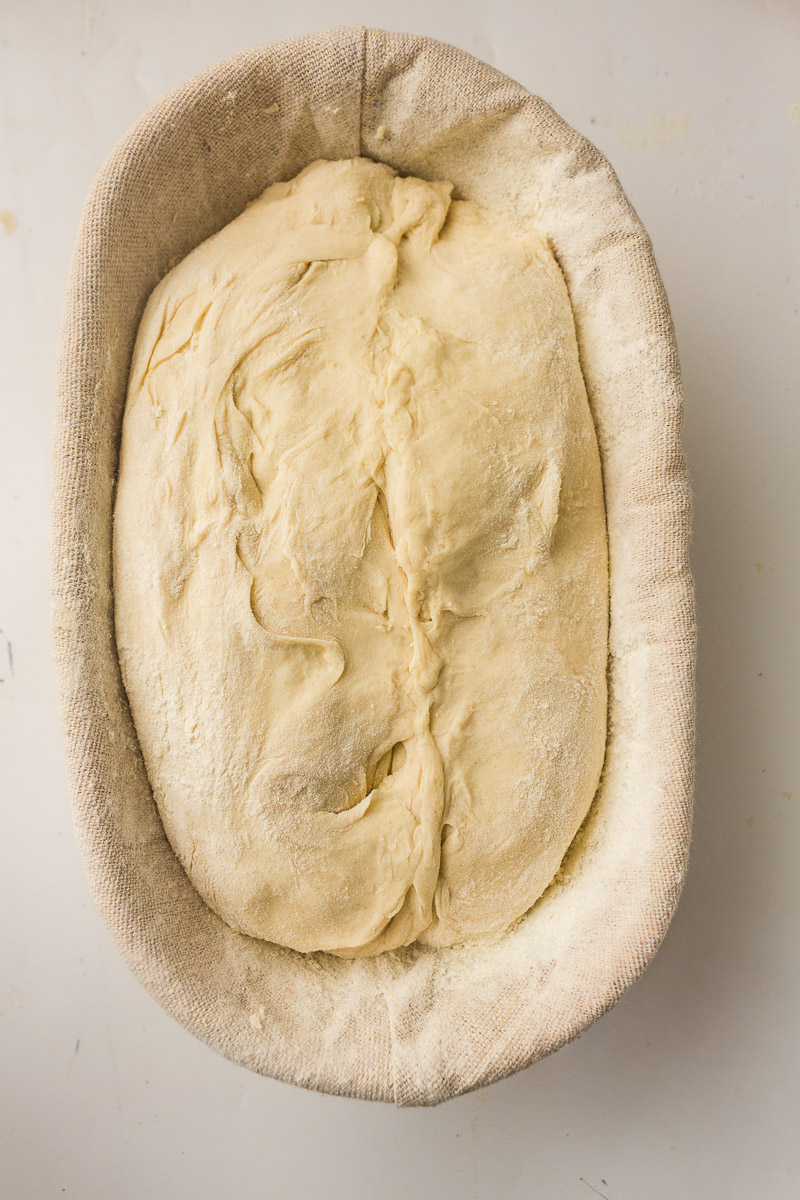
- Step 5: Shape and Proof. Turn the dough onto a lightly floured surface and shape it into a tight round loaf. Place the dough seam side up into a floured proofing basket or a bowl lined with a floured towel. Cover and let it proof for 1-2 hours at room temperature, or refrigerate overnight for deeper flavor.
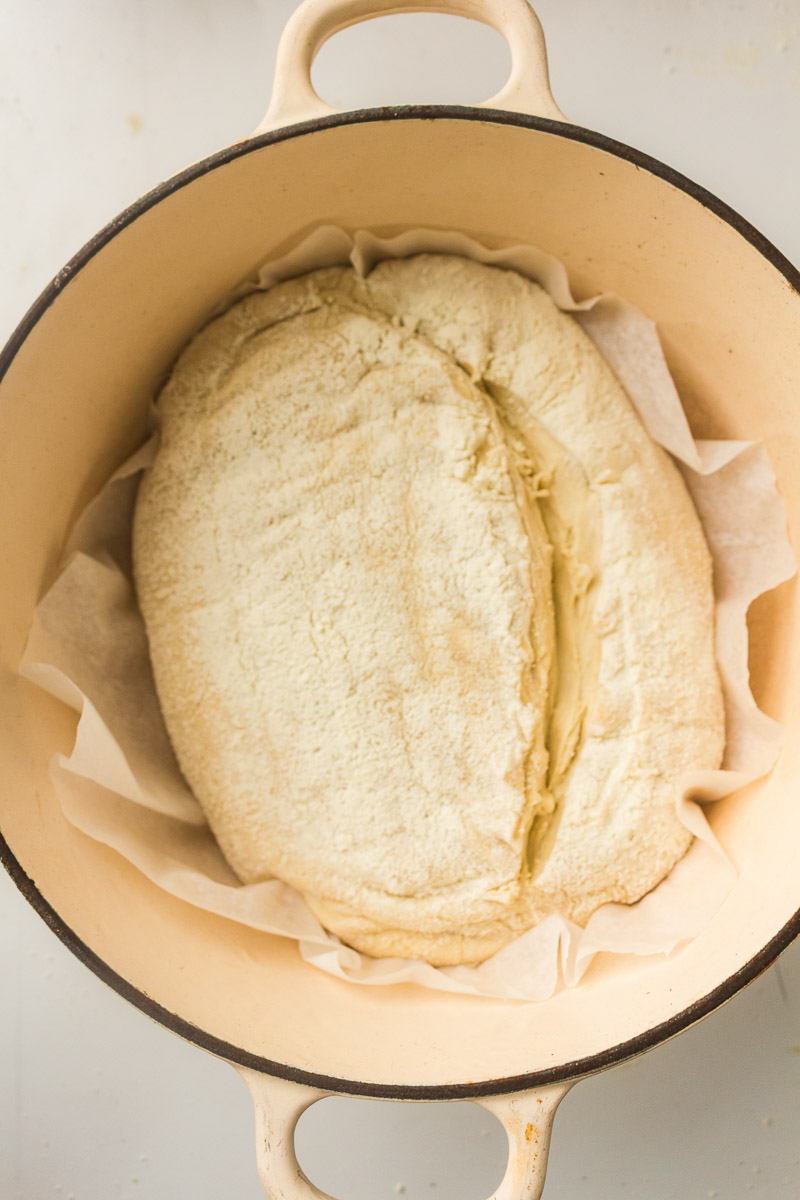
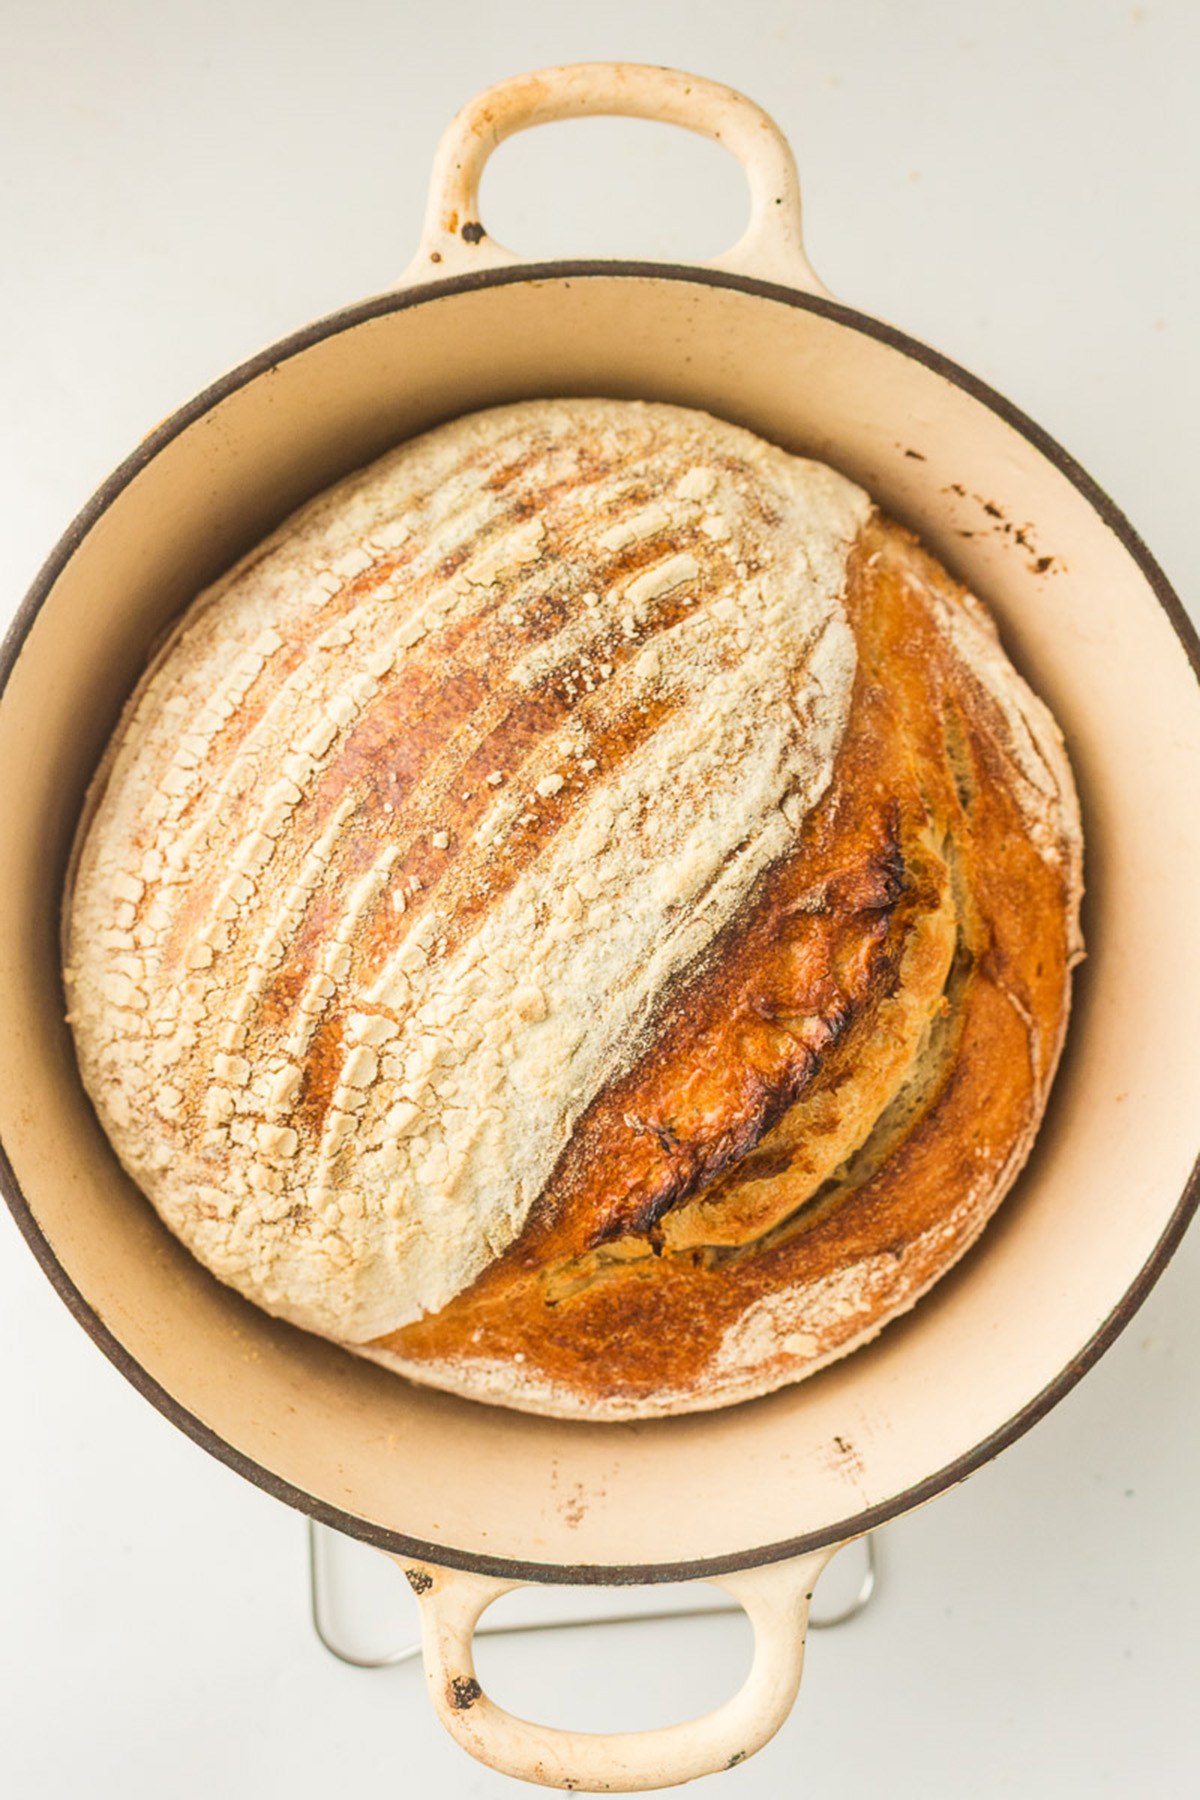
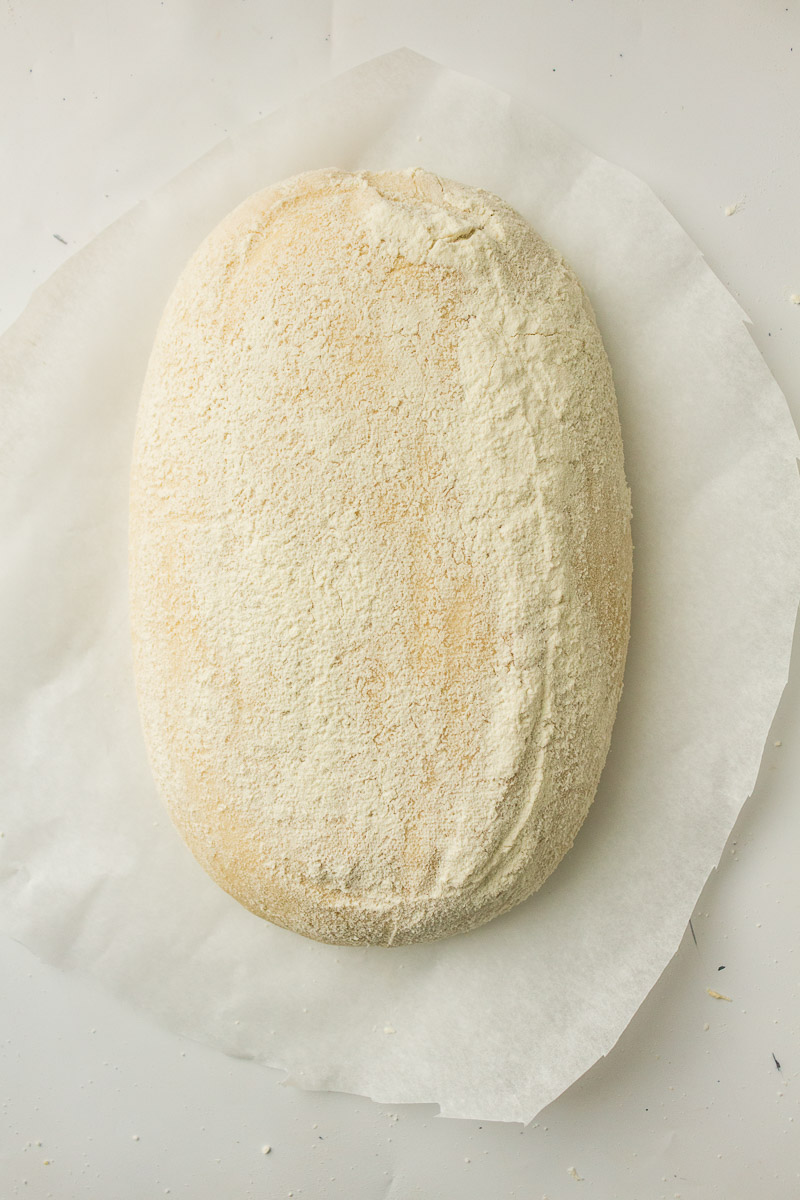
- Step 6: Bake in the Dutch Oven. Preheat the oven to 465°F (240°C) with your Dutch oven inside for at least 30 minutes. Carefully turn the dough out onto parchment paper, score the top with a sharp blade or lame, and transfer it into the hot Dutch oven. Bake covered for 20 minutes to trap steam. Then remove the lid and bake for another 20-22 minutes until the crust is deep golden brown.
Expert Tips for Baking Sourdough Bread in a Dutch Oven
- Use a Hot Dutch Oven: Preheating the Dutch oven for at least 30 minutes ensures the dough hits a blazing hot surface, which creates maximum oven spring and a better crust.
- Score with Confidence: A single deep slash (about ½ inch) down the center of the loaf gives the bread room to expand. Use a razor blade or bread lame for the cleanest cut.
- Don't Skip the Autolyse: Letting the flour and water rest together for 30 minutes before adding the starter makes the dough easier to work with and improves the final texture.
- Check Your Starter: Your sourdough starter should be bubbly, doubled in size, and pass the float test (a spoonful floats in water) before you use it. An under-active starter means a flat, dense loaf.
- Use Parchment Paper: Lowering the dough into the Dutch oven on parchment paper prevents sticking and makes it easy to lift the loaf out after baking.
- Let It Cool Completely: Cutting into a hot loaf is tempting, but the inside is still baking from residual heat. Wait at least 1 hour for the best texture and crumb.

Serving Suggestions
- This Dutch oven sourdough bread is perfect fresh out of the oven with a generous spread of butter or a drizzle of good olive oil.
- Slice it thick for sandwiches - it holds up beautifully to hearty fillings like roasted turkey, avocado, and sharp cheddar.
- Serve alongside a warm bowl of soup or stew for the ultimate comfort meal. It pairs perfectly with my Dutch Oven Beef Stew, Dutch Oven Chili Mac, or Dutch Oven Pot Roast.
- Toast slices and top with avocado, a poached egg, and a pinch of flaky salt for an easy weekend brunch.
- Make bruschetta by rubbing toasted slices with garlic and topping with fresh tomatoes, basil, and a drizzle of balsamic glaze.
Dutch Oven Sourdough Bread FAQs
You don't strictly need one, but a Dutch oven will give you the best results. The heavy lid traps steam inside the pot, which is the key to getting that crispy, crackly crust and maximum oven spring. Without a Dutch oven, you can use a baking stone with a tray of water in the oven, a heavy pot with a tight-fitting lid, or even a loaf pan. The results just won't be quite the same as a true Dutch oven bake.
A Dutch oven traps steam released from the dough during the first phase of baking. This steam keeps the crust soft long enough for the bread to fully expand (oven spring), and then the high, even heat creates that signature crackly, caramelized crust. The thick cast iron walls also hold heat incredibly well, giving you an even bake all the way around. It mimics the steam-injected ovens used in professional bakeries.
For most standard sourdough recipes, a 5 to 7 quart Dutch oven works best. This recipe uses about 1,250 g of total dough weight, so a 5.5 to 6 quart Dutch oven is ideal. You want about 1 inch of space between the dough and the sides of the pot, and at least 4 to 5 inches of depth so the loaf has room to rise without hitting the lid.
Yes, but check the manufacturer's maximum temperature rating first. Some enameled Dutch ovens are only rated to 450°F, which may not be hot enough for this recipe. If yours is rated for higher temperatures, it works great and has the added benefit of being easier to clean. A bare cast iron Dutch oven can handle any baking temperature without issue.
Yes! After shaping, place the dough in the proofing basket, cover it tightly, and refrigerate for 8 to 12 hours. Cold fermentation slows down the yeast activity, which develops a deeper, more complex flavor. You can bake it straight from the fridge with no need to bring it to room temperature first.
You can, but bread flour will give you the best results. Bread flour has a higher protein content (typically 12 to 14%), which means stronger gluten development, a chewier crumb, and better structure. If you use all-purpose flour, expect a slightly softer, less chewy loaf.
Look for the dough to have increased in volume by about 50 to 75%, with visible air bubbles on the surface and sides. It should feel light, airy, and jiggly when you gently shake the bowl. If it's still dense and tight, give it more time. Temperature plays a big role. A warmer kitchen (75 to 80°F) speeds things up, while a cooler one slows it down.
A flat loaf usually comes down to one of three things: an inactive or underfed starter, over-fermentation (the dough went too long and lost its structure), or under-developed gluten (not enough stretch and folds). Make sure your starter is active and bubbly, watch your fermentation times, and don't skip the stretch and fold steps.
More Delicious Bread Recipes

If you tried this Dutch Oven Sourdough Bread or any other recipe on my blog, please leave a 🌟 star rating and let me know how it went in the 📝 comments below. Thanks for visiting!
Get the Recipe
Dutch Oven Sourdough Bread
Equipment
- 5 quart Dutch Oven
- Proofing basket or bowl with towel
- Bench scraper
- Bread lame or sharp blade
- Parchment paper
Ingredients
- 720 g bread flour
- 380 g water room temperature
- 140 g active sourdough starter
- 14 g fine sea salt
Instructions
- In a large mixing bowl, combine the bread flour and water. Mix until all the flour is hydrated and a shaggy dough forms.
- Cover the bowl and let the dough rest for about 30 minutes (autolyse).
- Add the active sourdough starter and salt to the dough. Mix thoroughly until fully incorporated.
- Over the next 2 hours, perform stretch and folds every 30 minutes. Gently stretch one side of the dough upward and fold it over the center. Rotate the bowl and repeat until all sides have been folded.
- Cover the dough and allow it to bulk ferment at room temperature for about 6-8 hours (preferably overnight if your house is cold or it is the winter!), or until the dough has risen and looks airy.
- Turn the dough onto a lightly floured surface and shape it into a round loaf.
- Place the shaped dough seam side up into a floured proofing basket or a bowl lined with a floured towel.
- Cover and allow the dough to proof for 1-2 hours at room temperature, or refrigerate overnight for deeper flavor.
- Preheat the oven to 465°F (240°C) with a Dutch oven inside for at least 30 minutes.
- Turn the dough onto parchment paper, score the top with a sharp blade, and transfer it into the hot Dutch oven.
- Bake covered for 20 minutes. Remove the lid and bake for another 20-22 minutes until the crust is deep golden.
- Remove the loaf from the Dutch oven and allow it to cool completely on a wire rack before slicing.
Notes
- Don't skip the autolyse - it makes the dough easier to handle and improves the crumb.
- Make sure your sourdough starter passes the float test before using it.
- Use parchment paper for easy transfer into the hot Dutch oven.
- Let the loaf cool completely before slicing for the best texture.
Nutrition
Dutch Oven Daddy is not a dietician or nutritionist, and any nutritional information shared is only an estimate. We recommend running the ingredients through an online nutritional calculator if you need to verify any information.


Spencer Adams says
Amazing sourdough recipe!
Linda says
This has become my definitive sourdough recipe because it’s so consistent and reliable. The Dutch oven method ensures the inside stays soft and moist while the outside gets that signature crunch that my whole family craves.
Jim says
I loved the chewy texture and the complex flavor profile that developed during the long ferment. This recipe yields a sturdy, beautiful loaf that is perfect for everything from gourmet sandwiches to simply dipping in olive oil.
Susan says
Using the cast iron pot really is the secret to that artisan look; the spring I got on my loaf was incredible. The instructions were clear and precise, leading to a loaf that tasted far superior to anything I could buy at a local bakery.
Tom says
As someone who was intimidated by sourdough, this guide made the process feel manageable and rewarding. The resulting loaf had a fantastic tangy flavor and a deep, golden color that made it the star of our Sunday brunch.
Betty says
The heat retention of the Dutch oven created a steam-filled environment that gave this sourdough a professional-grade, crackly crust. The crumb was perfectly airy and developed those beautiful large holes that every bread baker dreams of achieving.