


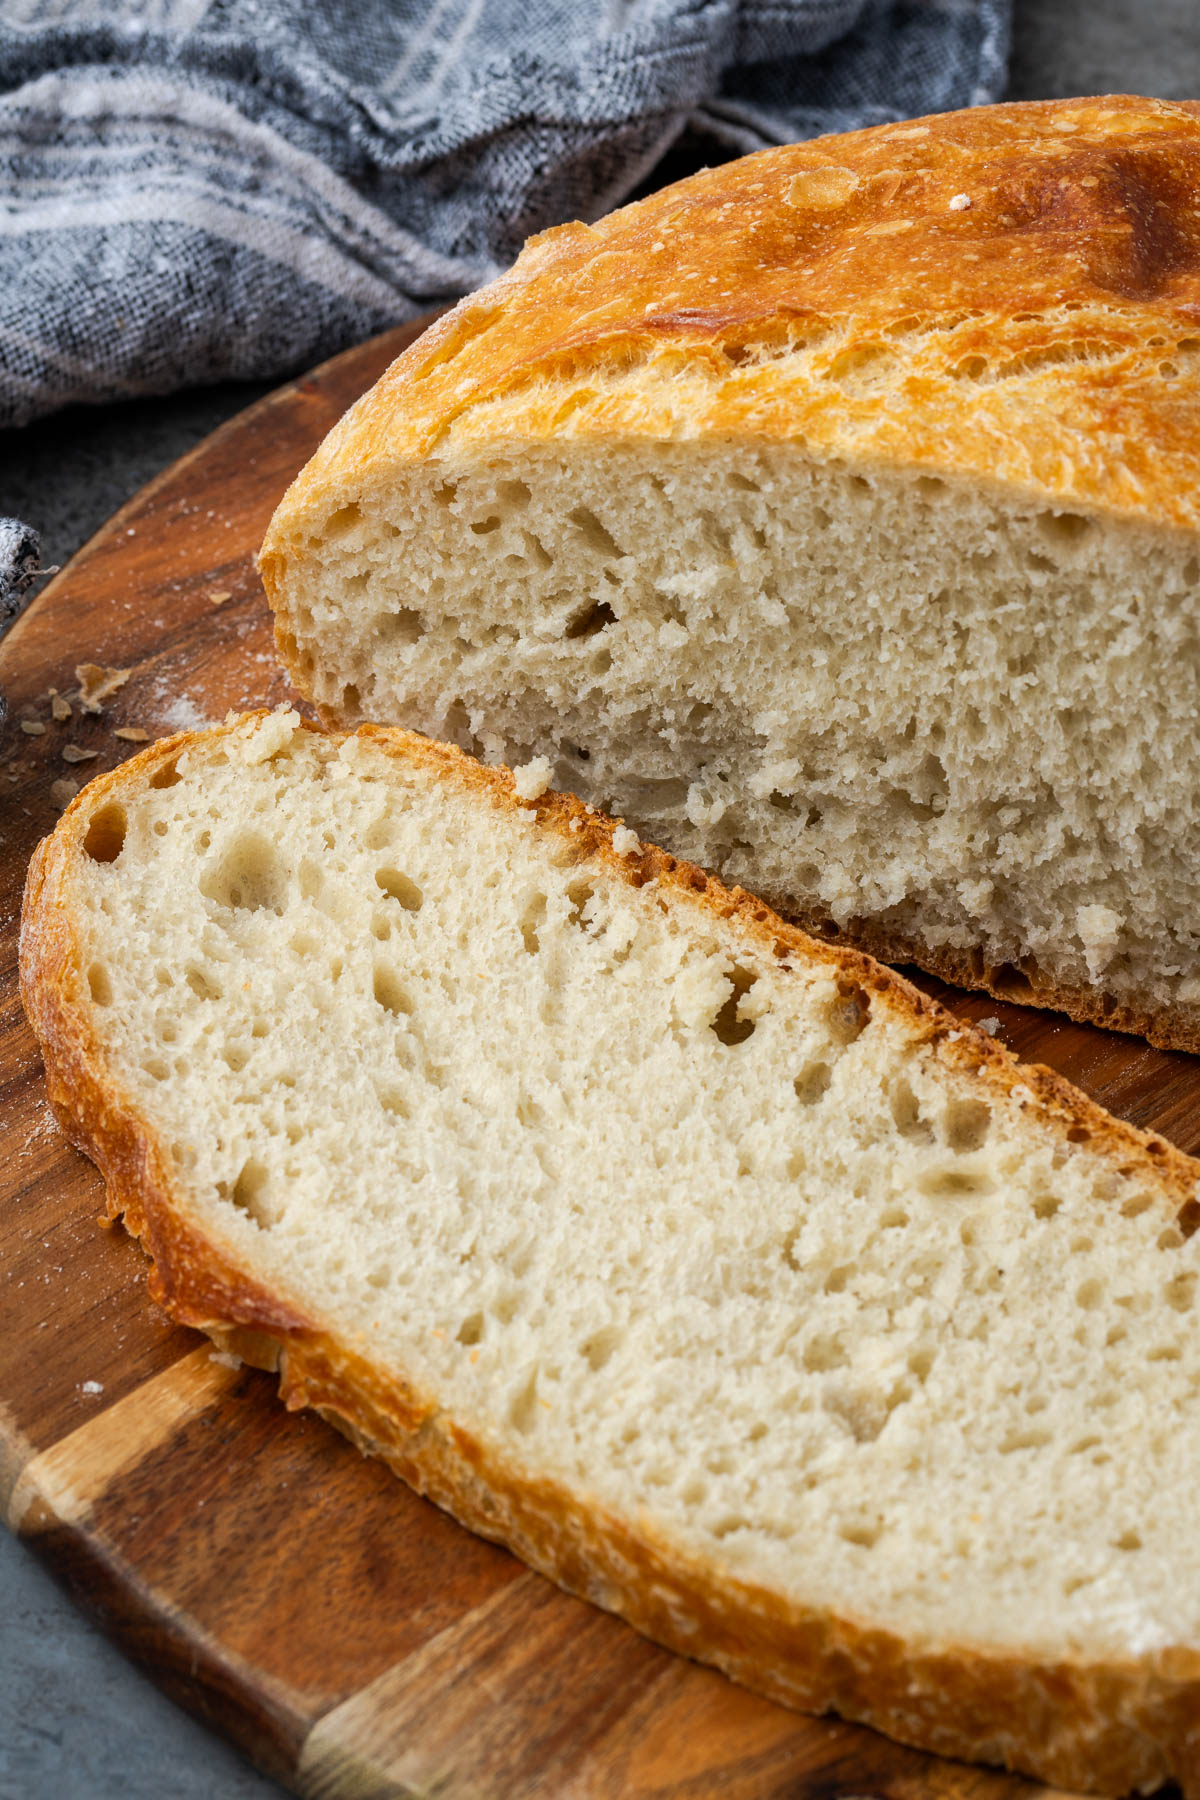
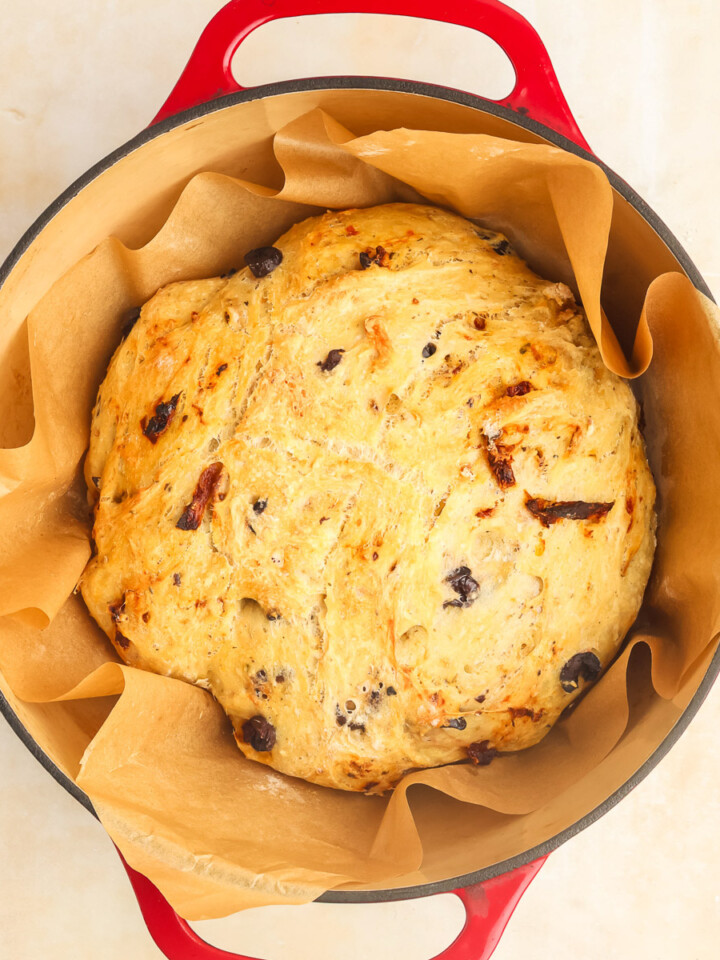
Dutch Oven Bread is one of the easiest recipes you will ever bake, and your cast iron Dutch oven is the secret weapon that makes it all work. Four ingredients, zero kneading, and a golden crust that crackles when you squeeze it. Whether you are a first-time baker or a seasoned pro looking for a foolproof loaf, this no-knead dutch oven bread recipe delivers every single time.
Quick Look at this Recipe
- ✅ Recipe Name: Dutch Oven Bread
- 🕒 Ready In: ~3 hours (10 min prep, 2 hr rise, 45 min bake)
- 👪 Serves: 8 people
- 🥣 Main Ingredients: bread flour, yeast, salt, water
- 📖 Dietary Info: Dairy-free, vegan
- ⭐ Why You'll Love It: Crusty, golden, bakery-quality bread with 4 ingredients and zero kneading
Summarize and Save the Recipe
Jump to:
- Quick Look at this Recipe
- Why You'll Love This Dutch Oven Bread
- What Makes This Recipe Different
- Ingredients
- How to Make Dutch Oven Bread
- Variations
- Expert Tips for Perfect Dutch Oven Bread
- Troubleshooting Common Problems
- Storage and Reheating
- What to Serve with Dutch Oven Bread
- Recipe FAQs
- More Delicious Bread Recipes
- Get the Recipe
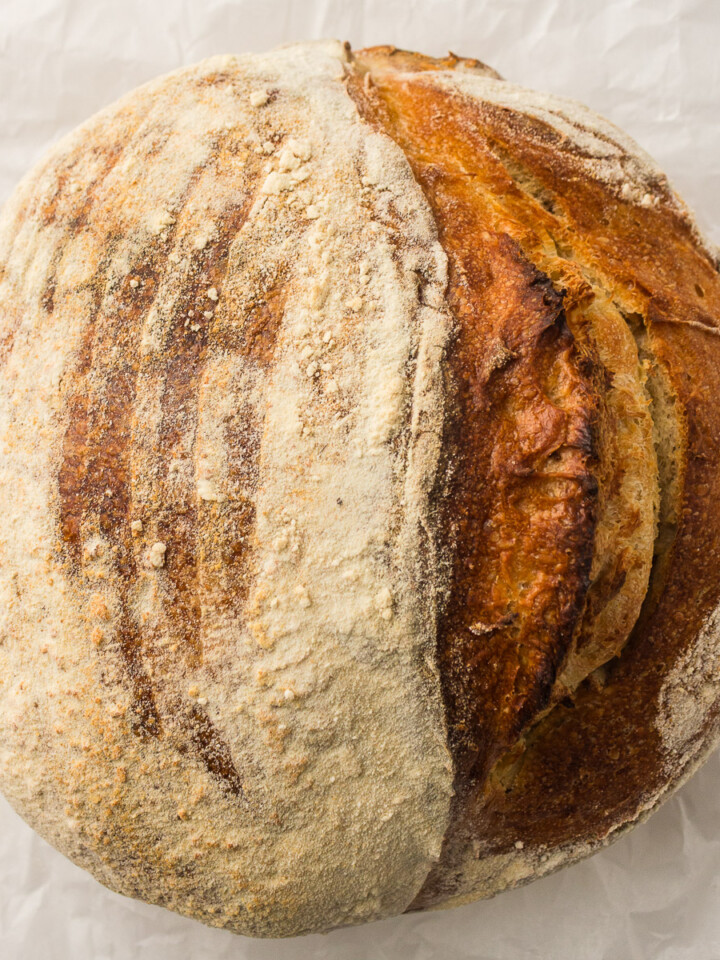
The Dutch oven traps steam during baking, which is exactly what professional bakeries use to get that blistered, crackly crust on artisan bread. The thick cast iron walls hold heat better than any thin baking sheet, so you get even browning from top to bottom. The result is a loaf that looks and tastes like it came from a bakery, but took you about five minutes of hands-on effort.
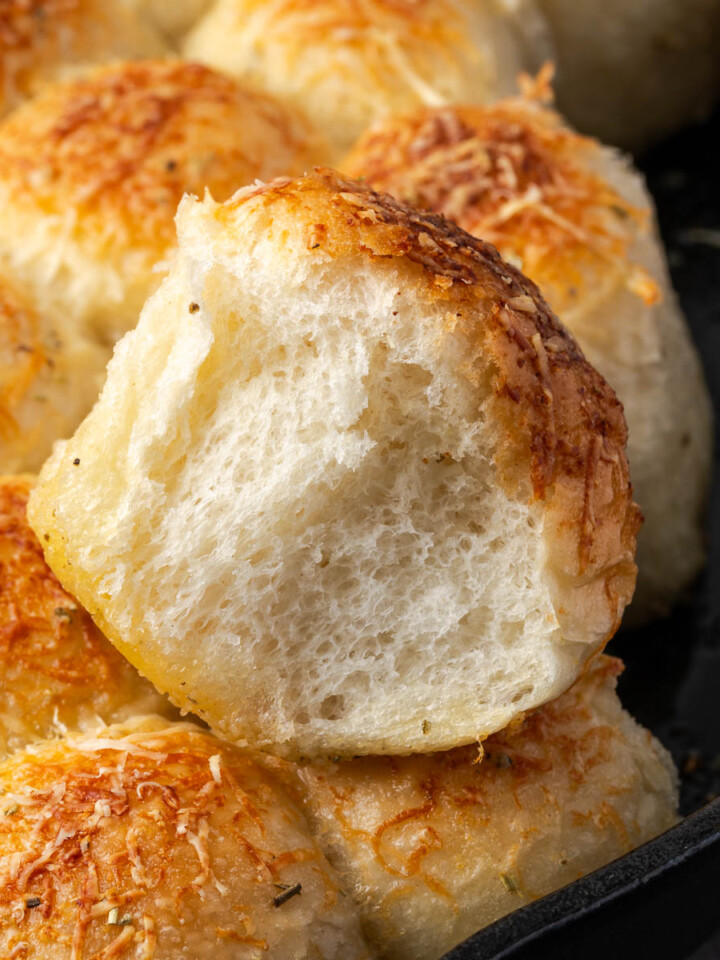
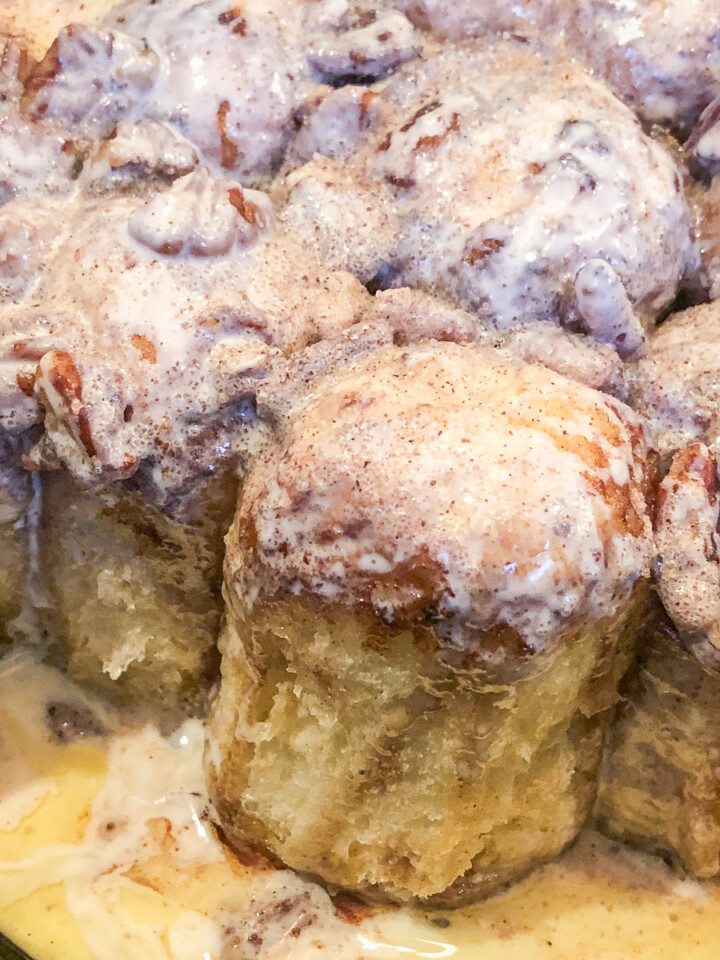
If you enjoy baking bread in cast iron, you will also love my Dutch Oven Sourdough Bread, Rosemary Garlic Bread, or these sweet Dutch Oven Cinnamon Rolls.
Why You'll Love This Dutch Oven Bread
- No Kneading Required: Mix the ingredients, cover the bowl, and walk away. The long rise gives the flour proteins time to hydrate and form gluten strands on their own, so you never have to touch the sticky dough with your hands.
- Just 4 Pantry Ingredients: Bread flour, salt, yeast, and water. That is the entire grocery list. No special equipment beyond the cast iron Dutch oven you already own.
- Cast Iron Makes the Difference: The Dutch oven traps steam during the first phase of baking, which is what gives artisan bread that golden, crackly crust. The thick cast iron walls also distribute heat more evenly than a thin baking sheet ever could.
- Endlessly Customizable: Once you have nailed the base recipe, fold in herbs, cheese, olives, seeds, or dried fruit to make it your own every time.
What Makes This Recipe Different
Most dutch oven bread recipes treat the pot like just another baking vessel. But if you cook with cast iron as much as I do, you know there is real science behind why it works so well for bread.
Cast iron has serious thermal mass. That means it absorbs heat slowly and holds onto it, so when you place the dough inside, the temperature does not drop the way it would in a thin-walled pot. You get better oven spring (that initial burst of rising in the oven) because the dough hits consistent, intense heat from the moment it goes in.
The tight-fitting lid is the other piece of the puzzle. As the dough bakes, it releases moisture. In a regular oven, that moisture escapes immediately. Inside the Dutch oven, it stays trapped, creating a steam environment that mimics the steam-injected ovens professional bakeries use. That steam is what gives you a glossy, blistered crust instead of a pale, soft one.
I recommend using a non-enameled cast iron Dutch oven for bread baking. The raw cast iron handles 450°F temperatures without any risk of damage, while enameled coatings can discolor or chip over time at those temperatures. If you want to learn more about keeping your cast iron in top shape, check out my cast iron care guides.
Ingredients

- Bread Flour: The higher protein content (12 to 14 percent) develops stronger gluten during the long rise, giving you a chewier crumb with more structure. All-purpose flour works if that is what you have, but the loaf will be softer and less structured. For a heartier loaf, try swapping half the bread flour with whole wheat, rye, or spelt.
- Yeast: Rapid-rise (instant) yeast for the quick 2-hour method, or active dry yeast for an overnight 12 to 18 hour rise. Both produce excellent bread. The overnight version develops slightly more complex flavor through longer fermentation.
- Water: Use warm water around 100 to 110°F for rapid-rise yeast. For the overnight method with active dry yeast, room temperature water (70 to 80°F) works fine. Water that is too hot will kill the yeast.
- Salt: Enhances flavor, regulates yeast activity so the dough does not over-rise, and strengthens gluten strands for better structure. Do not skip it and do not reduce it.
See the recipe card below for exact ingredient amounts, nutritional information, and detailed instructions.
How to Make Dutch Oven Bread
This bread comes together in just a few simple phases, and most of the time is hands-off rising. Preheat your oven to 450°F, grab your cast iron Dutch oven, and let us get baking.

- Step 1: Mix the Dough. Whisk the bread flour, salt, and yeast together in a large bowl. Pour in the warm water and stir with a wooden spoon until a shaggy, sticky dough forms. It will look rough and lumpy, and that is exactly right.

- Step 2: Let It Rise. Cover the bowl tightly with plastic wrap or a damp towel. Let the dough rise at room temperature for 2 hours (rapid-rise yeast) or 12 to 18 hours overnight (active dry yeast). The dough is ready when it has roughly doubled and the surface looks bubbly.

- Step 3: Shape the Dough. Turn the risen dough out onto a well-floured surface. Gently pull the edges toward the center, folding the dough over itself to create surface tension. Flip it seam-side down and shape it into a round ball. Do not knead or overwork it.

- Step 4: Rest and Prep. Place the dough ball back in the bowl, cover it, and let it rest for 30 minutes while the oven preheats to 450°F. Line the Dutch oven with parchment paper and gently transfer the dough inside.

- Step 5: Score and Bake Covered. Use a sharp knife to slash the top of the dough in an X pattern. Place the lid on the Dutch oven and bake for 30 minutes. The lid traps steam, which is what creates that golden, crackly crust.

- Step 6: Bake Uncovered. Remove the lid and bake for another 10 to 15 minutes, until the top is deep golden brown. The internal temperature should reach 200 to 210°F. Let the bread cool on a wire rack for at least 30 minutes before slicing.
Once you have mastered this basic loaf, try our Dutch Oven Sourdough Bread for a tangier, more complex flavor that uses the same cast iron baking technique.
Variations
This bread is a blank canvas. Once you have the base recipe down, try these mix-ins to keep things interesting. Just keep in mind that additions increase dough density, so you may need an extra 15 to 30 minutes of rise time.
- Savory: Fold in fresh rosemary, thyme, minced garlic, sun-dried tomatoes, kalamata olives, or shredded parmesan. An everything bagel seasoning sprinkle on top before baking is also a great move. For a dedicated herb bread, try our Rosemary Garlic Bread.
- Sweet: Mix in cinnamon and raisins, chocolate chips, or dried cranberries with chopped pecans for a breakfast loaf that disappears fast.
- Seeds and Grains: Sprinkle sesame seeds, poppy seeds, sunflower seeds, or rolled oats on top of the dough before baking for added crunch and visual appeal.
- Flour Swaps: Replace half the bread flour with whole wheat (denser, nuttier), rye (earthy flavor), or spelt (lighter than whole wheat). Do not swap more than half or the loaf may not rise properly.
Expert Tips for Perfect Dutch Oven Bread
- Use Parchment Paper: Line the Dutch oven with parchment before adding the dough. It prevents sticking completely and makes lifting the finished loaf easy. Trim the edges so they do not burn against the hot sides.
- Score the Top: Use a sharp knife or razor blade to slash the top of the dough before baking. This controls where the bread expands (called oven spring) and gives you that classic artisan look. One long slash or an X pattern both work well.
- Do Not Skip the Covered Bake: The first 30 minutes with the lid on traps steam and creates the crust. Removing the lid too early gives you a pale, soft top instead of a golden, crackly one.
- Check Doneness by Sound: Tap the bottom of the finished loaf. It should sound hollow. If it thuds, put it back in the oven (without the lid) for 5 more minutes.
- Cool Before You Slice: Let the bread rest on a wire rack for at least 30 minutes. Cutting too early releases steam that would otherwise be reabsorbed, leaving you with a gummy interior. This is the hardest part of the whole recipe.
- Measure Flour Correctly: Spoon the flour into the measuring cup and level it off. Scooping the cup directly into the flour bag packs in extra and will give you a dense loaf.

Troubleshooting Common Problems
Even simple bread can throw you a curveball. Here are the most common issues and how to fix them.
- Bottom Burned: Move the Dutch oven to a lower oven rack, or place a baking sheet on the rack below it to act as a heat shield. An oven thermometer is worth a few bucks to make sure your oven is not running hot.
- Gummy Interior: The bread either did not bake long enough or you sliced it before it cooled. Check the internal temperature (should reach 200 to 210°F) and let the loaf cool for a full 30 minutes on a wire rack.
- Flat Loaf, No Rise: Your yeast was likely dead. Test it first by dissolving it in warm water with a pinch of sugar. If it does not foam within 5 to 10 minutes, toss it and grab a new packet.
- Too Dense or Heavy: You probably used too much flour. Measure by spooning flour into the measuring cup and leveling, not scooping directly from the bag. Also make sure you gave the dough enough rise time.
- Pale, Soft Crust: The lid came off too early or the oven temperature was too low. Keep the lid on for the full 30 minutes and confirm you are baking at 450°F.
- Cracked Top: This is actually normal and gives the bread a rustic look. If you want more control over where it cracks, score the dough before baking so steam has a planned escape route.
Storage and Reheating
Once the loaf has cooled completely, wrap it in a clean kitchen towel or place it in a paper bag. It will stay fresh at room temperature for up to 3 days. Avoid storing it in plastic right away, as the trapped moisture will soften the crust.
Skip the refrigerator for bread storage. It might sound counterintuitive, but refrigeration actually speeds up staling. The cold temperature causes the starch molecules to crystallize faster (a process called retrogradation), which makes the bread go stale quicker than if you left it on the counter.
For longer storage, slice the bread and freeze individual portions wrapped tightly in plastic wrap and then foil. Frozen bread keeps well for up to 3 months. Reheat frozen slices straight in the toaster, or warm a whole loaf at 350°F for 10 to 15 minutes. Spritz the crust with a little water before oven reheating to bring back the crispness.
What to Serve with Dutch Oven Bread
This bread pairs with just about everything, but it really shines as a side for soup night or sliced thick for sandwiches.
- Soup Night: This bread was made for dunking. Tear off a chunk and dip it into a bowl of Dutch Oven Awesome Chili, Ham and Bean Soup, 7 Can Soup, or Chicken Noodle Soup.
- Sandwiches: Slice it thick and build your own with juicy Italian Meatballs for a meatball sub, or layer on sliced cast iron steak for something hearty.
- Breakfast: Toast a slice and top with butter and jam, cream cheese, or a drizzle of honey for a simple morning side.
Recipe FAQs
You do not have to, but preheating can help. A hot Dutch oven gives the dough an immediate blast of heat, which creates a taller rise (called oven spring) and a crispier crust. If you skip preheating, the bread still turns out great and takes just a minute or two longer to start rising in the oven. If you do preheat, use the parchment sling method to safely lower the dough into the hot pot.
A 5-quart Dutch oven works well for a standard loaf. Going smaller crowds the dough and limits rise. Going larger (7-quart) is fine but the loaf spreads flatter. For a tall, round loaf, 5 to 6 quarts is the sweet spot.
You can, but a non-enameled (bare) cast iron Dutch oven handles the high heat better. Temperatures above 450°F can damage enamel coatings over time, causing discoloration or chipping. If you do use enameled, keep the temperature at 450°F or below and check the manufacturer's heat rating.
Line the Dutch oven with parchment paper before adding the dough. This prevents sticking completely and makes it easy to lift the finished bread out. You can also lightly dust the inside with cornmeal or flour, but parchment is more reliable.
The two most common causes are underbaking and cutting too soon. Check the internal temperature with an instant-read thermometer: it should read 200 to 210°F when done. Then let the loaf cool on a wire rack for at least 30 minutes before slicing. Cutting hot bread releases steam that would otherwise be reabsorbed, leaving you with a gummy texture.
Wrap the cooled loaf in a clean kitchen towel or paper bag and store at room temperature for up to 3 days. Skip the refrigerator because cold temperatures actually speed up staling. For longer storage, slice and freeze in plastic wrap and foil for up to 3 months. Reheat frozen slices in the toaster, or warm a whole loaf at 350°F for 10 to 15 minutes. Spritz the crust with water before reheating to restore crispness.

More Delicious Bread Recipes
If you tried this Dutch Oven Bread or any other recipe on my blog, please leave a 🌟 star rating and let me know how it went in the 📝 comments below. Thanks for visiting!
Get the Recipe

Dutch Oven Bread
Equipment
- 1 5-Quart Cast Iron Dutch Oven (non-enameled)
- Parchment paper
- 1 Sharp Knife or Razor Blade (for scoring)
Ingredients
- 3 cups bread flour all-purpose flour works but produces a softer crumb
- 1 teaspoon fine salt
- ½ teaspoon rapid-rise (instant) yeast or active dry yeast for overnight rise
- 1 ½ cups warm water 100-110°F for rapid-rise, room temperature for overnight
Instructions
- In a large bowl, whisk together the bread flour, salt, and yeast. Pour in the warm water and stir with a wooden spoon or spatula until a shaggy, sticky dough forms. It will look rough and lumpy. That is exactly right.
- Cover the bowl tightly with plastic wrap or a damp kitchen towel. Let the dough rise at room temperature for 2 hours (rapid-rise yeast) or 12 to 18 hours (active dry yeast). The dough is ready when it has roughly doubled in size and the surface looks bubbly.
- Turn the risen dough out onto a well-floured surface. Gently pull the edges of the dough toward the center, folding it over itself to create tension on the surface. Flip the dough seam-side down and shape it into a round ball. Do not knead or overwork the dough.
- Place the dough ball back in the bowl (or on a piece of parchment paper), cover, and let it rest for 30 minutes while the oven preheats.
- Preheat your oven to 450°F. Line the inside of a 5-quart cast iron Dutch oven with parchment paper. Gently transfer the dough ball into the parchment-lined Dutch oven.
- Using a sharp knife or razor blade, slash the top of the dough in an X pattern or single line. This controls where the bread expands during baking and gives it that classic artisan look.
- Place the lid on the Dutch oven and bake for 30 minutes. The lid traps steam, which is what creates the golden, crackly crust.
- Remove the lid and continue baking for 10 to 15 minutes, or until the top is deep golden brown. The internal temperature should reach 200 to 210°F when checked with an instant-read thermometer.
- Carefully lift the bread out of the Dutch oven using the parchment paper. Place the loaf on a wire rack and let it cool for at least 30 minutes before slicing. Cutting too early releases steam and can make the interior gummy.
Notes
Nutrition
Dutch Oven Daddy is not a dietician or nutritionist, and any nutritional information shared is only an estimate. We recommend running the ingredients through an online nutritional calculator if you need to verify any information.
Edward says
I love this bread so much!
Mary says
This looks so good and easy to do!!
Valerie says
I have made this bread recipe many times. It is always really good crusty exterior & soft inside. Uncomplicated & delicious.
Ned Adams says
I really appreciate you coming back to this recipe again and again, that means a lot! Glad it’s hitting that perfect crusty outside and soft inside every time.
Jane Jones says
I'm going to try to make this recipe! I'm not a bread maker but this looks like one that I can do!! It looks delicious!
Leah Ingram says
You are speaking my husband's love language with this bread. I shared this recipe with him and he surprised me with it . It is so good. Thank you.
Ned Adams says
Oh that’s such a fun surprise!! Glad you both enjoyed it!
D says
Tasty!!!
Edward says
What an amazing, delicious, and easy recipe to make. Thank you!
Pat Gulley says
Can I use a black Dutch oven?
Ned Adams says
Absolutely! You can use a non enameled Dutch oven.
Dave Spencer says
I finally decided to try baking bread. This simple recipe was easy to follow. I thought I would ruin it, like hard crust and doughy in middle. It turned out with nice, thin, crispy crust, and light in the middle. Now I have the confidence to keep baking.
Kim says
Was so easy & delicious!!
Ned Adams says
So glad it was easy and turned out well for you!
Lynn says
Very good… must try!
Ned Adams says
Awesome, Lynn! So glad you enjoyed.
Chuck says
I use this recipe quite often. I only use 1/4 tsp of yeast and let it rise 18 hrs. Turns out great every time. I add raisins on occasion for something different. Definitely pre heat the Dutch oven!
Ned Adams says
Thanks for sharing Chuck! Glad you like this recipe! Great suggestion on the raisins.
Geoff says
hi, do you preheat the dutch oven?
Ned Adams says
Hi Geoff, thanks for your question. This recipe does not require to preheat the Dutch Oven.
Henry Quintero says
Good recipe even at 6,000 feet elevation.
Ned Adams says
Awesome! I'm glad it worked well for you at your elevation.