
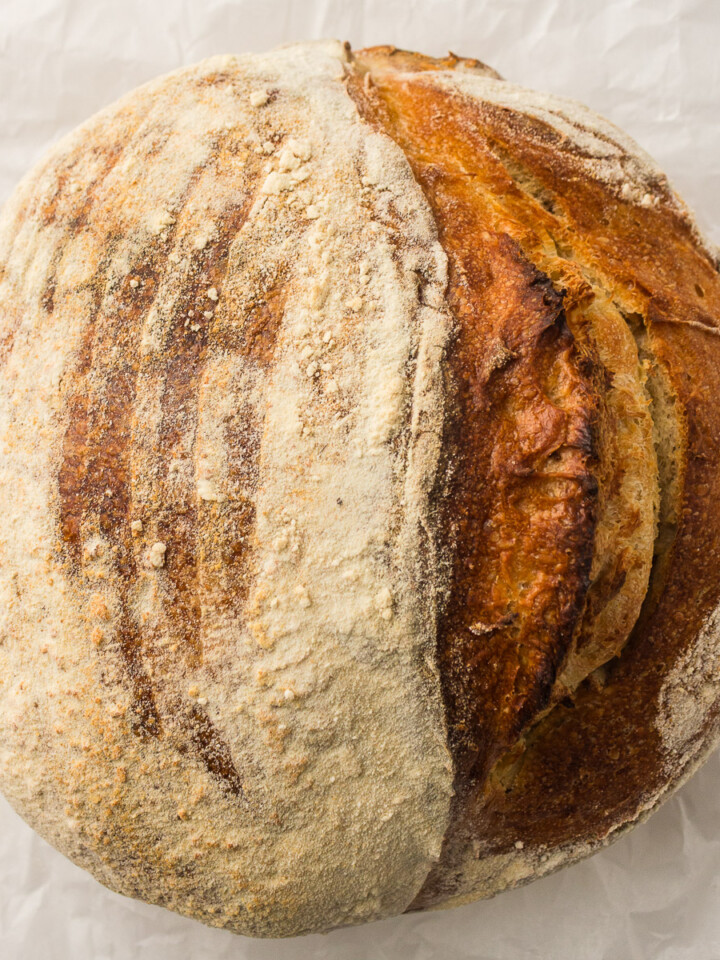
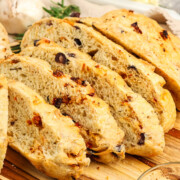
Get ready for the easiest, most flavorful Artesian Italian Bread you've ever made at home! This rustic loaf is loaded with kalamata olives, sun dried tomatoes, garlic, and oregano, and the best part is there's absolutely no kneading required. Just mix it up, let it rise, and pop it into your dutch oven for a crust that's impossibly crispy on the outside and soft and chewy on the inside.
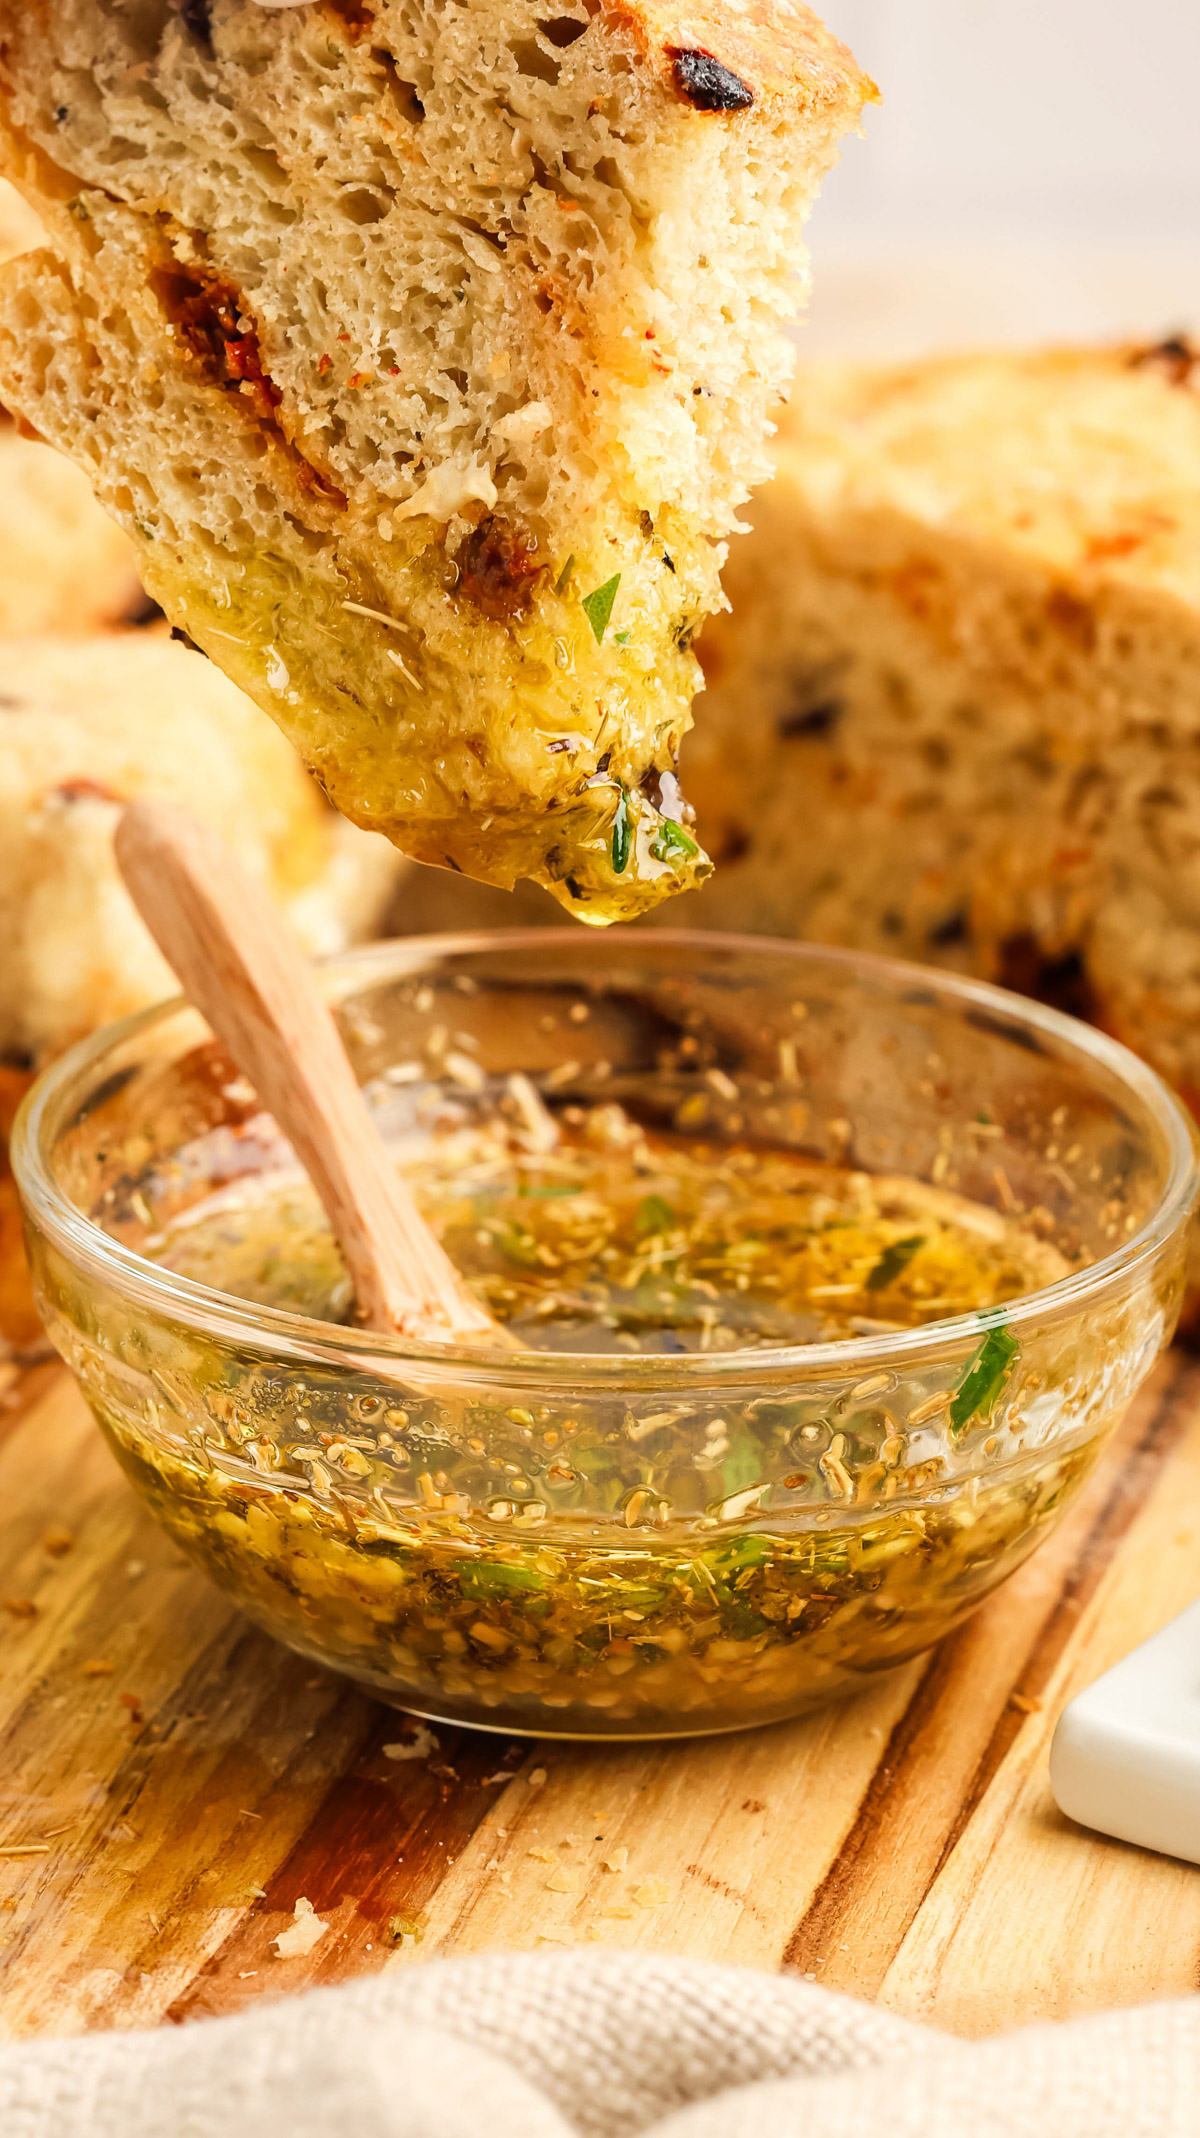
But we're not stopping at just the bread. This recipe comes with a simple herb dipping oil made with olive oil, fresh rosemary, oregano, and garlic that takes the whole thing over the top. It's the kind of appetizer that makes your guests say, "Wait, you actually made this?" Yes. Yes, you did. And it took very little hands-on time. Serve it with my homemade pork ragu! It's perfect for sopping up all the juices.
Quick Look at the Recipe
- ✅ Recipe Name: Artesian Italian Bread (with Dipping Oil)
- 🕒 Ready In: About 3 ½ hours (including rise time)
- 👪 Serves: 10 slices
- 🥣 Main Ingredients: Flour, kalamata olives, sun dried tomatoes, garlic, oregano, yeast, olive oil, fresh rosemary
- 📖 Dietary Info: Vegetarian, dairy-free
- ⭐ Why You'll Love It: This no-knead artisan bread comes out with an incredibly crispy crust and a soft, chewy center loaded with Mediterranean flavors. The homemade herb dipping oil makes it absolutely irresistible.
Summarize and Save the Recipe
After making this about a dozen times in my Lodge dutch oven, I can tell you it's become one of the most-requested recipes at our house. It's the kind of bread that makes the whole kitchen smell like an Italian bakery, and once you pull it out of that dutch oven with that golden crust, everyone comes running. Whether it's game day, a holiday dinner, or just a random Tuesday night when you want fresh homemade bread, this one delivers every single time.
Why You’ll Love This Recipe
- No kneading required. Just stir the dough together with a wooden spoon and let the yeast do all the heavy lifting. This is truly a beginner-friendly artisan bread that anyone can make.
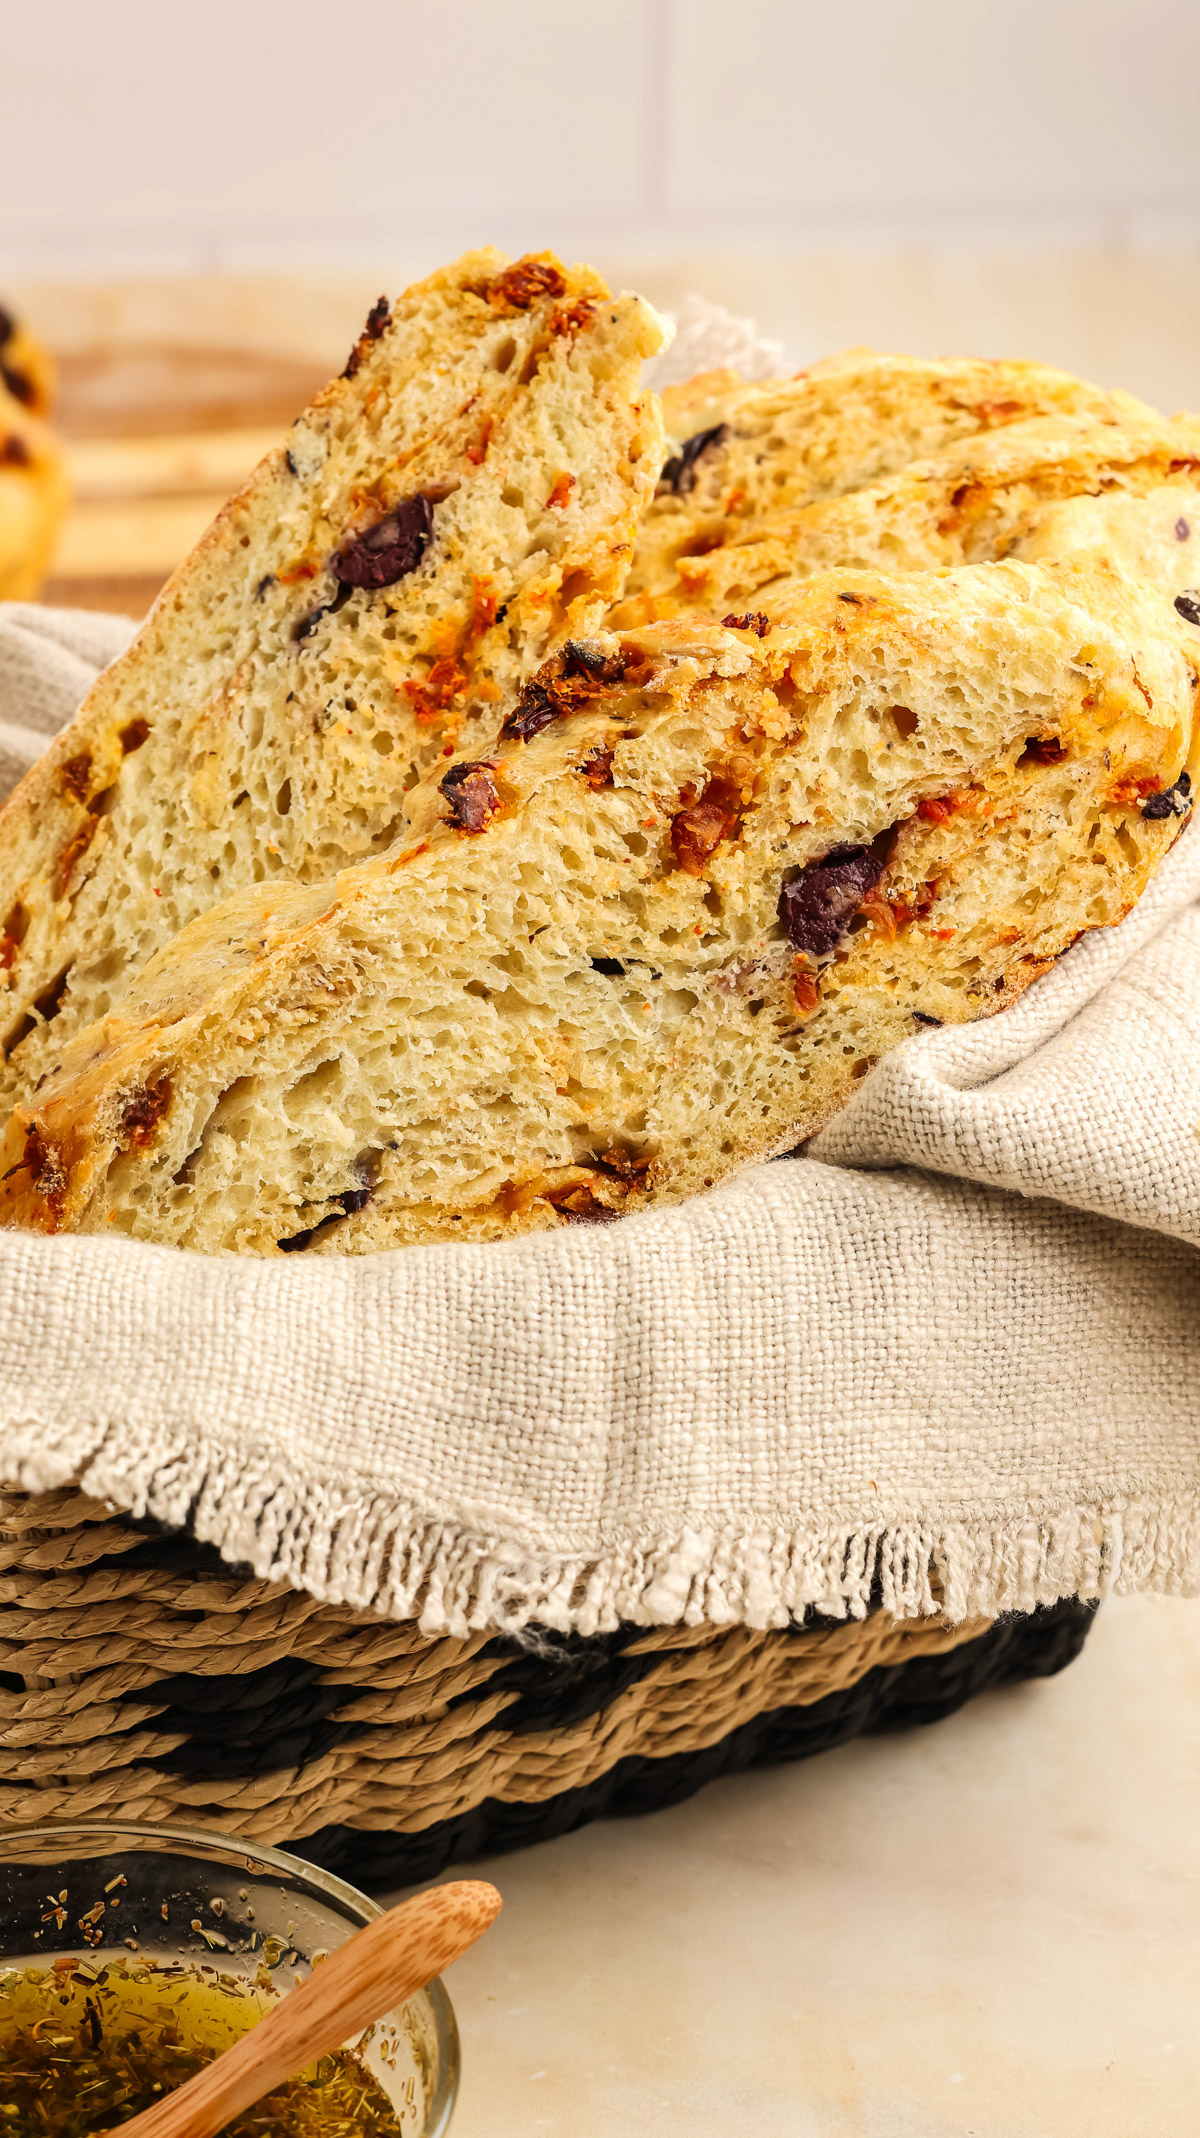
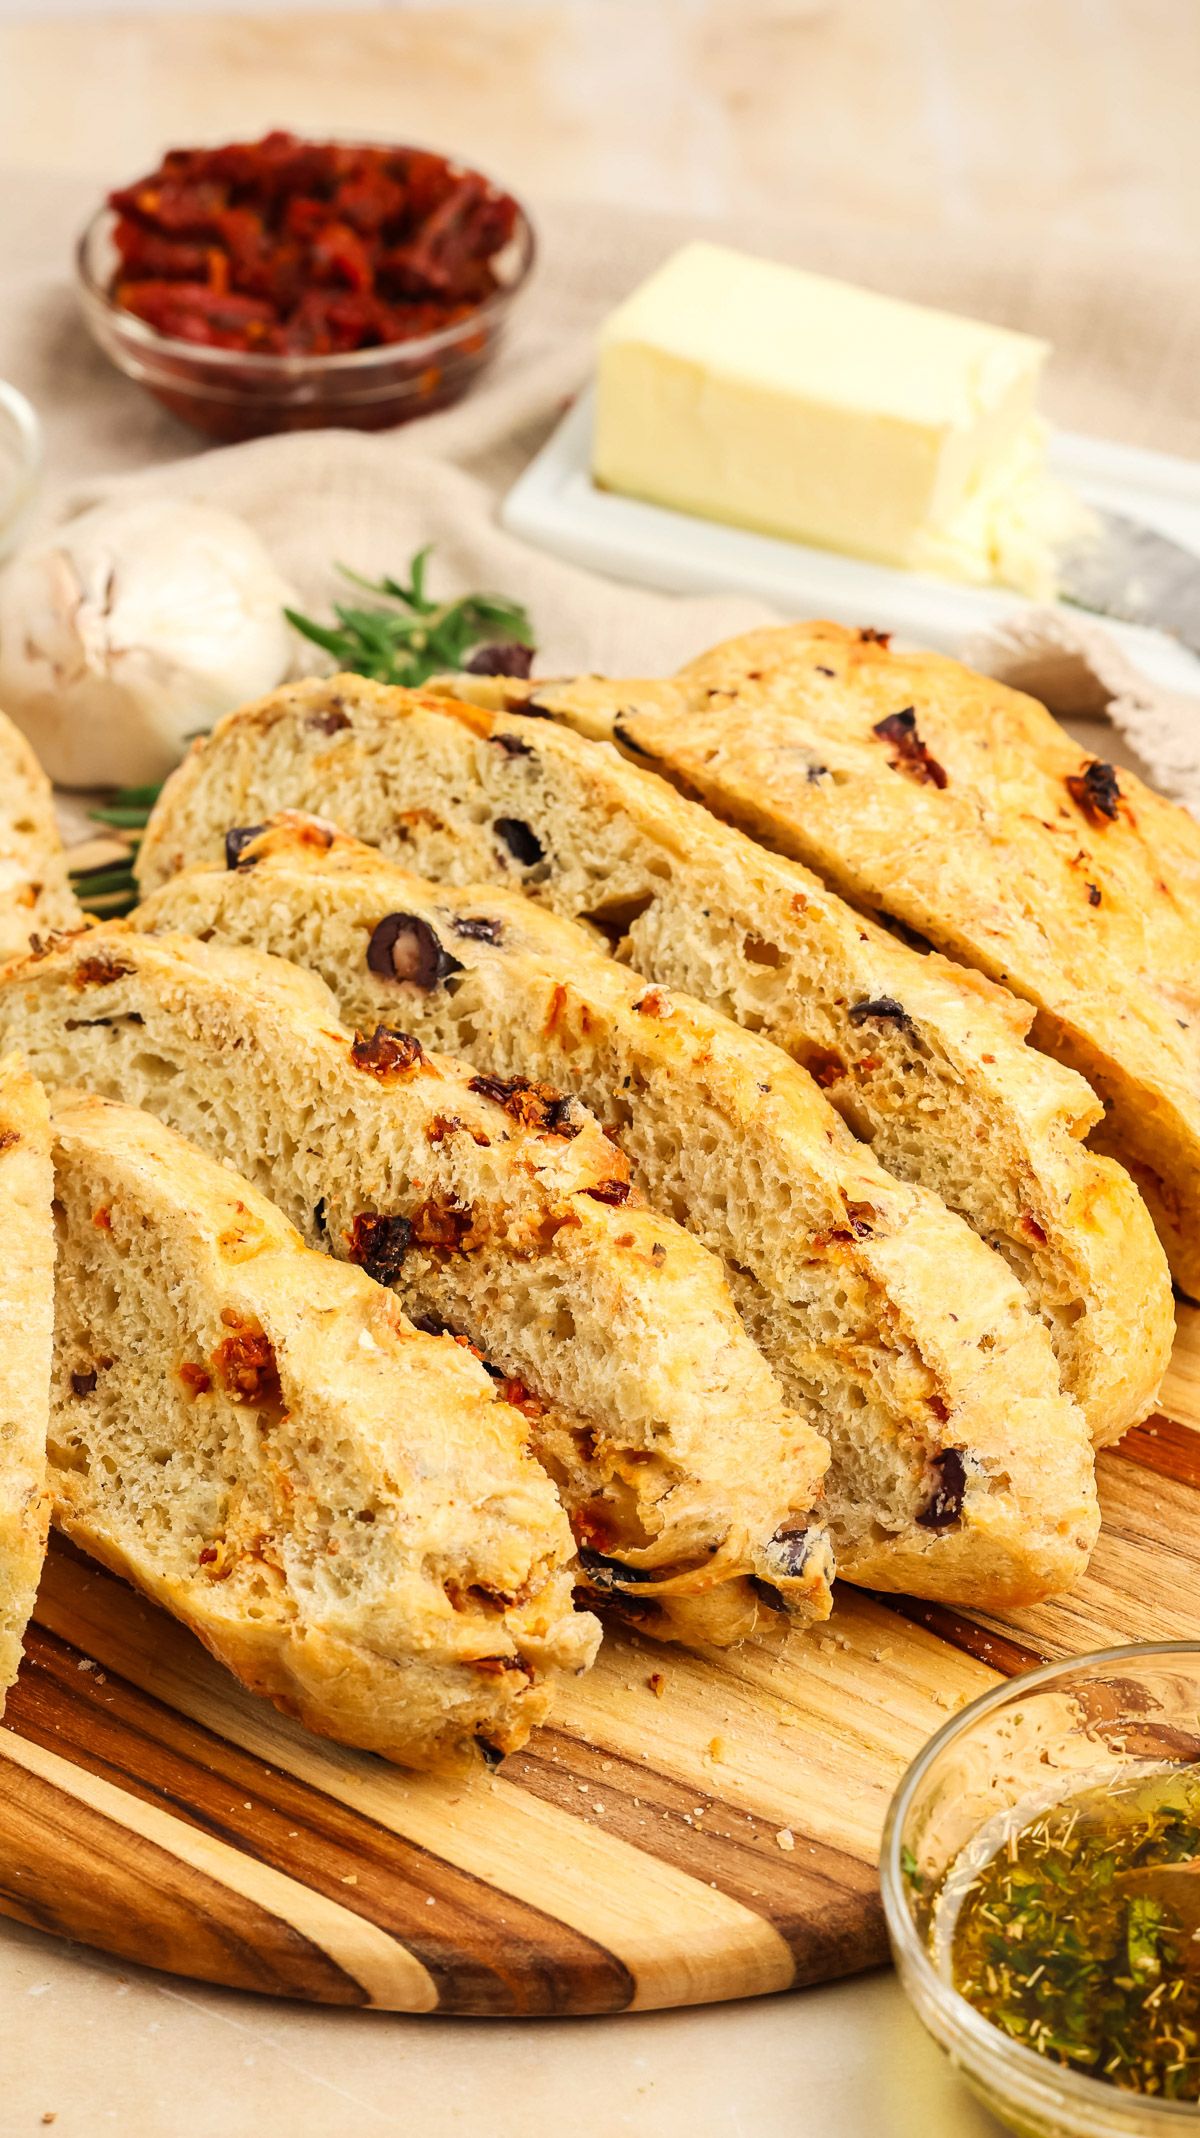
- Incredible Mediterranean flavors. Kalamata olives, sun dried tomatoes, garlic, and oregano baked right into every single slice. This isn't your average white bread. It's packed with bold, savory flavor.
- Dutch oven perfection. Baking in a preheated dutch oven creates steam that gives you that bakery-quality crust at home, every time. If you've made our Dutch Oven No-Knead Bread, you already know the magic.
- Comes with homemade dipping oil. The herb-infused olive oil takes 2 minutes to throw together and elevates this bread from great to unforgettable. It's basically a two-for-one recipe.
- Only 72 calories per slice. All that flavor without the guilt. This bread is surprisingly light thanks to the no-fat dough.
- Impressive but effortless. Perfect for hosting, holidays, or anytime you want to wow your family without spending hours in the kitchen.
Ingredients
For The Bread
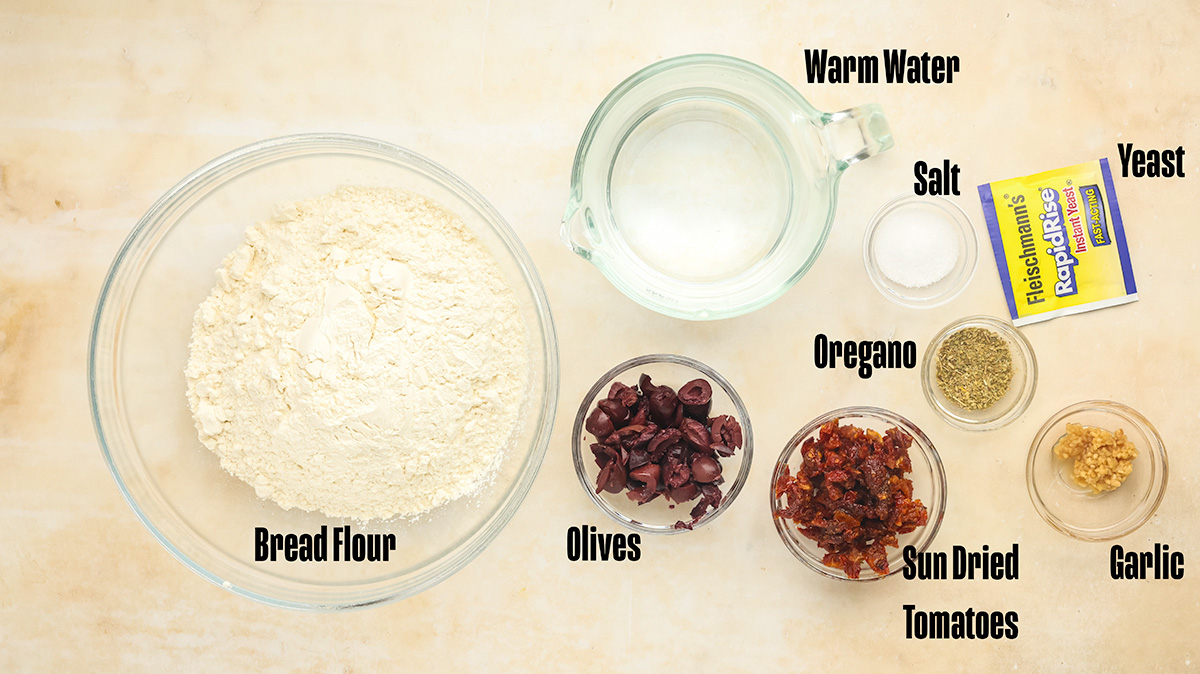
- All purpose flour or bread flour (3½ cups): Bread flour gives you a slightly chewier texture, but all purpose works perfectly fine. Don't pack the flour. Instead, spoon and level for the best results.
- Sea salt (1 tsp): Enhances all the flavors and controls the yeast. Don't skip it.
- Warm water (1½ cups): Should be about 110°F. Too hot kills the yeast; too cool slows the rise.
- Fast-acting yeast (2¼ teaspoon / 1 packet): Also called instant or rapid rise yeast. No proofing needed with this type, so just mix it right in with the dry ingredients.
- Oregano (1 tsp): Dried oregano blends beautifully into the dough and gives it that Italian flavor.
- Garlic (1 tsp, crushed or jarred): Jarred minced garlic works great here and saves time.
- Kalamata olives (½ cup, roughly chopped): The briny, bold flavor is what makes this bread special. Don't substitute with canned black olives because they don't have the same punch.
- Sun dried tomatoes (½ cup, roughly chopped): Pat these dry to remove excess moisture so the dough doesn't get too wet. If they're packed in oil, drain and blot with paper towels first.
For the Dipping Oil
- Extra virgin olive oil (¼ cup): Use a good quality olive oil here since it's the star of the dipping sauce.
- Oregano (1 tsp): Dried works great.
- Garlic (1 tsp, finely minced): Fresh minced garlic makes a big difference in the oil.
- Fresh rosemary (1 tsp, finely chopped): Adds a beautiful aromatic note.
See the recipe card below for exact ingredient amounts, nutritional information, and detailed instructions.
Variations
One of the things I love about this artesian Italian bread is how easy it is to customize. Here are a few of my favorite twists:
- Parmesan version. Fold in ½ cup of grated parmesan cheese for an extra savory, umami-packed loaf. The cheese gets crispy on the edges and it's incredible.
- Swap the olives. Try green Castelvetrano olives for a milder, buttery flavor, or use a mix of both for variety.
- Add some heat. Toss in ½ teaspoon of red pepper flakes to the dough, the dipping oil, or both.
- Roasted garlic. Replace the raw garlic with a full head of roasted garlic squeezed into the dough. It adds incredible depth of flavor.
- Balsamic dipping oil. Drizzle a tablespoon of aged balsamic vinegar into the dipping oil for a restaurant-style touch. If you've been to any Italian restaurant, you know this combo.
How to Make Artesian Italian Bread in a Dutch Oven
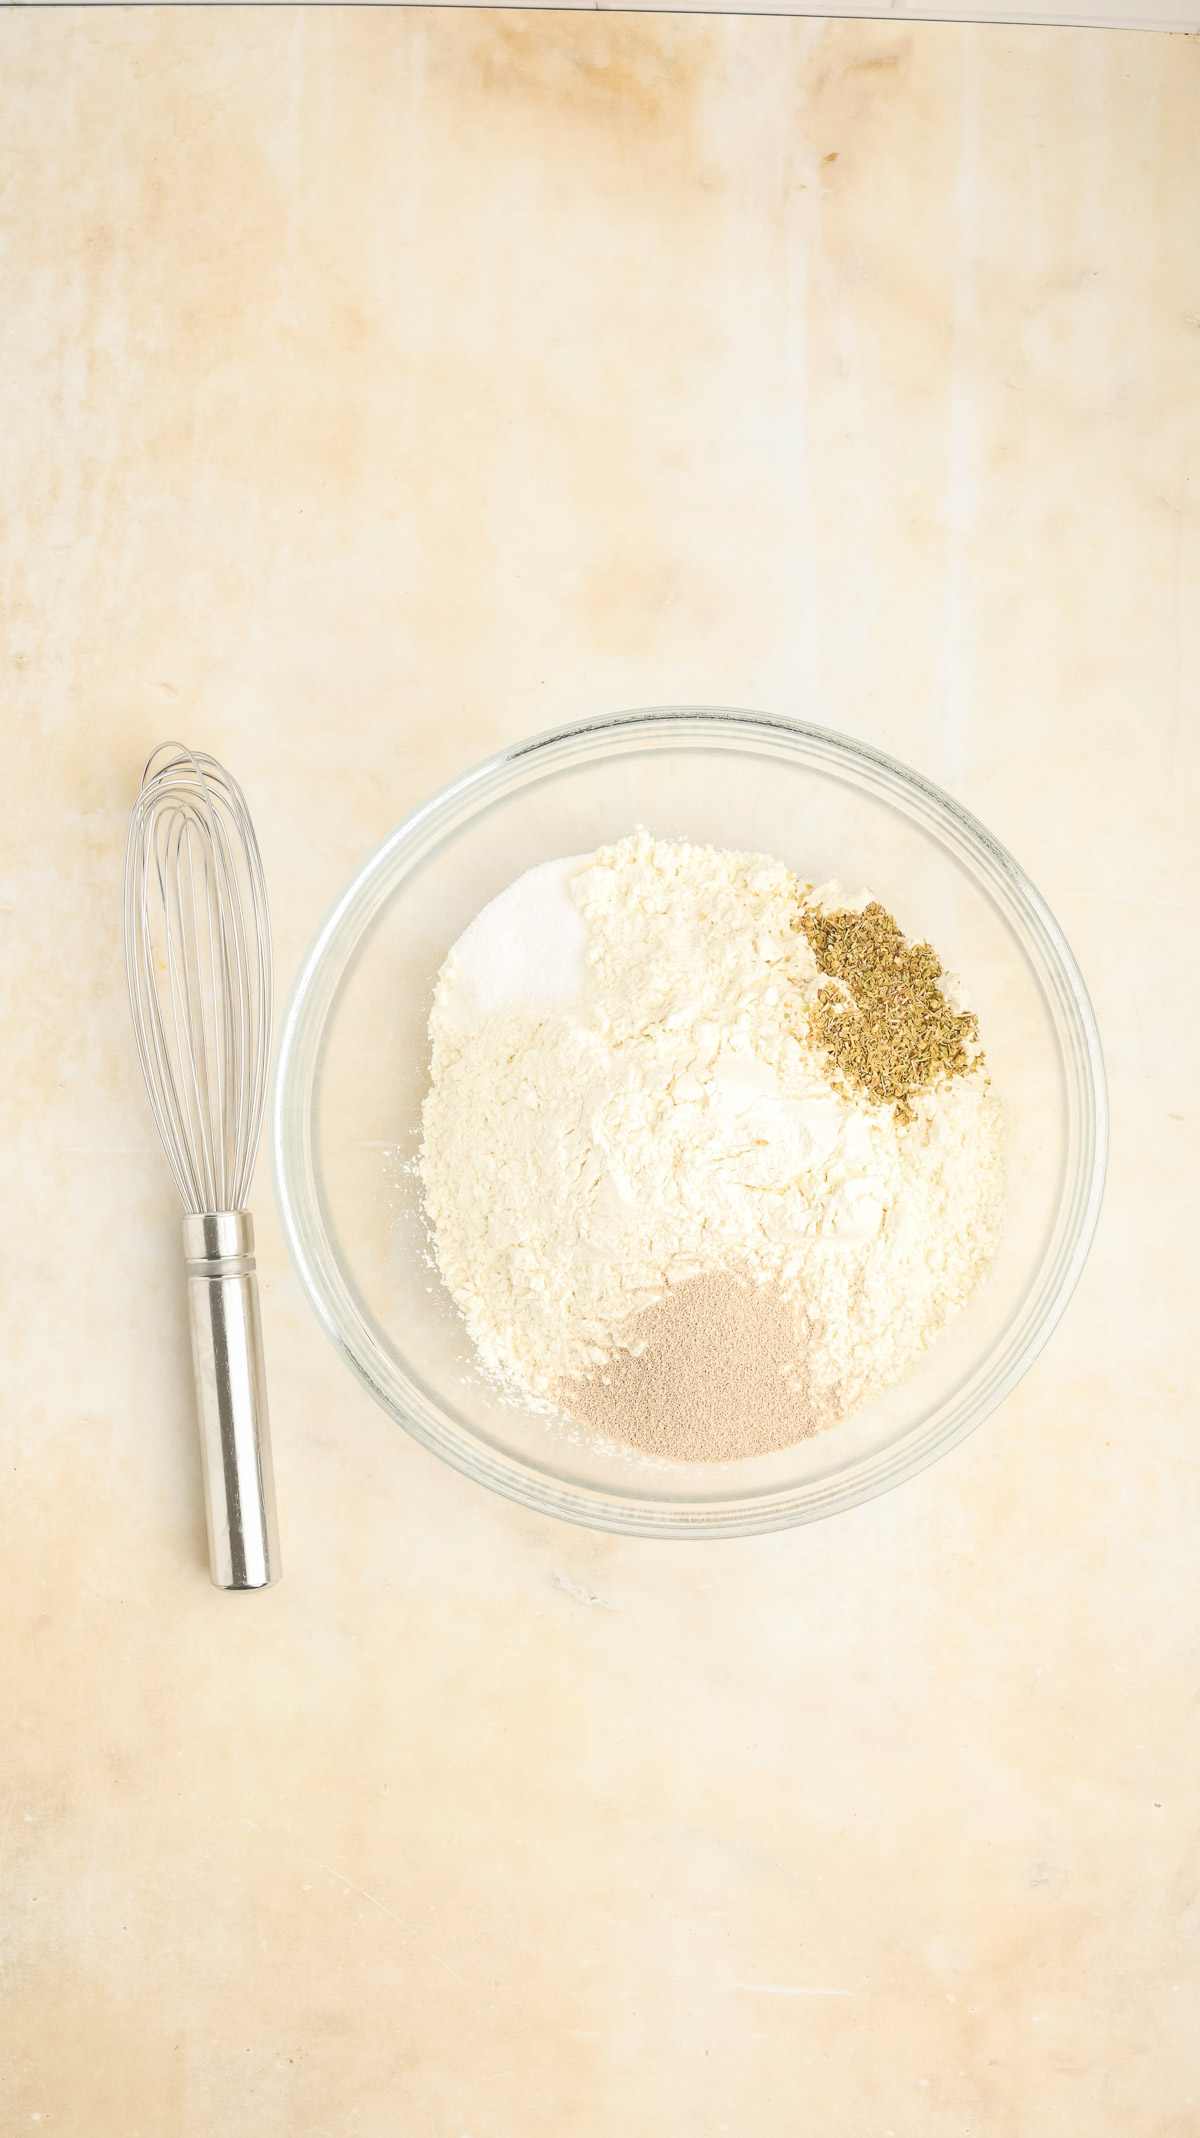
Step 1: Mix the dry ingredients. In a large bowl, combine the flour, sea salt, and yeast. Give it a quick whisk to distribute everything evenly. This takes about 30 seconds.
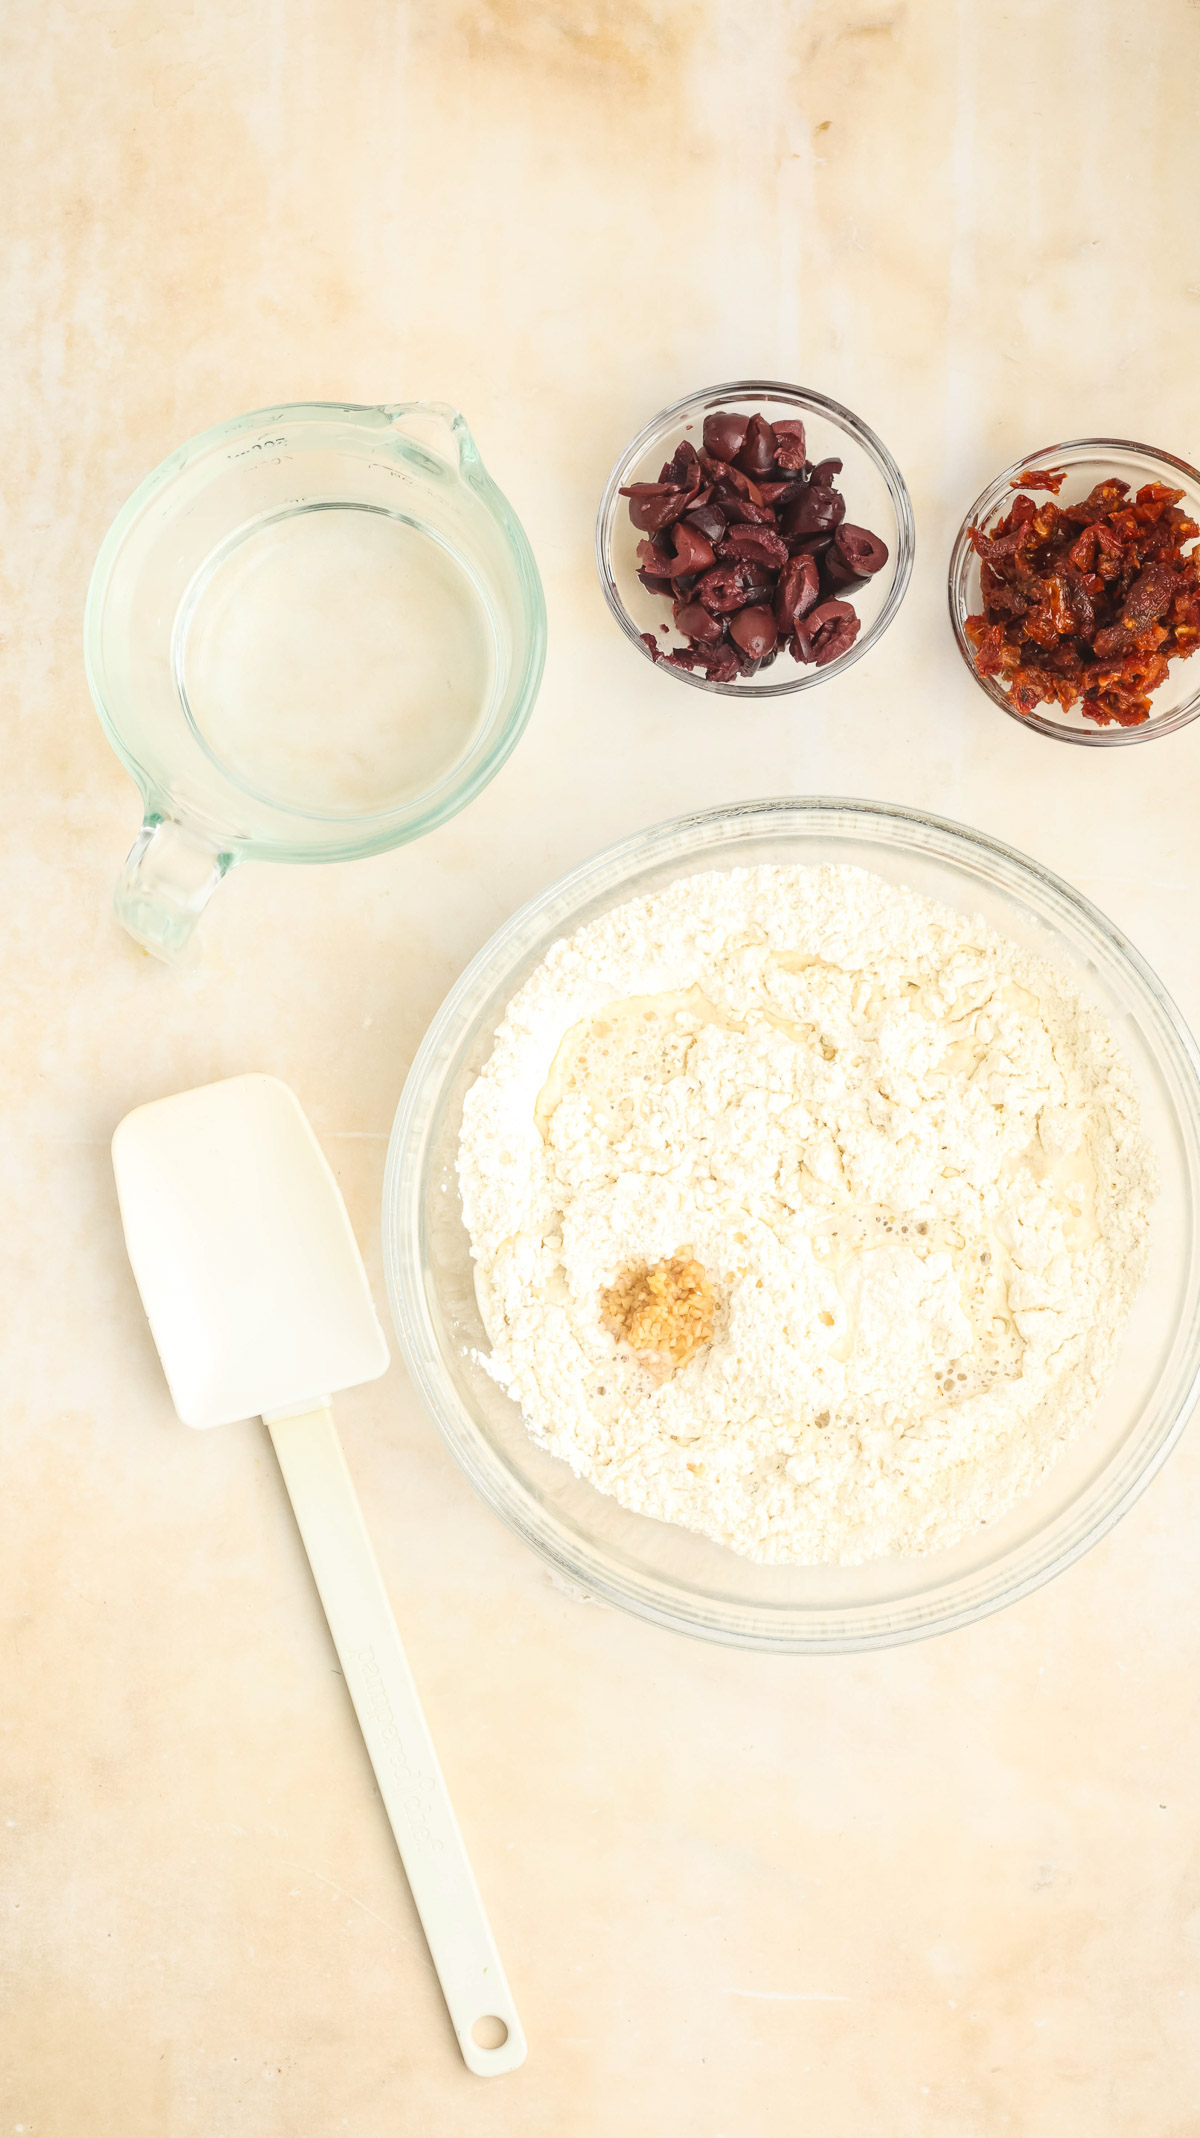
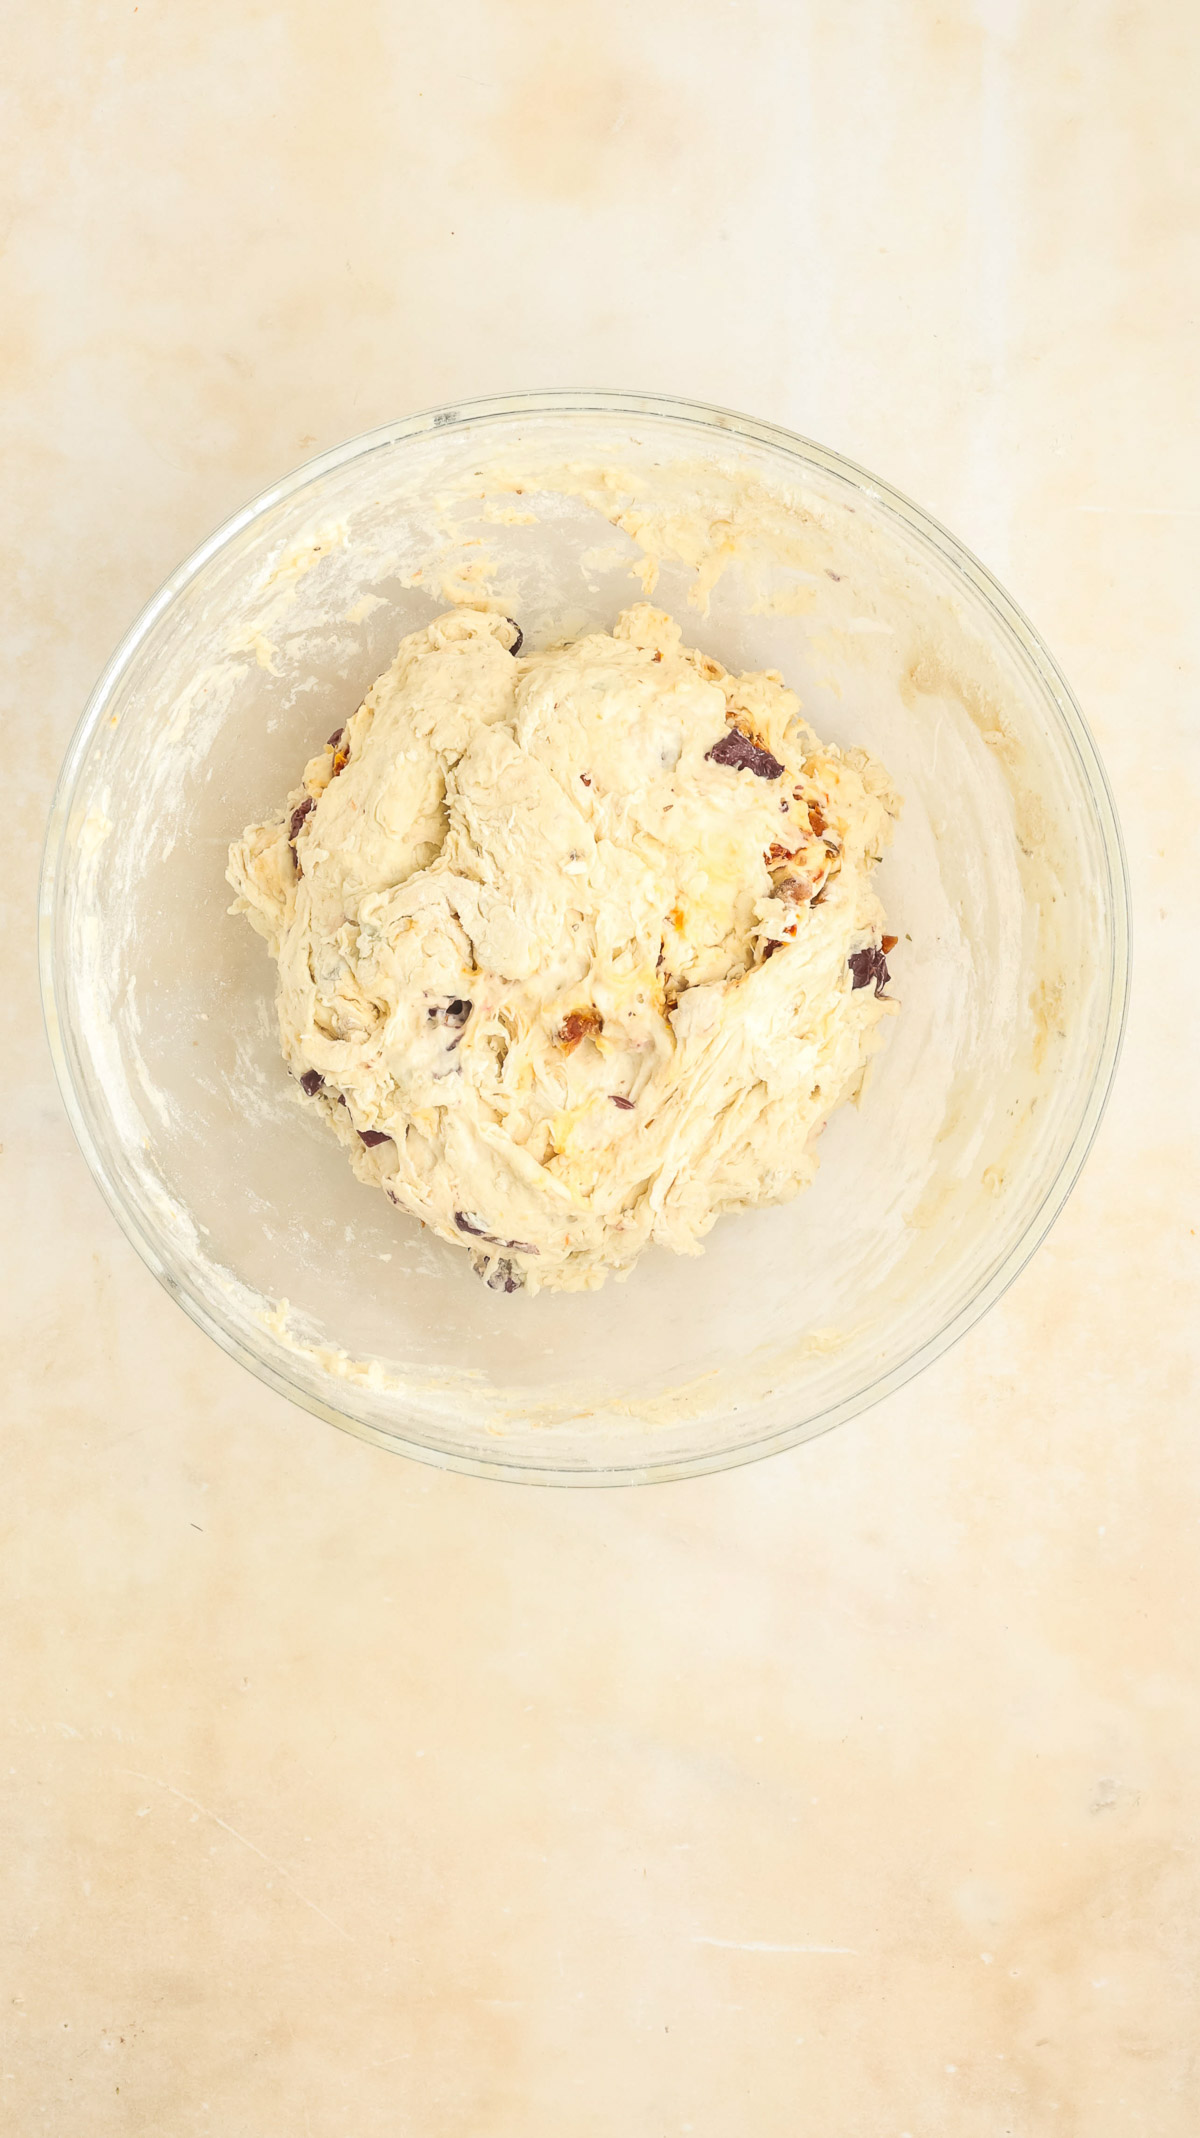
Step 2: Add the wet ingredients and mix-ins. Pour in half the warm water along with the garlic, olives, and sun dried tomatoes. Stir with a wooden or silicone spoon to combine. Add the remaining water and continue mixing until all the flour is incorporated. The dough will be sticky, and that's exactly what you want. Don't add extra flour.
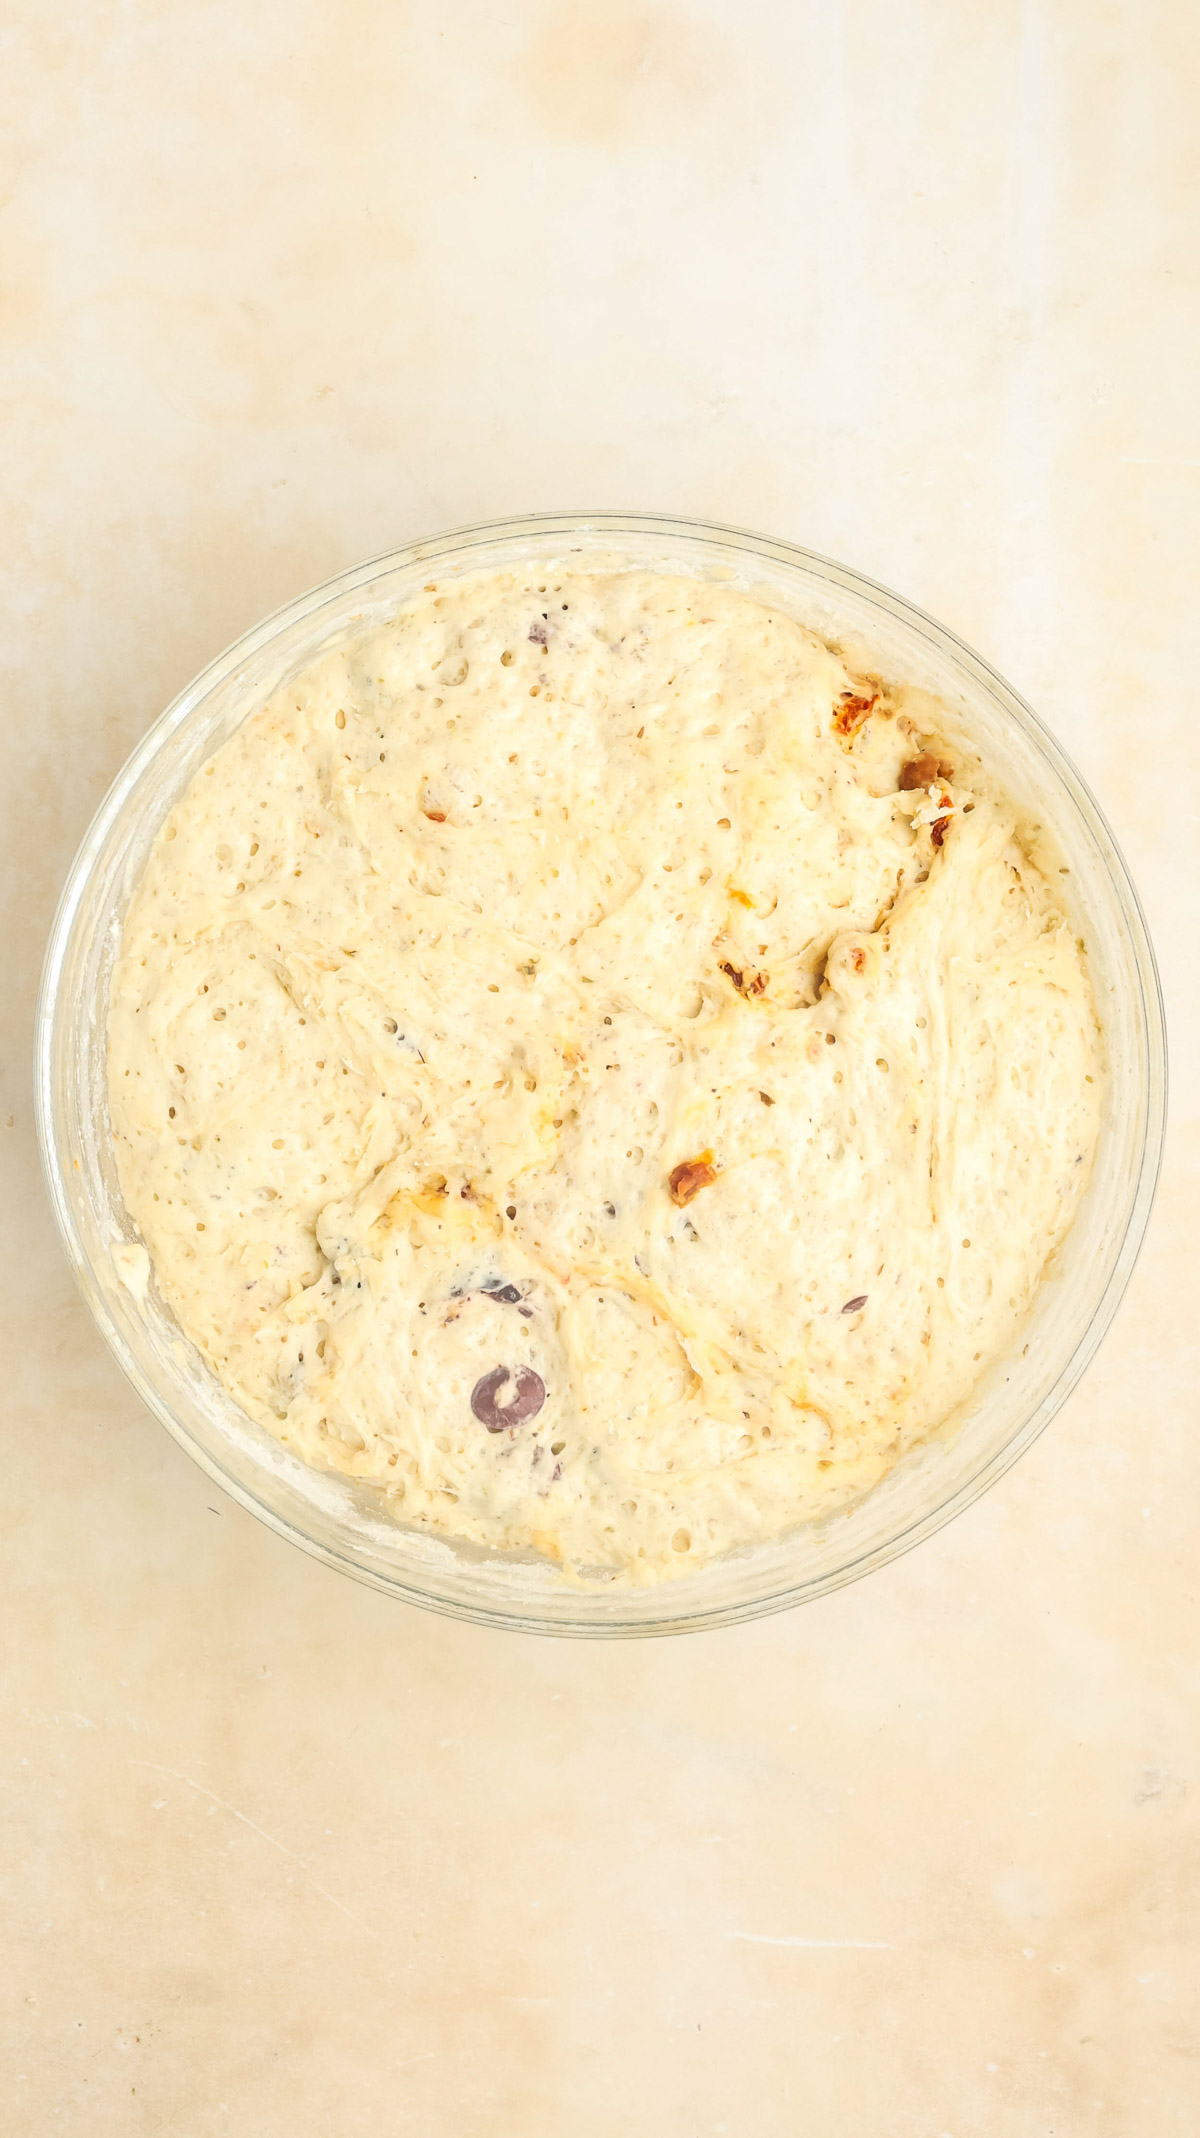
Step 3: Let it rise. Cover the bowl with plastic wrap and a kitchen towel, then place it in a warm spot for 2–3 hours until the dough has doubled in size. The proof setting on your oven works great for this since it provides a warm, draft-free environment.
Step 4: Preheat your dutch oven. Once the dough has doubled, place your dutch oven (lid on) into the oven and preheat to 450°F. Let it heat for at least 15–20 minutes so the dutch oven is screaming hot. This is the key to that amazing crust.
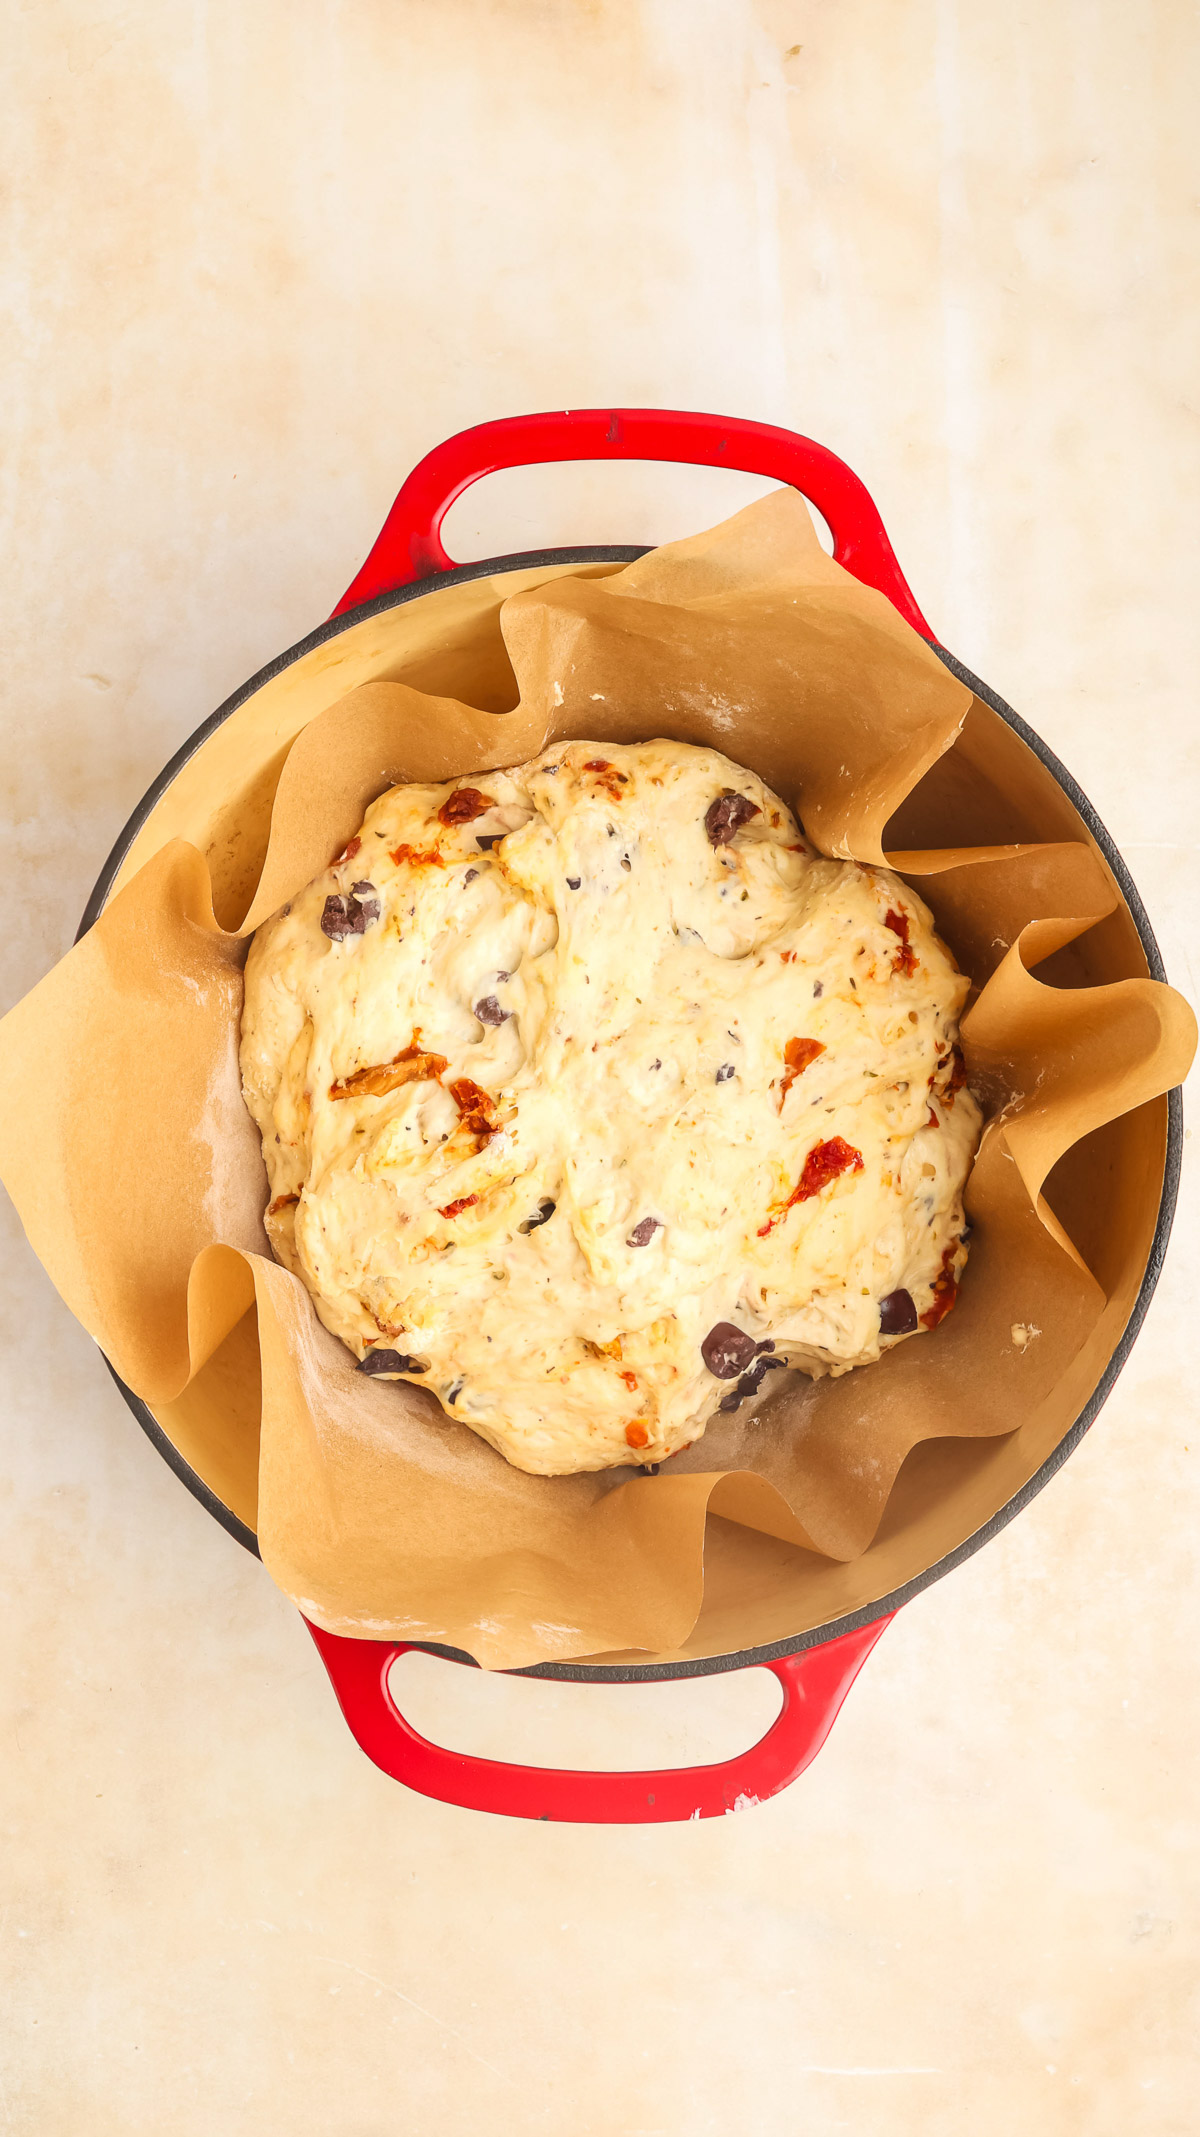
Step 5: Shape and transfer. While the dutch oven preheats, turn the dough out onto a lightly floured piece of parchment paper. Gently shape it into a round ball, but don't overwork it. When the dutch oven is hot, carefully lift the parchment by all four corners and lower the dough into the pot.
Step 6: Score and add steam. Use a sharp knife to cut 2 lines or an X across the top of the bread. Place a couple of ice cubes under the parchment paper to create steam during baking. This is the secret to that incredible artisan crust.
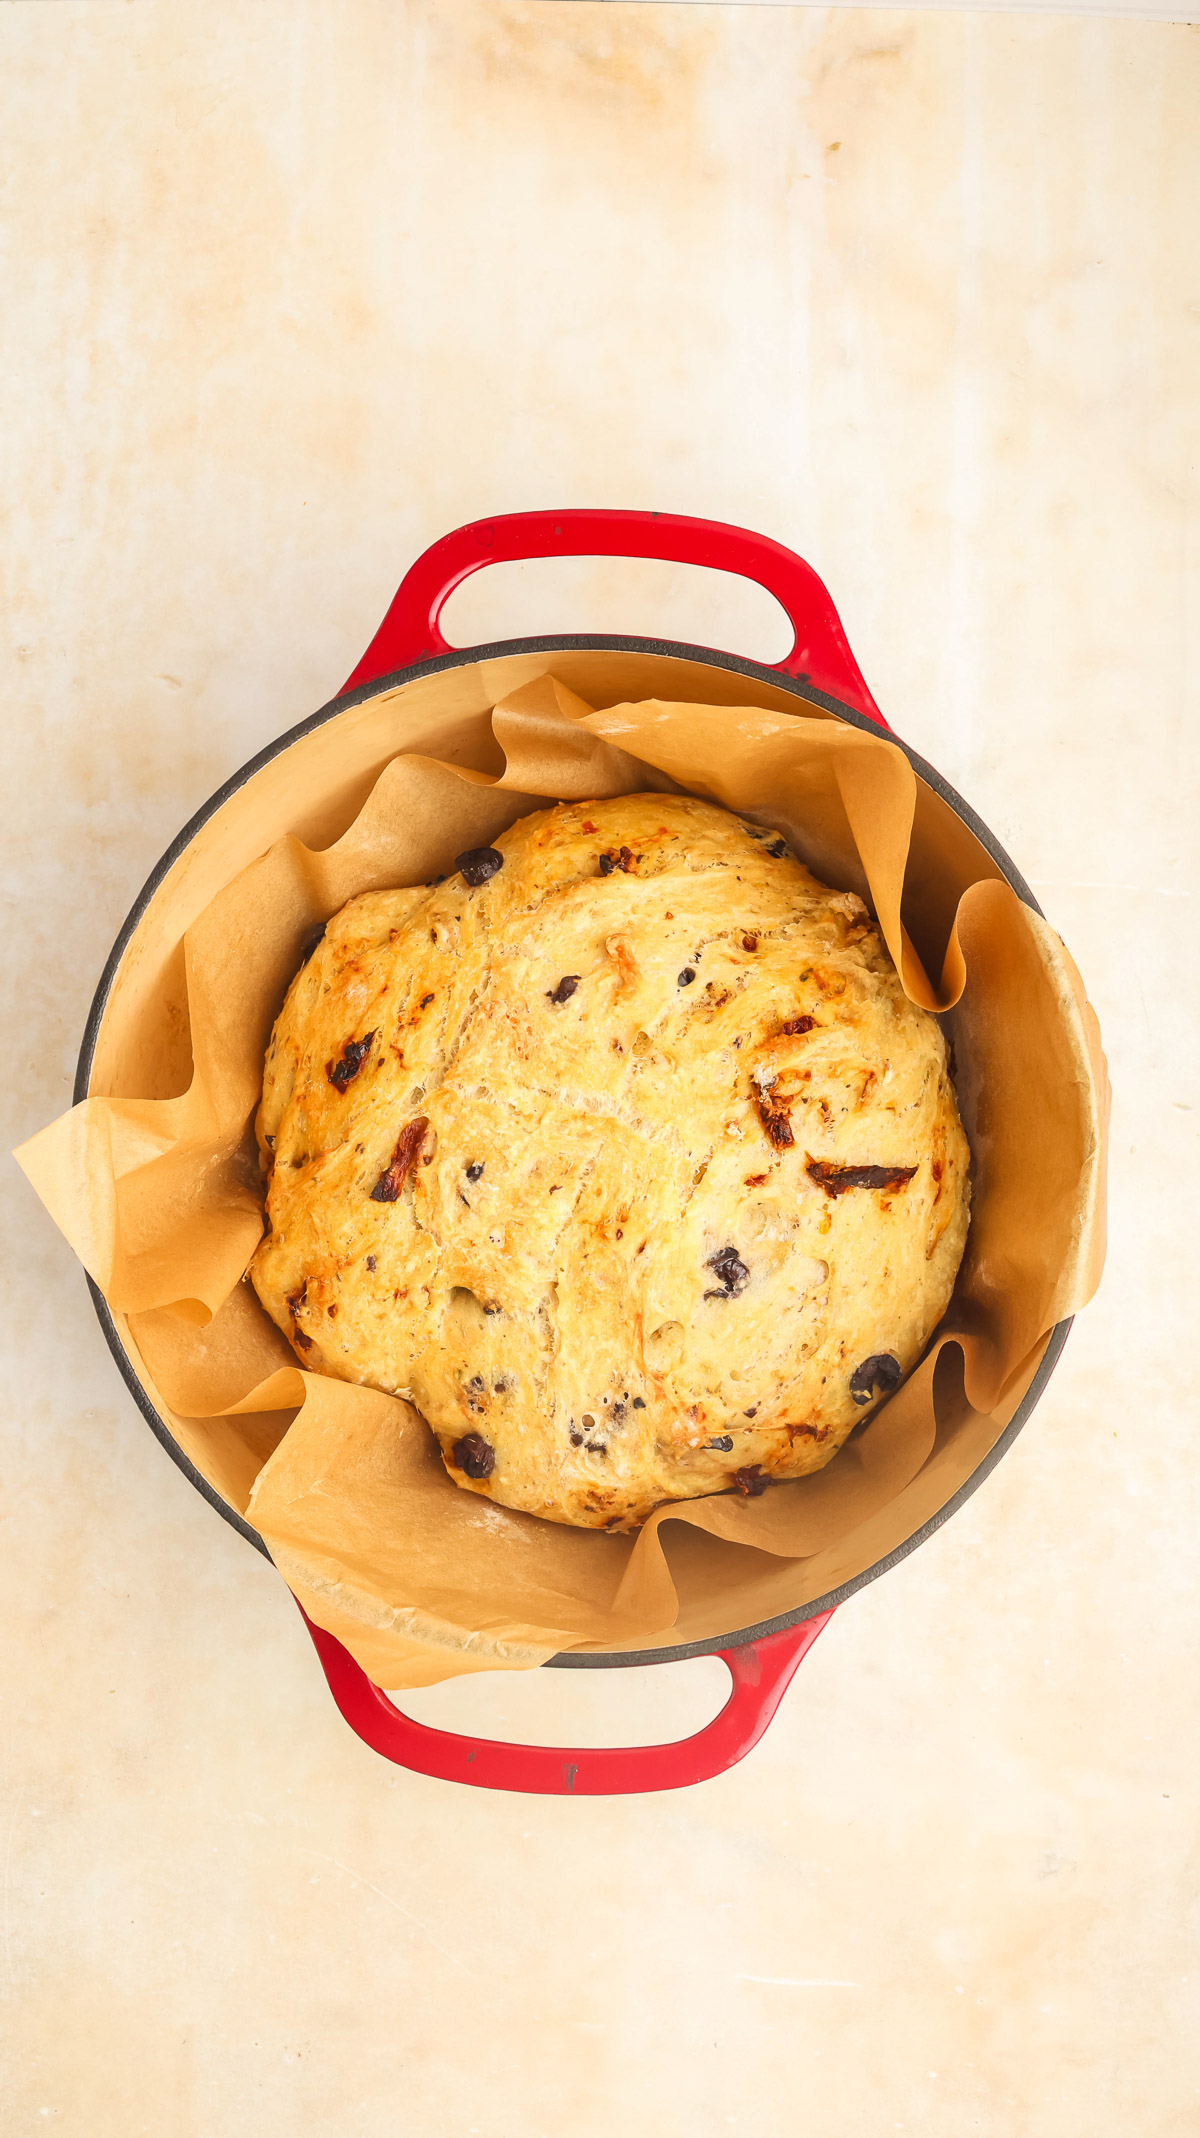
Step 7: Bake covered. Put the lid on and bake for 25 minutes. The trapped steam works its magic during this phase, keeping the crust soft enough to continue expanding.
Step 8: Bake uncovered. Remove the lid and continue baking for another 10–15 minutes until the bread is deep golden brown. The internal temperature should reach 200–210°F.
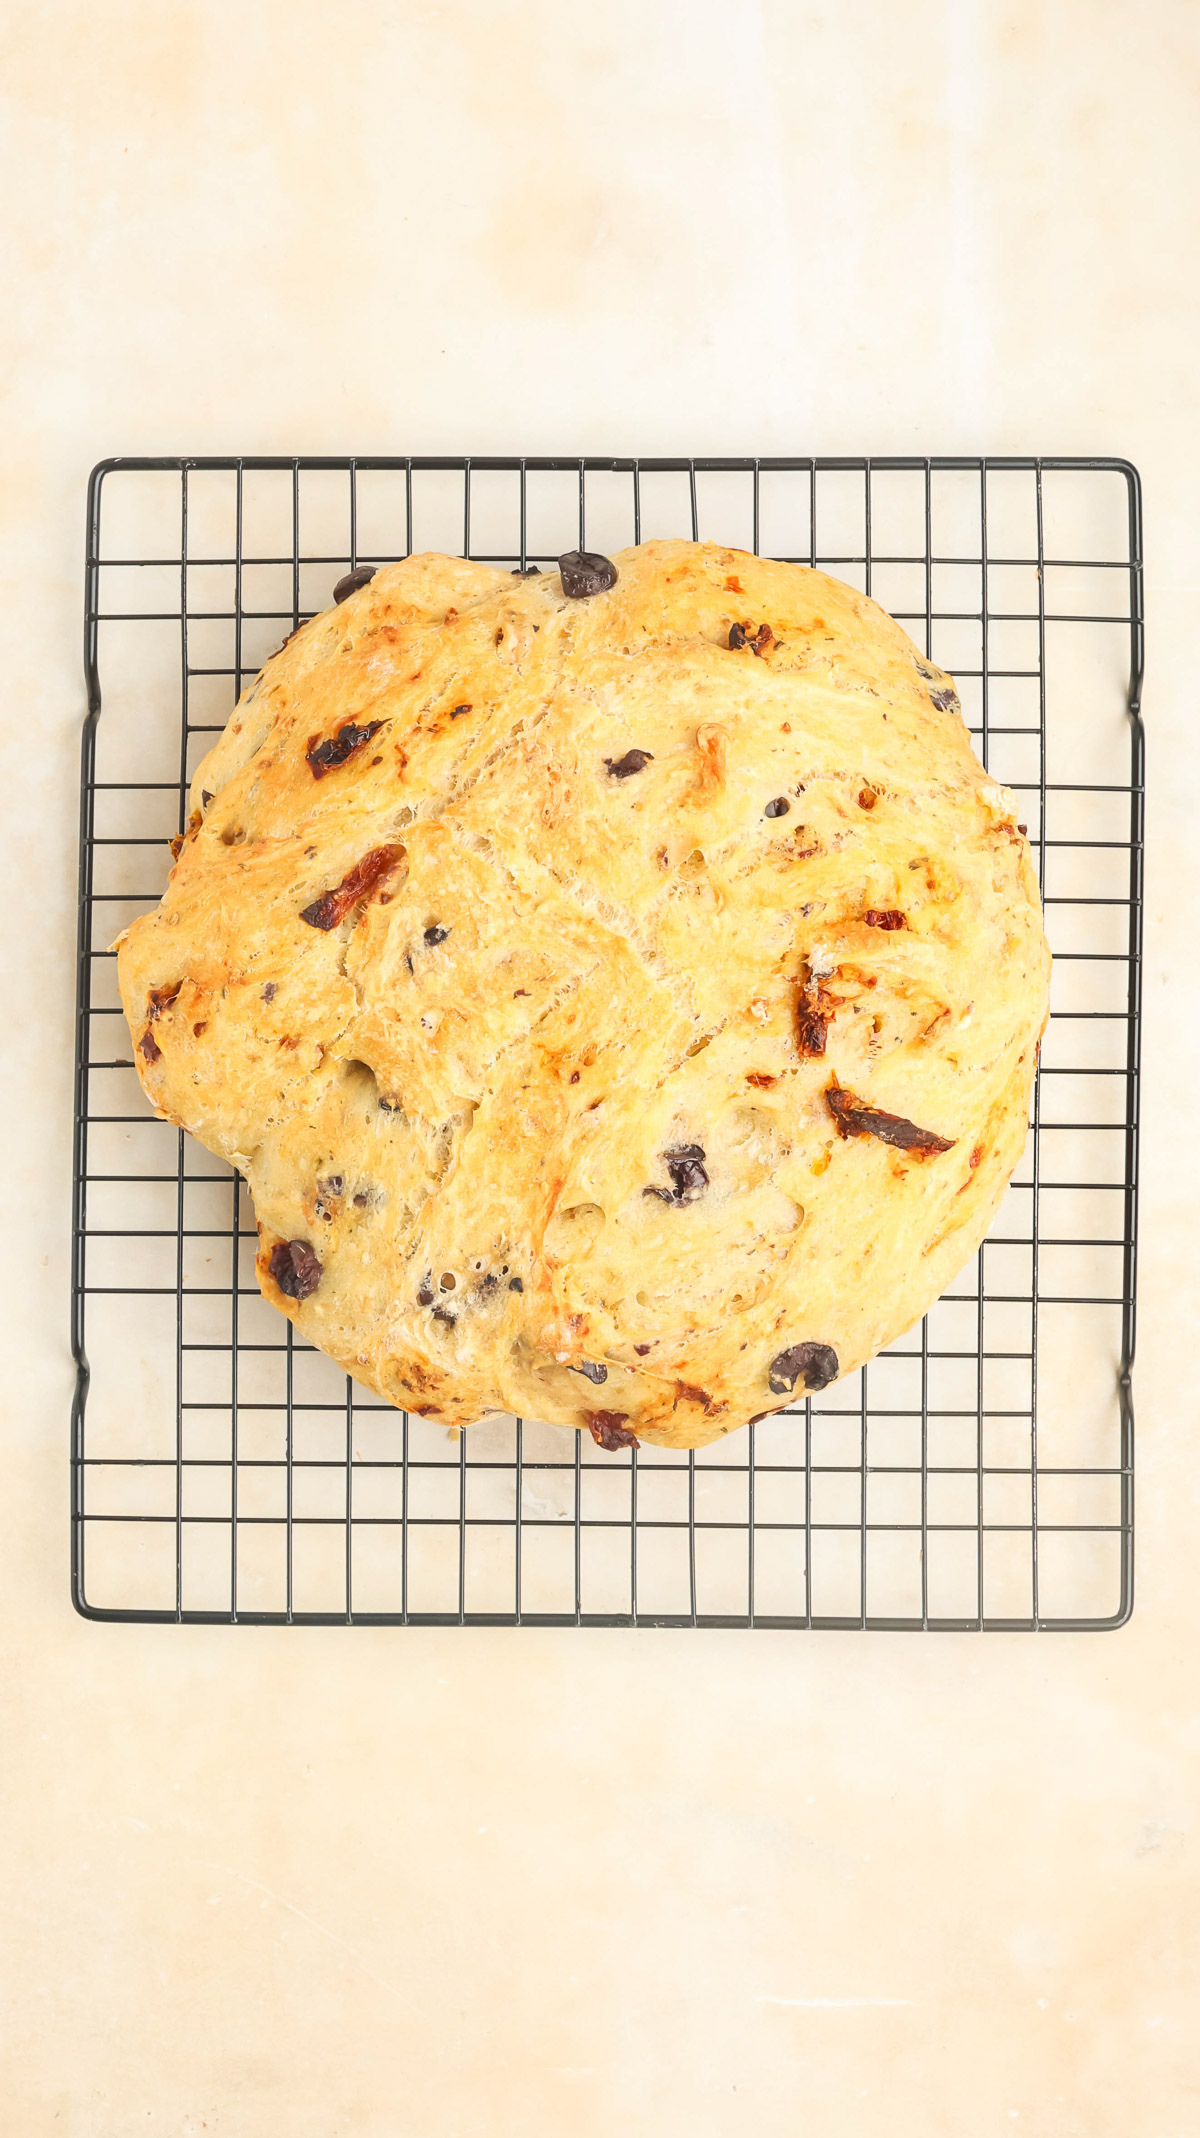
Step 9: Cool on a wire rack. Remove the bread from the dutch oven by lifting the parchment at all four corners. Transfer to a wire cooling rack and let it cool for at least 15–20 minutes before slicing. I know it's tempting, but this lets the interior finish setting up.
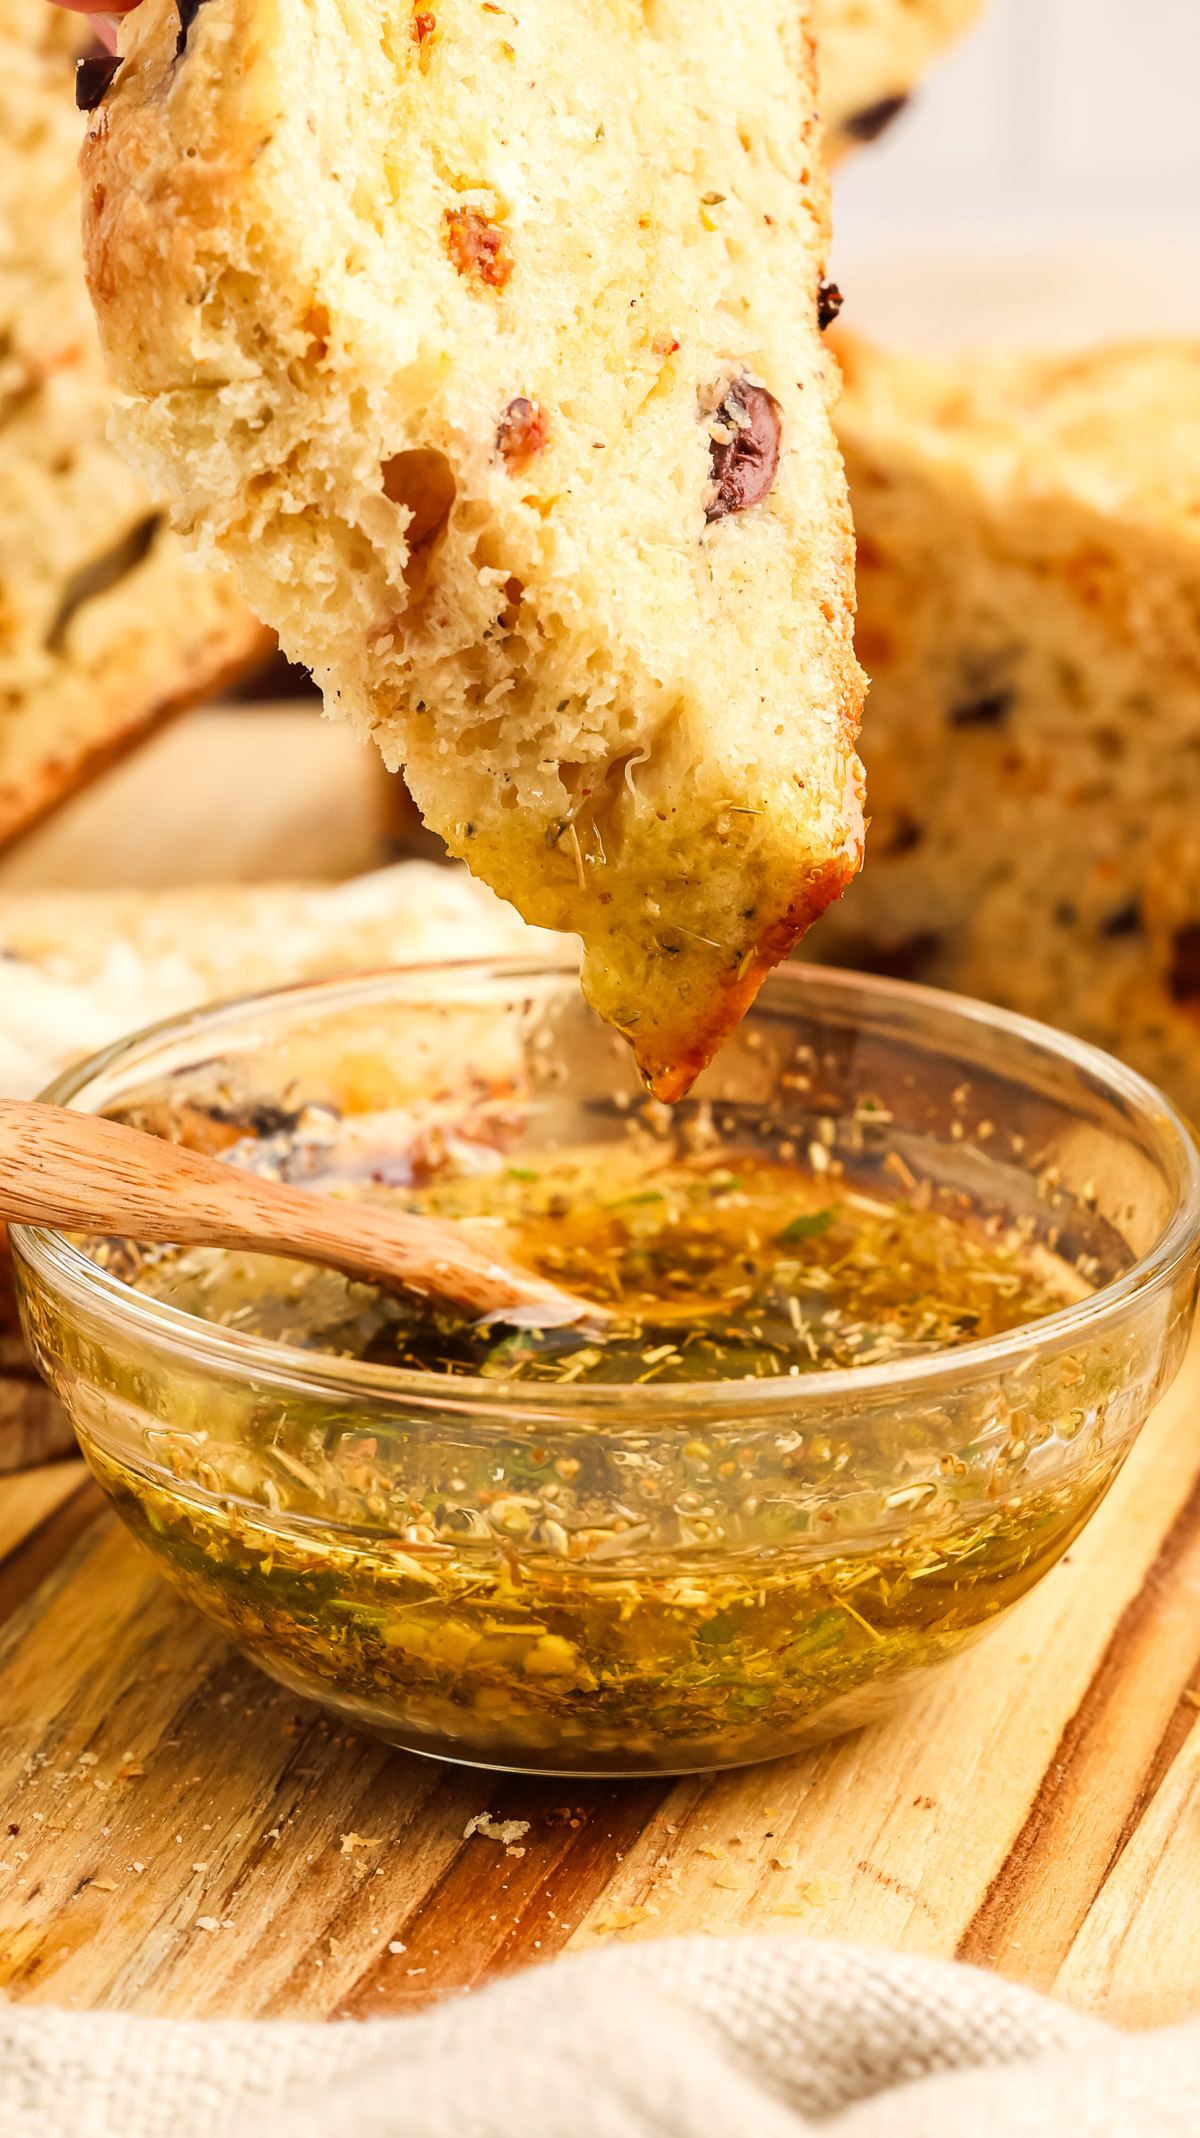
Step 10: Make the dipping oil. While the bread cools, combine the olive oil, oregano, garlic, and fresh rosemary in a small bowl. That's it. Pour it into a shallow dish and serve it alongside the warm bread.
Expert Tips
- Don't skip the ice cubes. The steam they create is what gives dutch oven bread that artisan bakery crust, crackly on the outside and perfectly chewy underneath. This is non-negotiable.
- Use parchment paper, not cooking spray. The parchment makes it easy to lower the dough into the hot dutch oven without burning your hands, and it lifts right out when you're done. Safety first.
- Pat your sun dried tomatoes dry. If they're packed in oil, drain and blot them well with paper towels before adding to the dough. Extra moisture can make the bread gummy in spots.
- Don't rush the rise. The dough needs to fully double in size. In a cool kitchen this can take closer to 3 hours, while a warm kitchen might be done in under 2. Use the proof setting on your oven if you have one.
- Let the bread cool before cutting. Give it 15–20 minutes on the cooling rack. This lets the interior finish baking with residual heat, and you'll get cleaner slices with better texture.
Serving Suggestions
- Italian dinner starter. Serve this bread alongside a bowl of Dutch Oven Lasagna or Dutch Oven 7 Can Soup for a complete Italian-inspired meal. The dipping oil doubles as a great addition to the table.
- Game day or party appetizer. Tear off chunks and set out the dipping oil alongside some marinara. Add it to a charcuterie board with cured meats, cheeses, and marinated vegetables and watch it disappear.
- Bruschetta base. Slice, toast, and top with fresh diced tomatoes, basil, and a drizzle of balsamic. This bread has enough flavor on its own that you don't need much on top. It also pairs beautifully with our Dutch Oven Ham at holiday dinners.
Storage and Leftovers
- Room temperature (2–3 days). Wrap the bread in parchment paper or place in a paper bag. Avoid plastic bags because the moisture from the olives and tomatoes can cause mold faster in a sealed environment.
- Freezer (up to 3 months). Wrap tightly in parchment paper, then place in an airtight freezer container or heavy-duty freezer bag. Thaw on the counter and refresh in a 350°F oven for 5–10 minutes to bring the crust back.
- Avoid the refrigerator. Refrigerating bread accelerates staling and ruins the crust texture. Room temp or freezer only.
Artesian Italian Bread Recipe FAQs
You can, but the dutch oven is what creates the steam that gives this bread its signature crusty exterior. If you don't have one, place a baking sheet with the bread on the middle rack and a pan of boiling water on the bottom rack to mimic the steam effect. A cast iron skillet with a tight-fitting lid also works in a pinch.
Yes! If using active dry yeast, dissolve it in the warm water first and let it sit for about 5–10 minutes until it gets foamy before adding to the flour mixture. The rise time may be slightly longer, but the final results will be the same.
The most common causes are expired yeast, water that was too hot (which kills the yeast), or a kitchen that's too cold for a good rise. Make sure your water is around 110°F and that your yeast is fresh. Let the dough rise in a warm, draft-free area until it has truly doubled in size.
Absolutely. Mix the dough, cover it tightly, and refrigerate for up to 24 hours. The slow cold rise actually develops even more flavor. When you're ready to bake, let it come to room temperature for about 30 minutes, then proceed with shaping and baking as directed.
A 5 to 7-quart dutch oven works best for this recipe. I use my 6-quart Lodge and it's perfect every time. An enameled or bare cast iron dutch oven both work. Just make sure yours can handle 450°F.
More Delicious Bread Recipes

If you tried this Artesian Italian Bread (with Dipping Oil) or any other recipe on my blog, please leave a 🌟 star rating and let me know how it went in the 📝 comments below. Thanks for visiting!
Get the Recipe
Artesian Italian Bread (with Dipping Oil)
Equipment
- Dutch oven (5–7 quart)
- Large mixing bowl
- Wooden or silicone spoon
- Parchment paper
- Wire cooling rack
- Sharp knife (for scoring)
- Measuring cups and spoons
Ingredients
Bread
- 3 ½ cups bread flour
- 1 teaspoon sea salt
- 1 ½ cups warm water 110℉
- 2 ¼ teaspoon fast-acting yeast 1 packet
- 1 teaspoon oregano
- 1 teaspoon crushed or jarred garlic
- ½ cup kalamata olives roughly chopped
- ½ cup sun dried tomatoes roughly chopped (pat dry)
Dipping Oil
- ¼ cup extra virgin olive oil
- 1 teaspoon oregano
- 1 teaspoon crushed or jarred garlic
- 1 teaspoon fresh rosemary fine chopped
Instructions
- In a large bowl, combine flour, sea salt, and yeast. Whisk to distribute evenly.
- Add half the warm water, garlic, olives, and sun dried tomatoes. Stir with a wooden spoon. Add remaining water and mix until all flour is incorporated. Dough will be sticky.
- Cover with plastic wrap and a towel. Place in a warm spot and let rise 2–3 hours until doubled in size.
- Place dutch oven with lid into oven. Preheat to 450°F for 15–20 minutes.
- Turn dough onto a lightly floured piece of parchment paper and gently shape into a round. Lift parchment by all 4 corners and lower into the hot dutch oven.
- Score the top with a sharp knife (2 lines or an X). Add 2–3 ice cubes under the parchment paper for steam.
- Cover and bake 25 minutes.
- Remove lid and bake 10–15 more minutes until deep golden brown (internal temp 200–210°F).
- Lift out using parchment and cool on a wire rack for 15–20 minutes before slicing.
- For the dipping oil: combine olive oil, oregano, garlic, and rosemary in a small bowl. Serve alongside warm bread.
Notes
- Don't skip the ice cubes. The steam they create is what gives dutch oven bread that artisan bakery crust, crackly on the outside and perfectly chewy underneath. This is non-negotiable.
- Use parchment paper, not cooking spray. The parchment makes it easy to lower the dough into the hot dutch oven without burning your hands, and it lifts right out when you're done. Safety first.
- Pat your sun dried tomatoes dry. If they're packed in oil, drain and blot them well with paper towels before adding to the dough. Extra moisture can make the bread gummy in spots.
- Don't rush the rise. The dough needs to fully double in size. In a cool kitchen this can take closer to 3 hours, while a warm kitchen might be done in under 2. Use the proof setting on your oven if you have one.
- Let the bread cool before cutting. Give it 15–20 minutes on the cooling rack. This lets the interior finish baking with residual heat, and you'll get cleaner slices with better texture.
Nutrition
Dutch Oven Daddy is not a dietician or nutritionist, and any nutritional information shared is only an estimate. We recommend running the ingredients through an online nutritional calculator if you need to verify any information.
Barbara says
I love how the kitchen smelled while this bread was baking. The dipping oil is so much better than anything you can buy at the store and it complements the fresh bread perfectly. This has officially become our new favorite weekend baking project.
Robert says
The texture of this bread is spot on and the dipping oil is addictive. I followed the instructions exactly and the loaf came out of the Dutch oven looking absolutely beautiful. It is the ultimate comfort food for a chilly evening.
Patricia says
I was a bit nervous about making artisan bread but this recipe made it so easy. The dipping oil really elevates the flavor and makes it feel like a meal from a fancy Italian restaurant. It is a simple process that yields incredible results.
John says
This recipe is a total winner for any dinner party. The artisan look of the loaf is so impressive and the dipping oil has just the right amount of garlic and herbs. We enjoyed every bite and there was not a single crumb left on the plate.
Mary says
The crust on this Italian bread is phenomenal and the dipping oil is the perfect accompaniment. I loved how the Dutch oven created that bakery style crunch while keeping the inside light and airy. It is easily the best bread I have ever made at home.