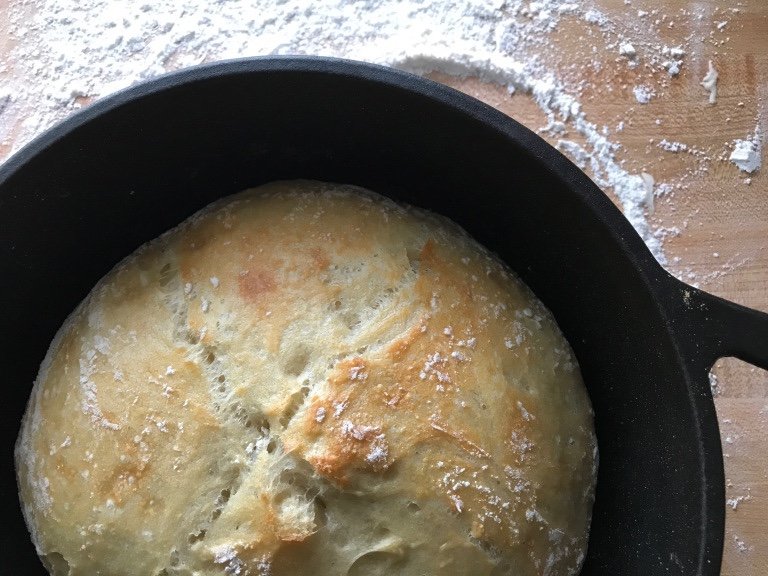
Who says baking bread has to be hard? Some recipes can be complicated, but this one isn’t! Bake your own Dutch Oven Bread with this easy recipe. Whether you’re a novice baker or just craving fresh homemade loaf, this foolproof recipe is the perfect way to get started!

Jump to:
This beginner-friendly Dutch Oven Bread is fresh, hot, and very easy to make! All you need are a few simple ingredients—bread flour, salt, yeast, and water—and a trusty Dutch oven. With just a little patience, any baker can create delicious, no-knead bread right at home.
Ready to make bakery-quality loaf at any skill level? Whether you're enjoying it with a warm bowl of soup or as the perfect sandwich base, this dutch oven bread recipe will quickly become a kitchen favorite!
Interested in more savory and sweet dutch oven bread recipes? Check out these sweet Dutch Oven Cinnamon Rolls, Rosemary Garlic Bread, or my Dutch Oven Raspberry Bread, next!
Why You’ll Love This Recipe
- Minimal Effort, Maximum Results: Perfect for bakers of all levels, this recipe makes it easy—just mix, let it rise, and bake. No kneading required!
- Simple Pantry Staples: With only 4 ingredients (water included!), this rustic bread recipe is not only affordable but also easy for everyone to make.
- Versatile for Every Meal: This loaf is like a blank canvas so you can pair it with anything—dip it in a warm soup, pile on your favorite sandwich fillings, or enjoy with butter and jam.
- The Dutch Oven Difference: The Dutch oven creates the ideal steam environment for a crispy, golden crust and evenly baked bread every time. The secret to this recipe is all in the pot!
Ingredients
- White Bread Flour: Preferred over all-purpose flour for its higher protein content, which helps develop gluten during the rising process, resulting in a chewier, more substantial texture. For a healthier option, try substituting half of the white flour with whole wheat flour, rye, or spelt—just be mindful that each will bring a different flavor and texture to it.
- Yeast and Water: The yeast acts as the leavening agent, helping the dough rise to create a light, airy texture, while the warm water (around 100°F) activates the yeast, speeding up the rise for a fluffier loaf.
- Salt: Not only enhances flavor but also regulates yeast activity and strengthens gluten strands, improving both texture and taste.
See the recipe card below for exact ingredient amounts, nutritional information, and detailed instructions.
Variations
- Infuse Herbs: Add thyme, rosemary, oregano, or basil to infuse your loaf with fragrant, aromatic flavors.
- Fold in Flavor: Gently fold in ingredients like cheese, olives, sun-dried tomatoes, or pesto to bring Mediterranean flair to your loaf.
- Nuts, Seeds, and Fruit: Sprinkle in sesame or poppy seeds for a subtle crunch, or top with chopped almonds, walnuts, pecans, or pistachios for added nutty flavor. You can also fold in dried fruit for a chewy bite that enhances the texture.
- Sweeten Your Loaf: For a sweet twist, mix in cinnamon, raisins, or even chocolate chips, creating a mouthwatering breakfast loaf or dessert.
How to Make Bread in a Dutch Oven
Take just 3 simple steps and bake your way to the best Dutch oven bread, all from the comfort of your own home. It’s easy, accessible, and bakes in just 45 minutes. Preheat your oven to 450°F, grab your 12” Dutch oven, and gather those 5 ingredients:
- Step 1: Make the Dough. Combine the white bread flour, salt, rapid-rise yeast, and warm water in a bowl. Mix together to form a shaggy dough. .
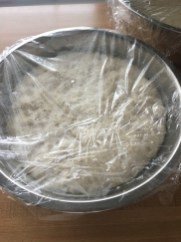
- Step 2: Let It Rise. Cover the bowl and let it rise for 2 hours.
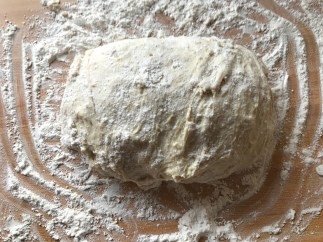
- Step 3: Transfer Dough. Place the dough on a floured surface.
- Step 4: Let it Rest. Shape the dough into a ball and return the dough to the bowl, cover it, and let it rest for another 30 minutes.
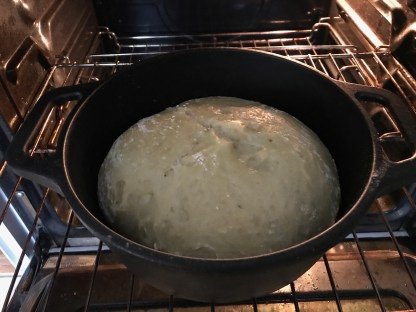
- Step 5: Prep for Baking. Gently place the dough ball into the Dutch oven and cover with a lid.
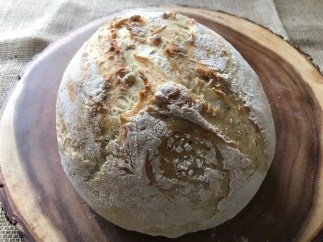
- Step 6: Bake. Bake the bread covered for 30 minutes. Then, uncover it and bake for an additional 10-15 minutes, or until the top is golden.
Serving Suggestions
Now that your cast iron Dutch oven bread is ready, let’s talk about the best ways to slice it up! It is incredibly versatile and a great addition to any table. Whether it’s a snack, side, or part of a main dish, here are some ideas to enhance your meal:
- Slice and spread with cream cheese and jam for a simple yet wholesome breakfast side.
- Build your own restaurant-style sandwich with juicy Italian meatballs, sliced cast iron steak, or honey glazed ham for a satisfying lunch or dinner.
- Dip it in a hearty bowl of ham and bean soup, corn chowder, or ground beef stew as the perfect way to warm up on a chilly night.
- Use it to mop up the savory sauce on pasta night, whether it’s with tortellini with sausage, chili mac, or manicotti pasta bake.
Expert Tips
- Measure Carefully: Baking can be a bit picky, so measuring your ingredients accurately really matters. It makes a big difference in how your Dutch oven white bread turns out, both in texture and flavor.
- Get that Perfect Crust: Bake your bread in a Dutch oven with the lid on at the start! This traps steam and ensures the dough starts baking right away. It’s the key to a golden, crispy crust while keeping the inside soft and airy.
- Additions Impact the Rise: If you’re adding extra ingredients, the dough will need more time to rise and bake since the added density affects the texture. Be sure to adjust your baking times accordingly!
- Choose the Right Dutch Oven: For best results, use a non-enameled Dutch oven. It handles the high heat better and won’t get damaged during the baking process.
Recipe FAQs
Once your loaf has cooled, store leftovers in a resealable bag or wrap it in plastic wrap - it’ll stay fresh for up to 5 days. You can also freeze it in portions for up to 3 months. If freezing, just thaw overnight, then stick it in the oven at 350°F for 10-15 minutes to bring back that perfect crust and warm center.
While many Dutch ovens work on the stovetop, for the best bread, it’s best to bake in the oven. The oven provides even heat and the steam needed for that perfect crust and soft inside.
Yes, you can! If you don’t have a Dutch oven, you can use any oven-safe pot or even a baking stone. Just keep in mind that different methods can affect how well the bread bakes in the oven and the texture of the crust.
More Delicious Bread Recipes
If you tried this dutch oven white bread recipe or any other recipe on my blog, please leave a 🌟 star rating and let me know how it went in the 📝 comments below. Thanks for visiting!
Get the Recipe
Homemade Dutch Oven Bread
Equipment
- 12" Dutch Oven (5 quart)
Ingredients
- 3 cups white bread flour
- 1 tsp. salt
- ½ tsp. yeast rapid rise
- 1 ½ cups water warm
Instructions
- In a bowl combine ingredients, cover and let rise for 2 hours
- Add dough to a floured surface and form a ball
- Let dough rest for 30 minutes in bowl, covered
- Preheat oven to 450 degrees
- Add dough to Dutch oven and bake for 30 minutes covered
- Uncover and bake for 10-15 minutes
- OPTIONAL: Serve with jam
Notes
- Measure Carefully: Accurate measurements are key to achieving the perfect texture and flavor for your Dutch oven bread.
- The Perfect Crust: Preheat your Dutch oven with the lid on to trap steam and ensure the bread starts baking right away. This is key to getting a golden, crispy crust while keeping the inside soft and airy.
- Let the Dough Rest: Letting it rest for 30 minutes will allow it to rise further and help develop a lighter texture. The rest time allows the dough to breathe and form a better structure during baking.
- Bakeware: This bread recipe works best in a non enameled Dutch oven.
- Using Regular Yeast: If you do not have rapid rise yeast, you can use regular yeast. Let rise for 12 hours in that case.
Nutrition
Dutch Oven Daddy is not a dietician or nutritionist, and any nutritional information shared is only an estimate. We recommend running the ingredients through an online nutritional calculator if you need to verify any information.
D
Tasty!!!
Edward
What an amazing, delicious, and easy recipe to make. Thank you!
Pat Gulley
Can I use a black Dutch oven?
Ned Adams
Absolutely! You can use a non enameled Dutch oven.
Dave Spencer
I finally decided to try baking bread. This simple recipe was easy to follow. I thought I would ruin it, like hard crust and doughy in middle. It turned out with nice, thin, crispy crust, and light in the middle. Now I have the confidence to keep baking.
Kim
Was so easy & delicious!!
Ned Adams
So glad it was easy and turned out well for you!
Lynn
Very good… must try!
Ned Adams
Awesome, Lynn! So glad you enjoyed.
Chuck
I use this recipe quite often. I only use 1/4 tsp of yeast and let it rise 18 hrs. Turns out great every time. I add raisins on occasion for something different. Definitely pre heat the Dutch oven!
Ned Adams
Thanks for sharing Chuck! Glad you like this recipe! Great suggestion on the raisins.
Geoff
hi, do you preheat the dutch oven?
Ned Adams
Hi Geoff, thanks for your question. This recipe does not require to preheat the Dutch Oven.
Henry Quintero
Good recipe even at 6,000 feet elevation.
Ned Adams
Awesome! I'm glad it worked well for you at your elevation.