
Looking to create a restaurant-quality meal at home? Save some money and get cooking with the perfect Pan Seared Salmon - it’s easier than you think! The best part is you can make this gourmet meal right from your own kitchen in about 15 minutes or less.
For more salmon dinner ideas, try this baked Lemon Pepper Salmon or this classic Cedar Plank Salmon, next!
Quick Look: Pan Seared Salmon with Chilis
- ✅ Recipe Name: Thai Chili and Balsamic Pan-Seared Salmon
- 🕒 Ready In: 15 Minutes
- 👪 Serves: 6
- 🥣 Main Ingredients: Salmon fillets, Thai sweet chili sauce, balsamic vinegar, soy sauce, brown sugar, garlic, fresh ginger, scallions
- 📖 Dietary Info: Dairy-free, pescatarian, gluten-free option (use gluten-free soy sauce)
- ⭐ Why You'll Love It: This salmon cooks fast and delivers big flavor with a sweet, tangy, and slightly spicy glaze.
Summarize and Save the Recipe
Mastering some basic searing techniques turns simple salmon into a crispy, golden delight with tender, flaky insides. Learning how to make Pan Seared Salmon is not only incredibly delicious but also elevates your dinner game right from the comfort of your own home.
Loaded with nutrients, this recipe combines omega-3-rich salmon with bold ingredients like scallions, sesame oil, soy sauce, Thai chili sauce, lime, garlic, and ginger. For another flavorful salmon dish, try this hot smoked salmon recipe next!
Why You’ll Love This Recipe
- Quick & Easy: Ready in 15 minutes flat, this pan seared salmon recipe is a big timesaver for busy weeknights.
- Crispy Perfection: Searing transforms the salmon from a simple piece of fish to a masterpiece with a golden, crispy crust and tender, flakey inside.
- Healthy & Nutritious: Packed with omega-3 fatty acids, protein, and essential nutrients, salmon is as good for your body as it is for your taste buds.
- Better Than Takeout: The balsamic and Thai chile glaze delivers a deliciously sophisticated restaurant experience in your own home.
Key Ingredients
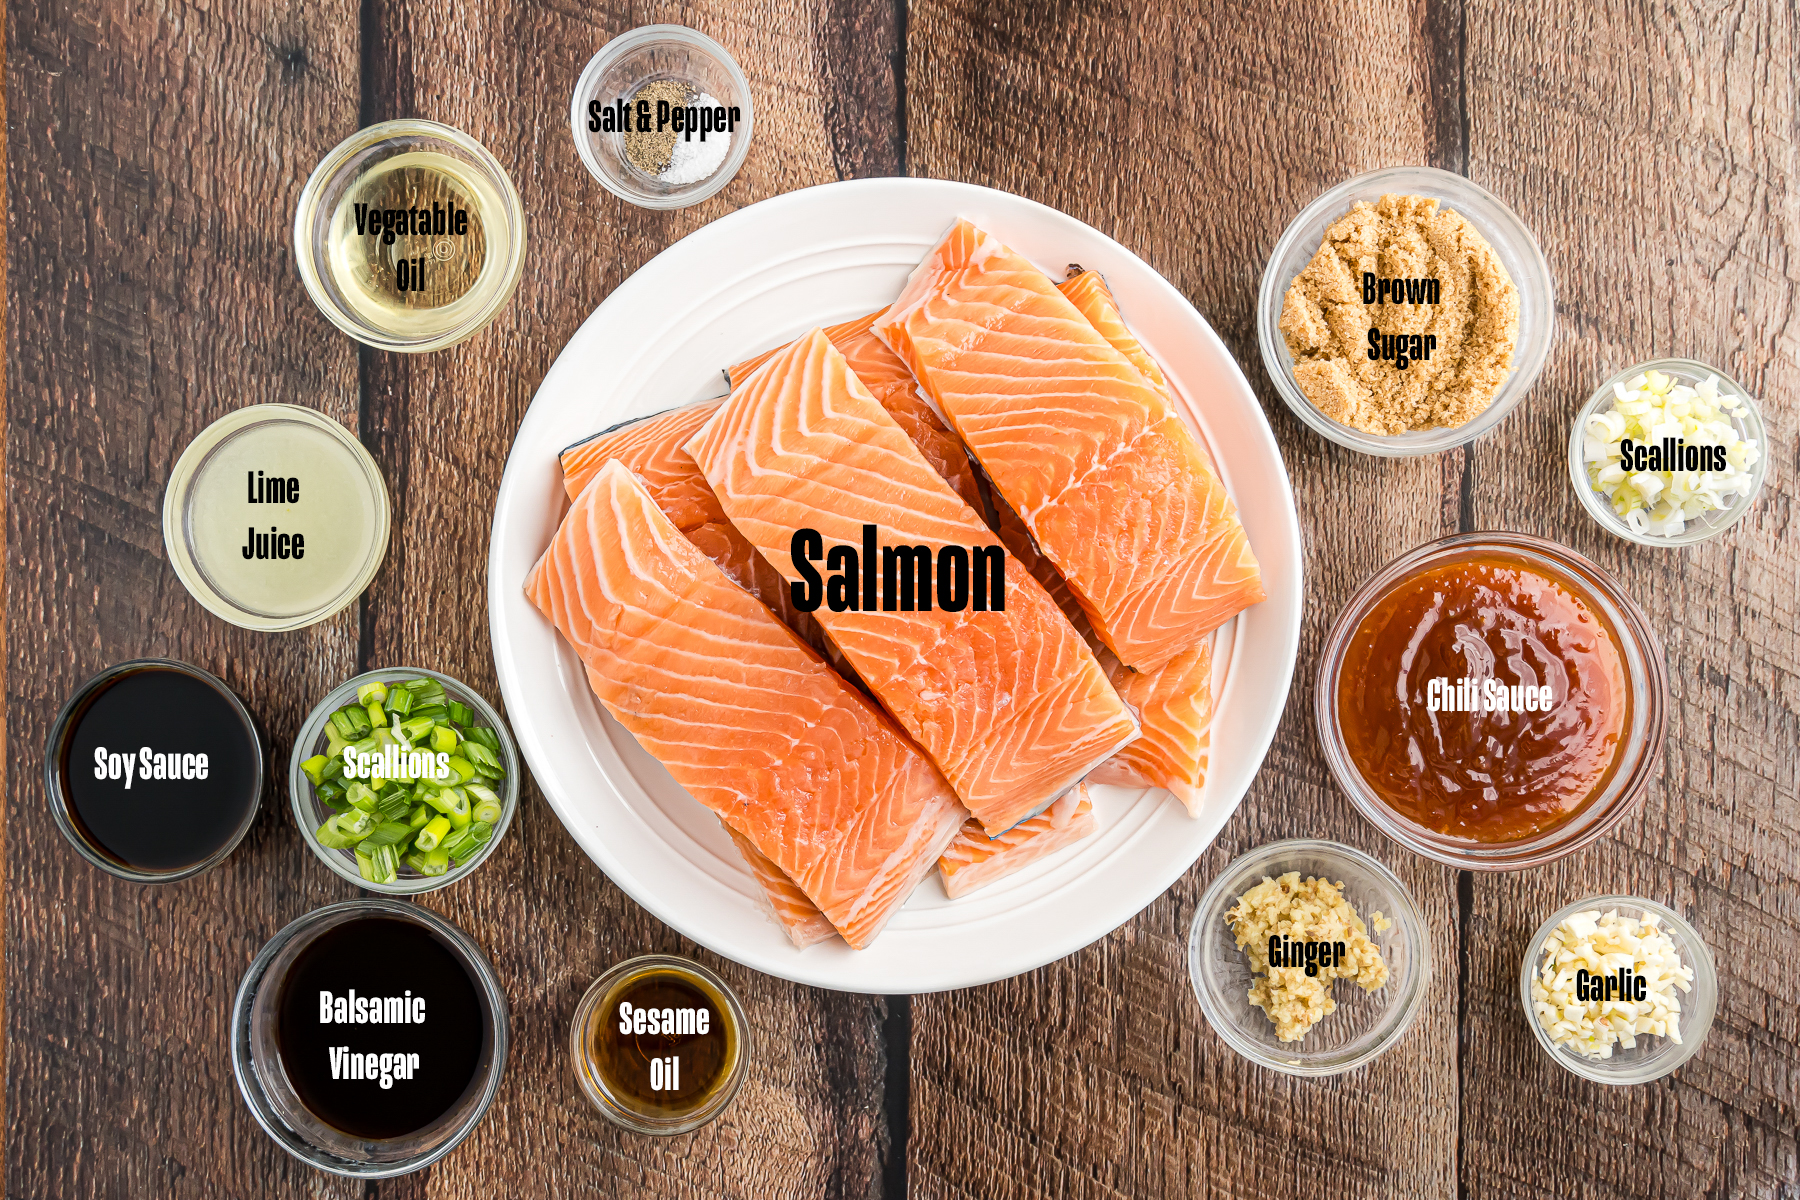
- Salmon: Choose even-sized skin-on fillets with vibrant and moist flesh. Opt for wild-caught, if possible, for a better nutritional profile, and don’t be afraid to ask your fishmonger for the best options available.
- Thai Chili & Soy Sauce: The ultimate duo of sweet and spicy (Thai chili) and salty umami (soy sauce) gives the pan-fried salmon recipe a balanced and bold taste.
- Balsamic Vinegar: Brings tanginess and subtle sweetness, balancing heat and saltiness with light, acidic notes.
- Brown Sugar: Thickens the sauce with sweet, molasses-like richness and caramelizes as it cooks. Swap for honey or maple syrup for a slightly different, equally delicious glaze.
- Lime Juice: Brightens the dish with a refreshing splash of citrus, complementing the salmon well. Add lime zest for a little extra zing, too!
See the recipe card below for exact ingredient amounts, nutritional information, and detailed instructions.
Variations
- Other Asian Inspirations: Try other sauces like a soy honey ginger, teriyaki, or hoisin glaze for new Asian-inspired flavors.
- Extra Heat: Crank up the heat with crushed red pepper or a drizzle of sriracha to the glaze.
- Nutty Crunch: Top the pan seared salmon with chopped peanuts, cashews, pistachios, or sesame seeds for added crunch.
- Coconut Flair: Stir in a few spoonfuls of coconut milk for a creamier, milder glaze. Top with toasted coconut for a crunchy, nutty topping.
How to Make Pan Seared Salmon
Ready to wow yourself and your family with a gourmet meal? The secret to the best pan-seared salmon starts with prep. Rinse, pat dry, and let the fillets sit at room temperature for 15 minutes to ensure they cook evenly when in the pan.
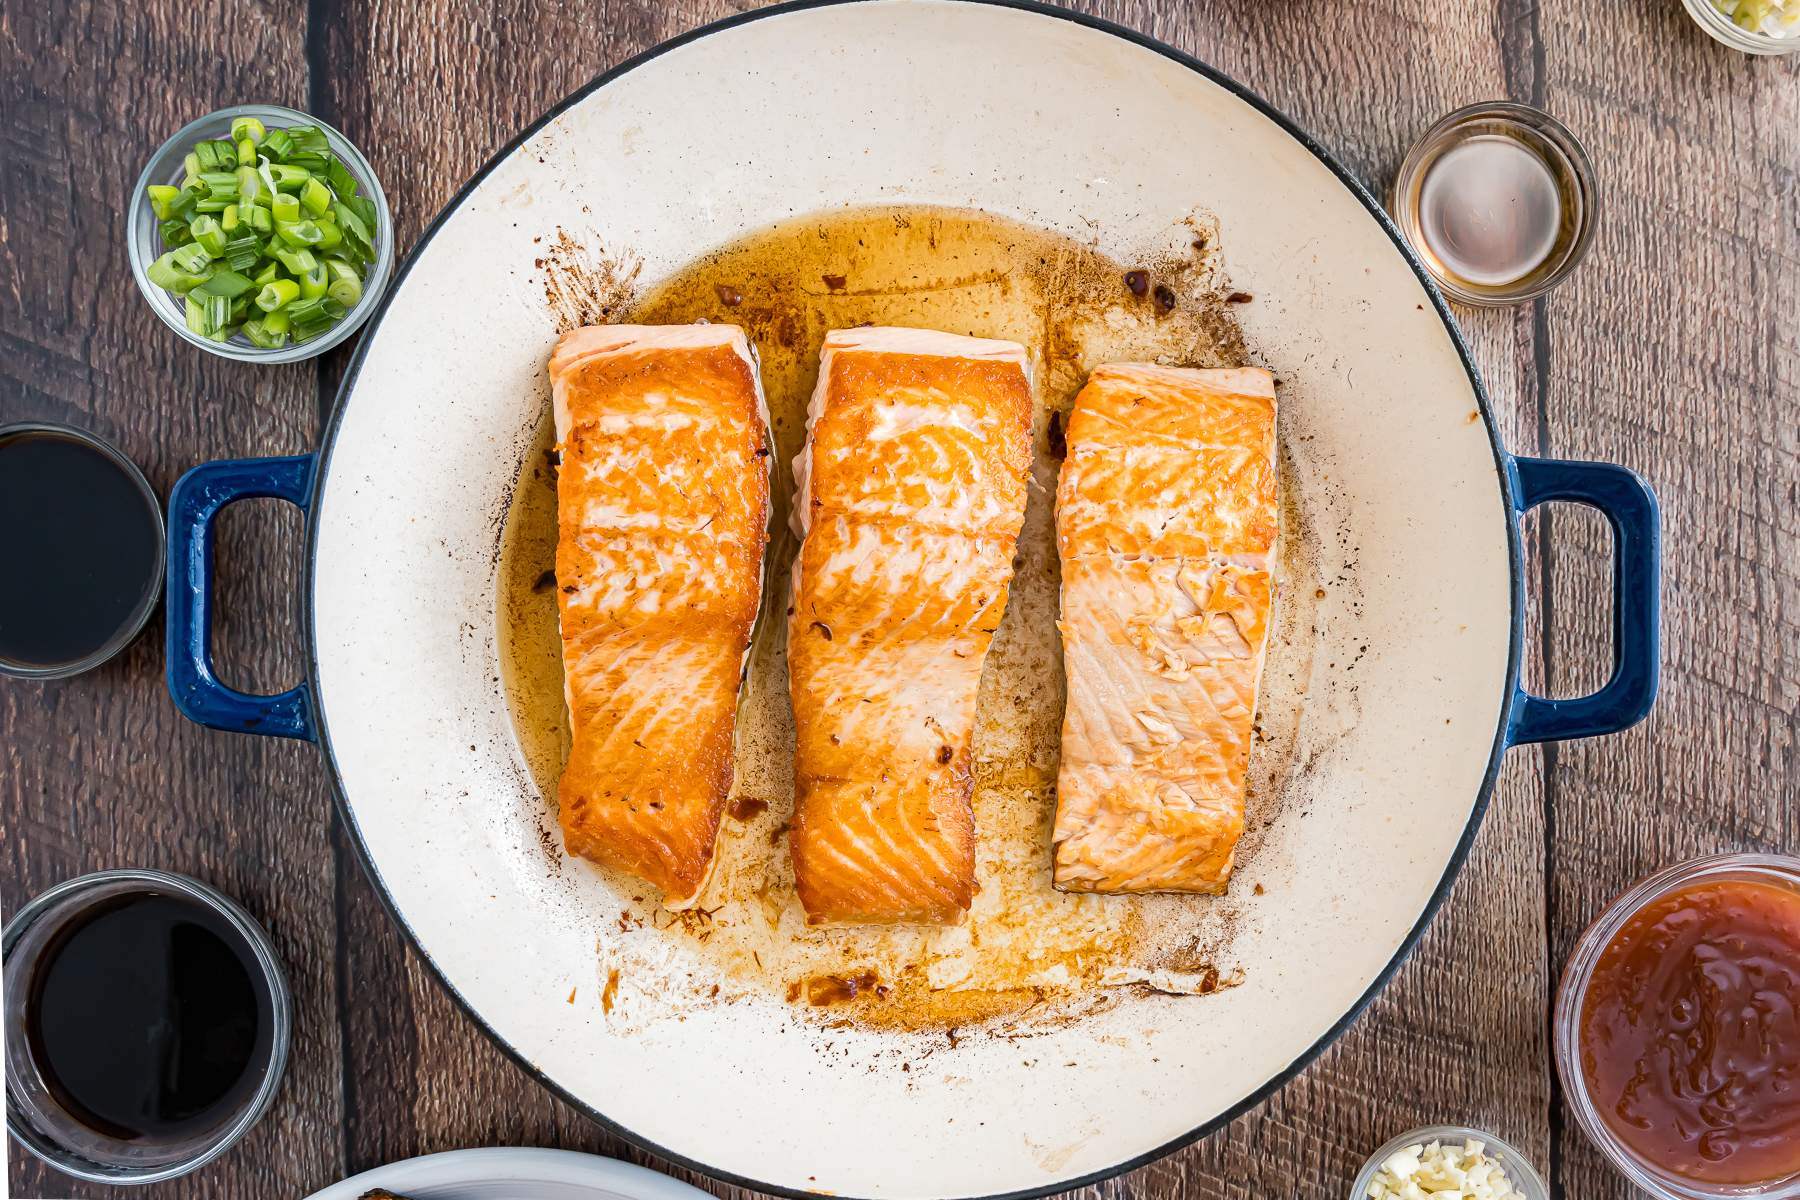
- Step 1: Prep and Sear. Heat the oil in a skillet over medium-high and sear the fillets, skin-side up, for 4 minutes. Flip and cook until translucent. Then, remove them from the pan and cover with foil.
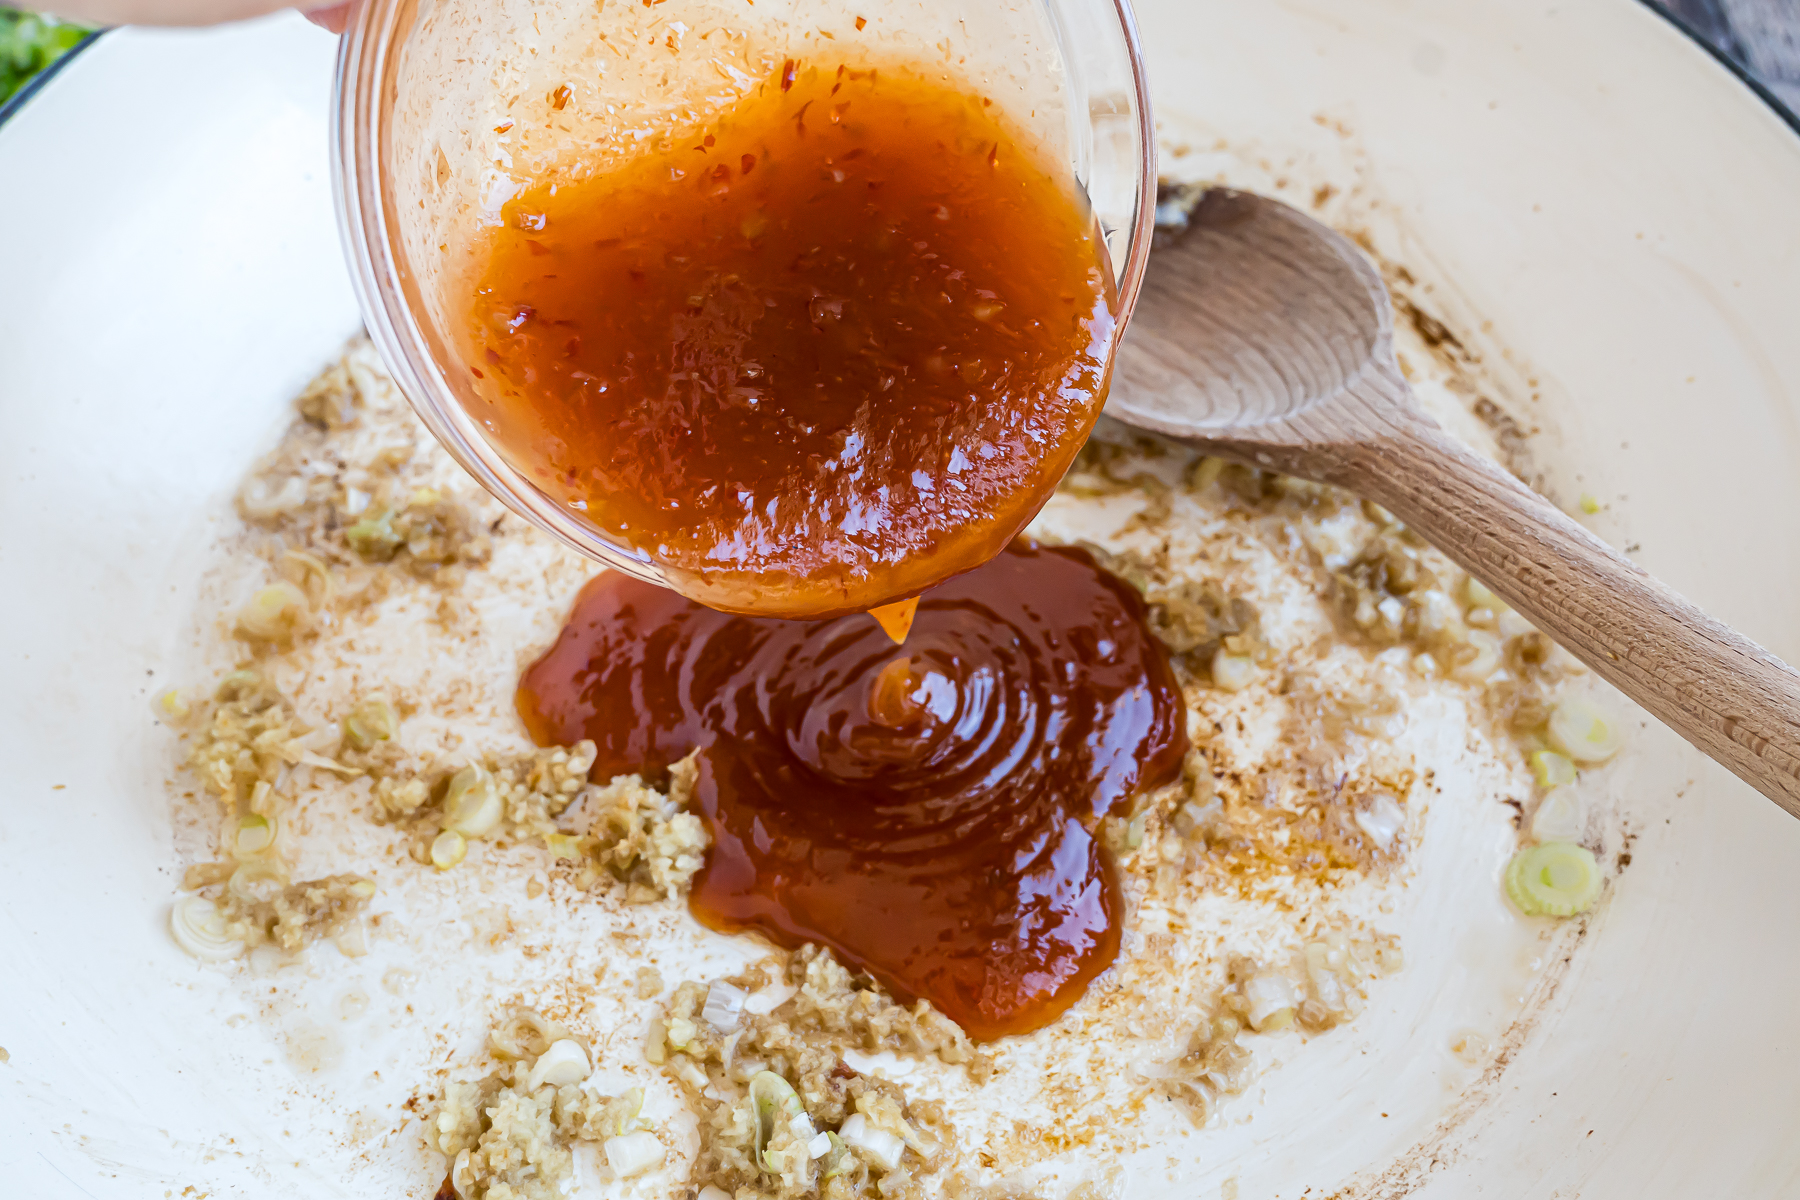
- Step 2: Make the Sauce. Carefully wipe the skillet clean and heat the sesame oil. Add the garlic, ginger, and the chili sauce and cook for 1-2 minutes to allow it to become fragrant.
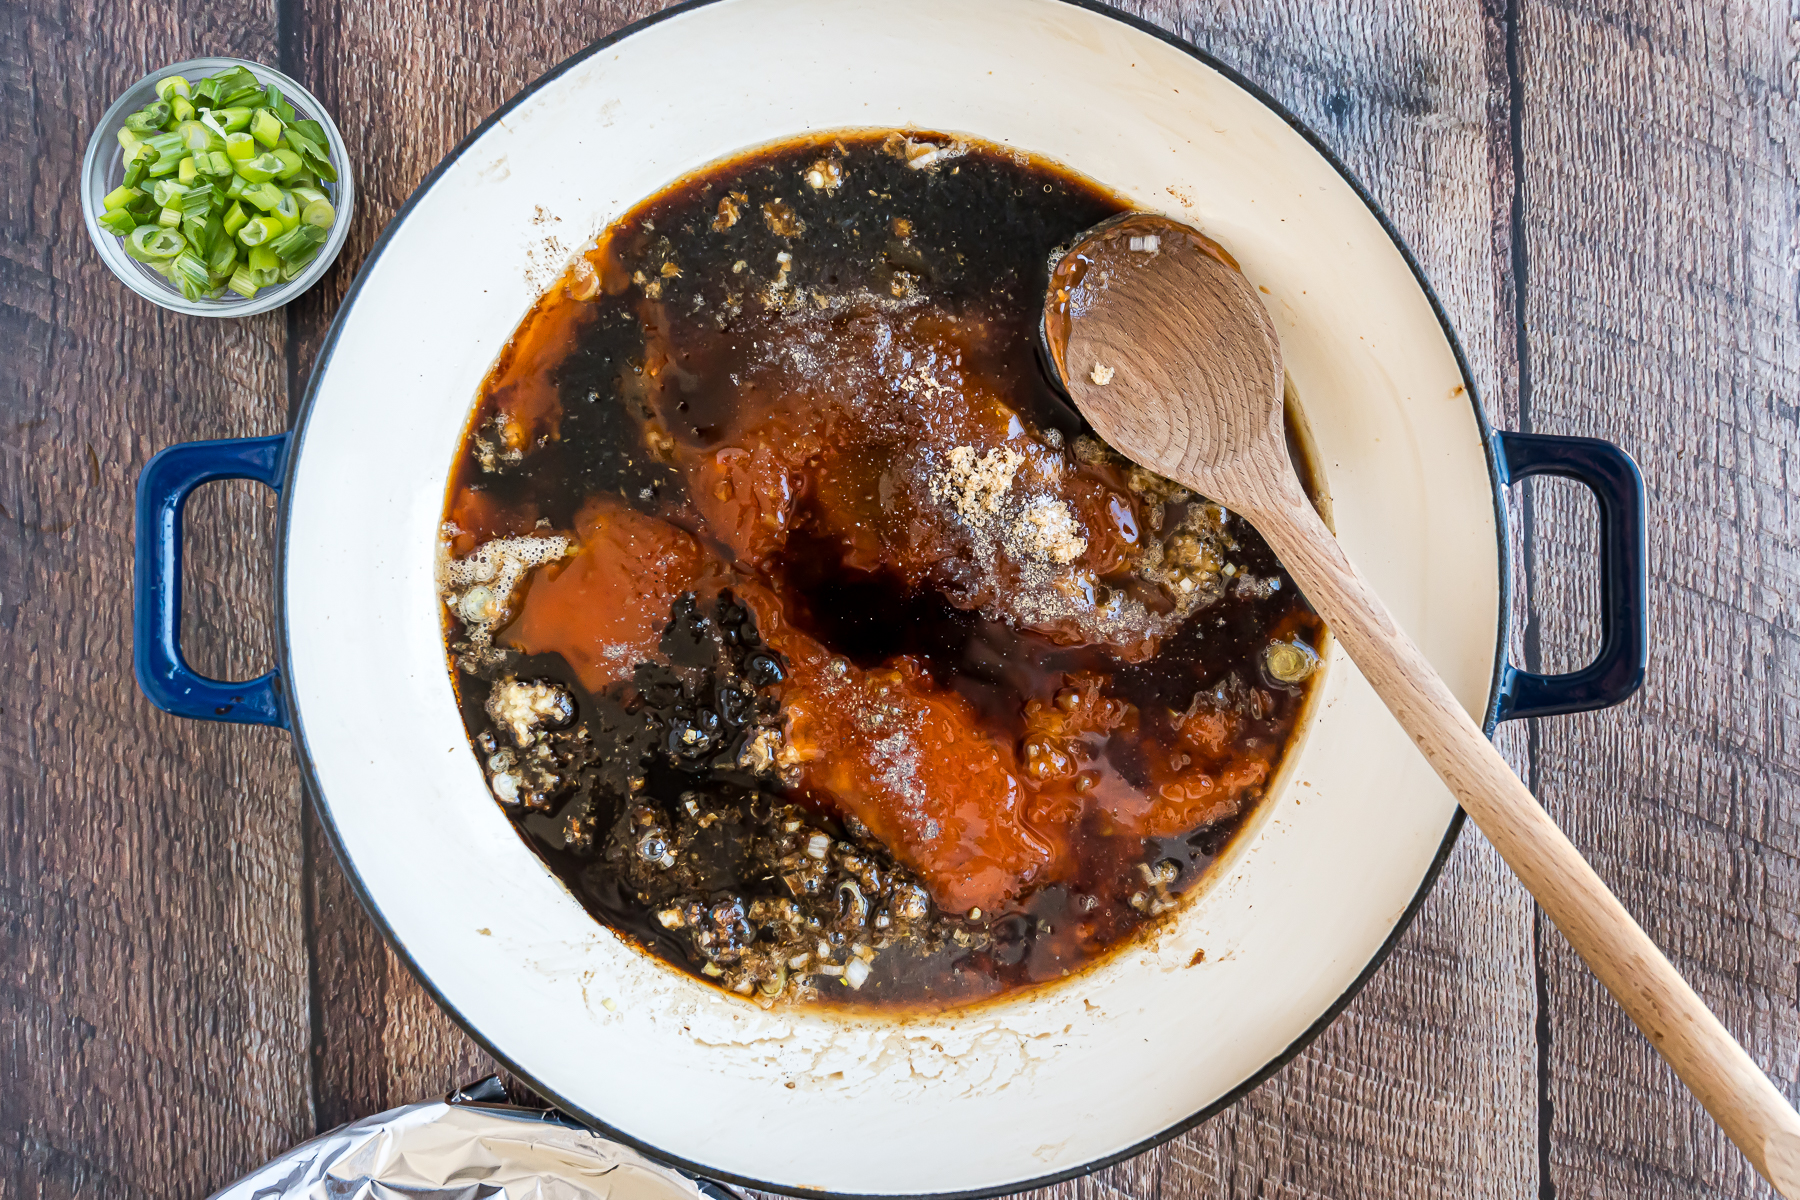
- Step 3: Thicken the Sauce. Stir in the brown sugar, soy sauce, and balsamic vinegar. Simmer until it becomes thick and syrupy.
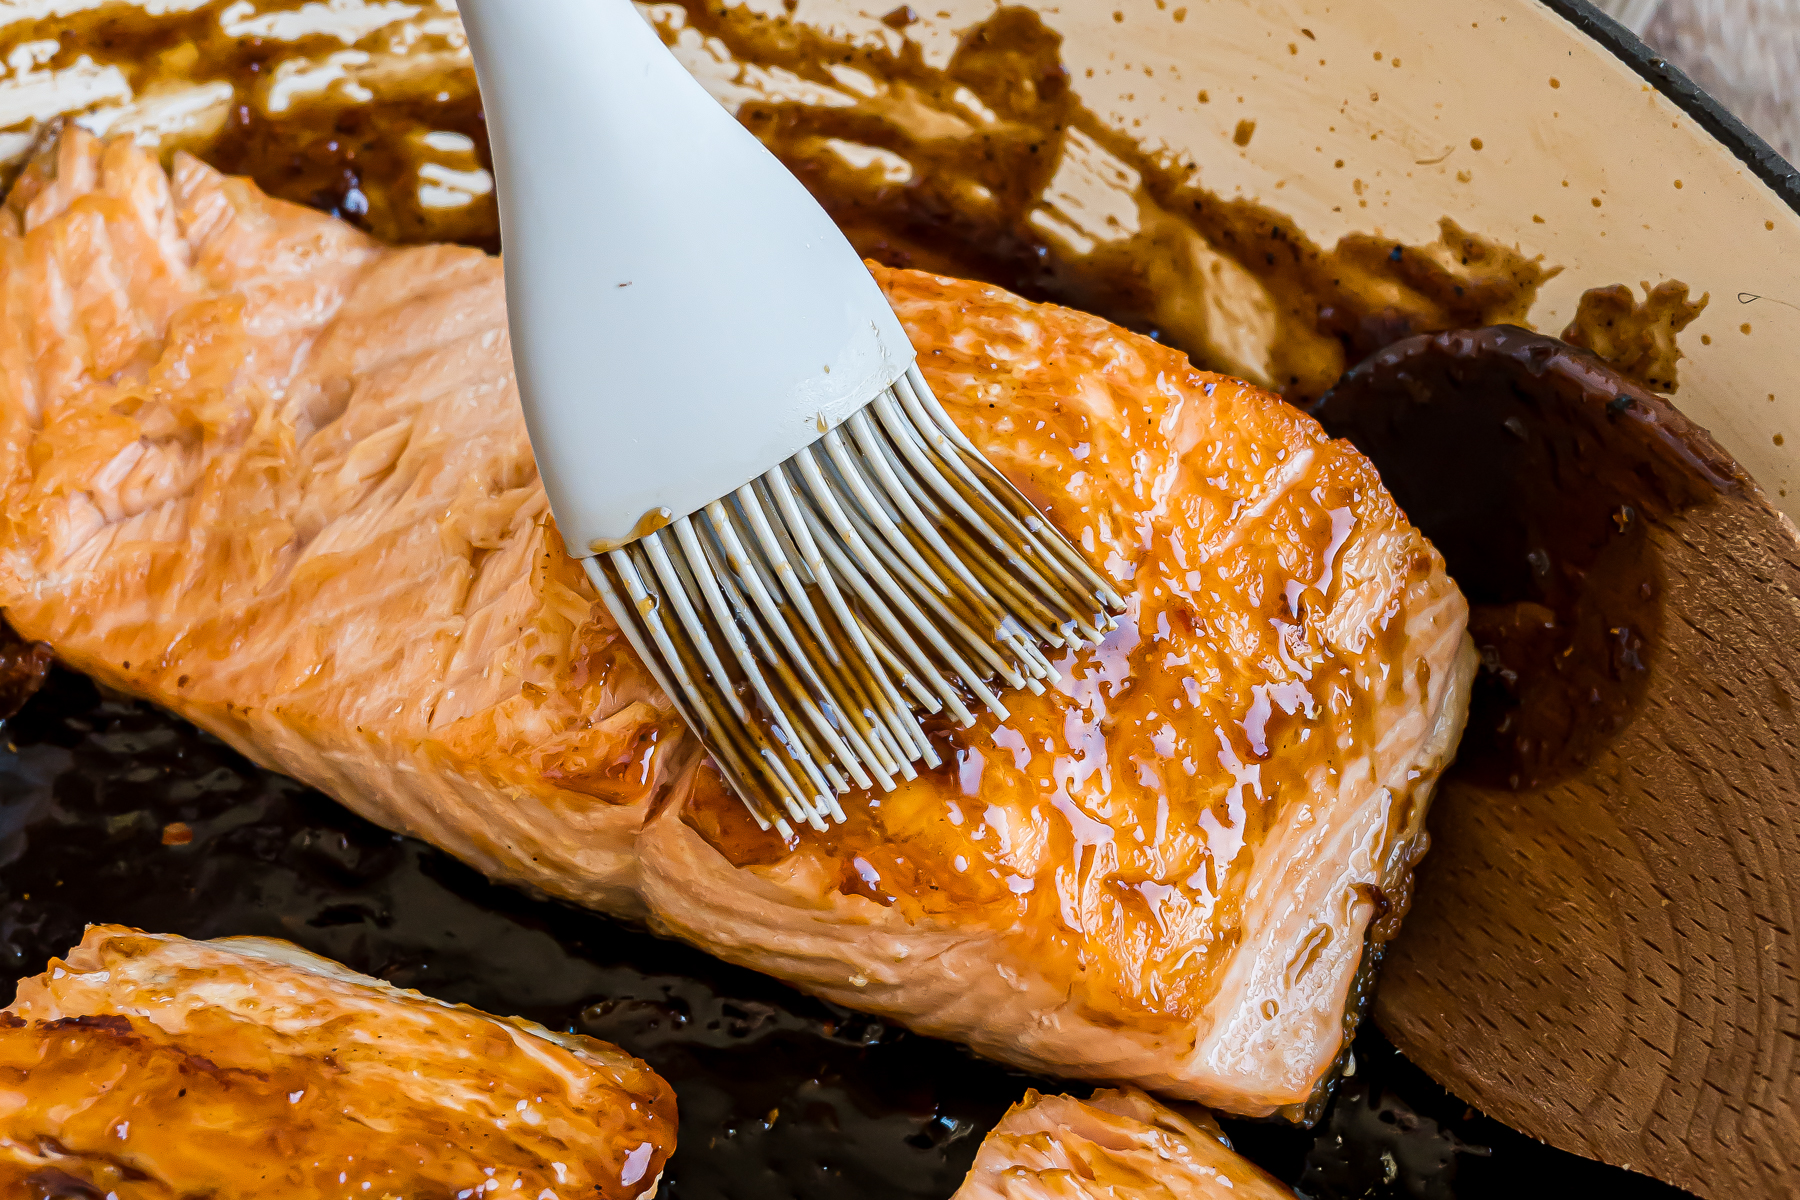
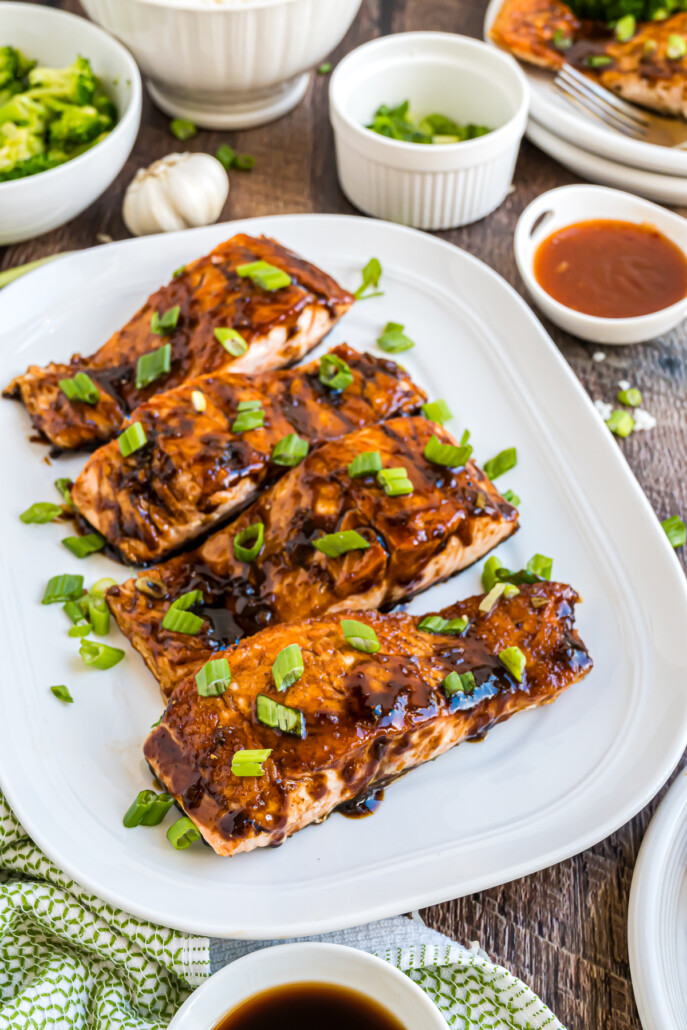
- Step 4: Brush and Serve. Brush each salmon fillet with the warm glaze, sprinkle with scallion greens, and serve!
Expert Tips
- Hot Pan, Perfect Sear: Preheat the skillet to medium-high heat so the salmon crisps beautifully without sticking.
- Don’t Overcrowd: Cooking for a crowd? Sear the fillets in batches to ensure even cooking and a crispy skin. Overcrowding the pan can cause steaming instead of searing.
- Watch the Cook Time: Use an instant-read thermometer for accuracy. Aim for 125°F for medium-rare or 145°F for fully cooked, keeping in mind the salmon will continue cooking slightly after it’s off the heat.
- Storing & Reheating: Store leftovers in an airtight container in the fridge for up to 3 days or freeze for up to 3 months. Thaw in the fridge overnight, then reheat in the oven on a baking sheet until warmed through.
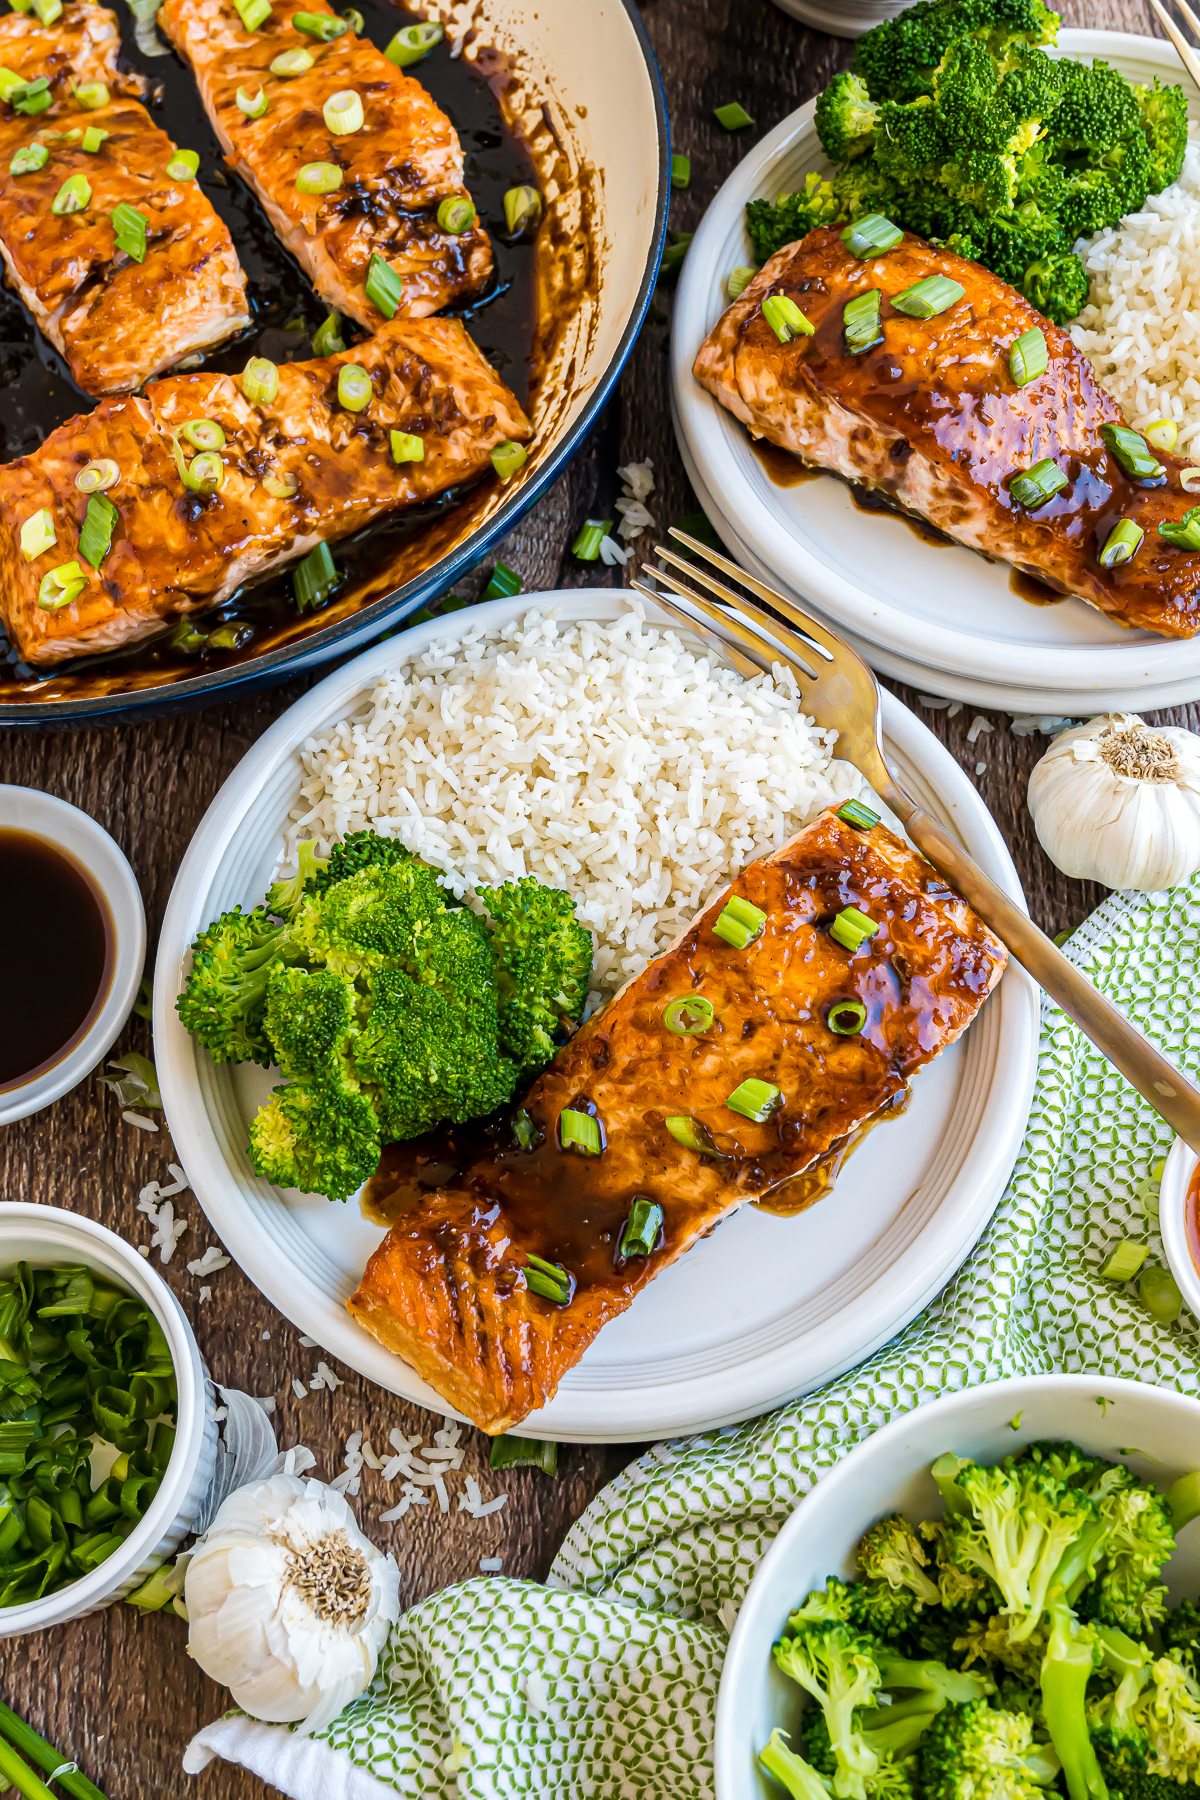
Serving Suggestions
When it comes to serving pan seared salmon, these fillets present themselves! Here are some great ways you can add a little bit more flair and pair these beauties at the dinner table:
- Dress it up even more with a few lime wedges on the side or additional chopped herbs like cilantro, parsley, chives, or even mint over the top for serving.
- Serve pan seared salmon in a cast-iron skillet over a bed of fondant potatoes or skillet roasted asparagus.
- Serve with a side of roasted cauliflower steaks.
- Make it extra fun for the family by building your own banana splits at the end of your meal.
Pan Seared Salmon FAQs
I always use a cast-iron skillet, but any heavy skillet works best, including stainless steel. Cast iron and stainless steel pans retain heat well, which is key for getting that golden, restaurant-style crust.
Overcooking is the usual culprit. Salmon continues cooking slightly after it leaves the pan, so pull it off just before it looks fully done. Choosing thicker fillets also helps prevent drying out.
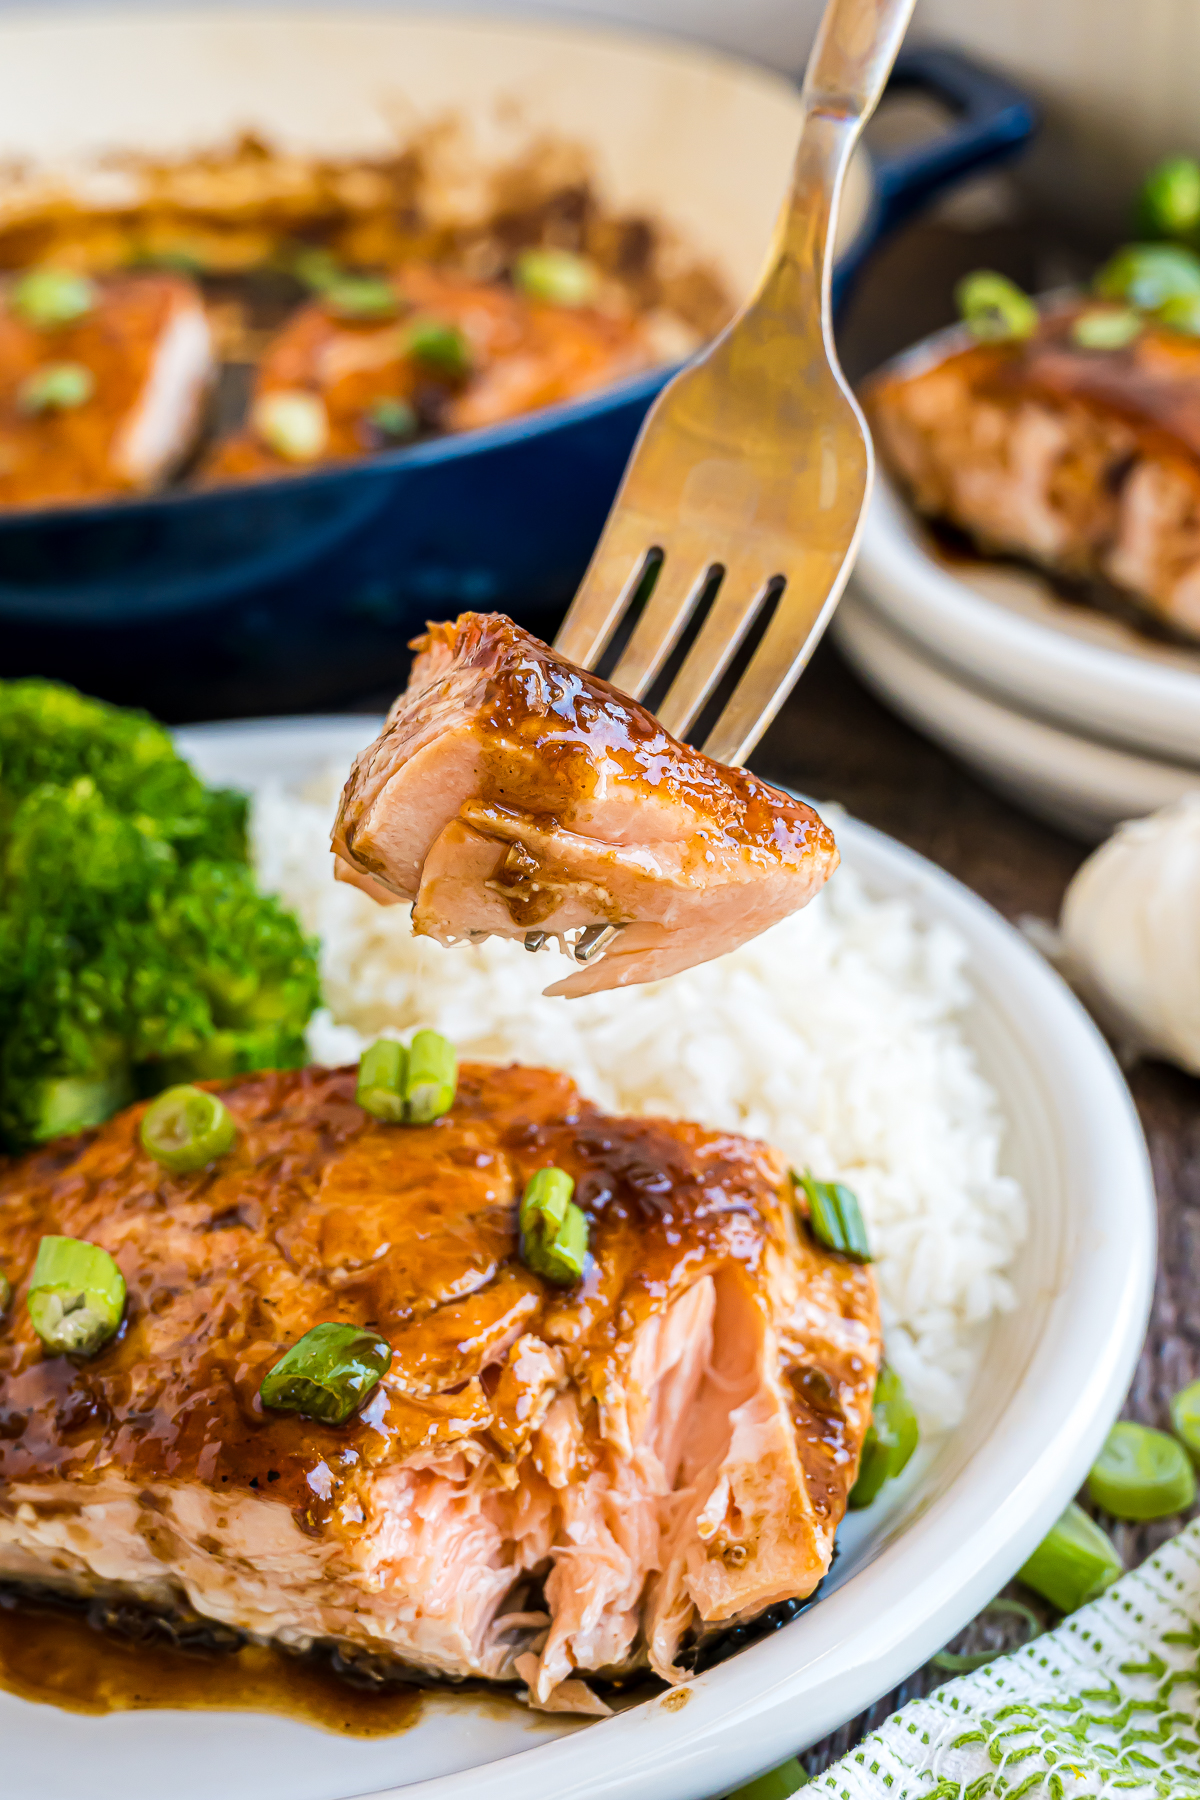
Salmon is done when it flakes easily with a fork and reaches an internal temperature of 125–130°F for medium. The center should look slightly translucent, not raw.
Yes, but it’s more delicate. Use a well-heated pan, add enough oil, and flip carefully. Skin-on salmon is more forgiving, but skinless works beautifully when handled gently.
Use a hot pan, enough oil, and don’t move the salmon too early. Once the skin (or flesh) forms a crust, it will naturally release from the pan. If it’s sticking, it’s not ready yet—patience pays off here.
More Delicious Cast Iron Skillet Dinner Recipes


If you tried this Pan Seared Salmon or any other recipe on my blog, please leave a 🌟 star rating and let me know how it went in the 📝 comments below. Thanks for visiting!
Get the Recipe

Thai Chili and Balsamic Pan-Seared Salmon
Equipment
- 12" cast iron skillet
Ingredients
- 4 scallions white parts and 4 inches of green tops
- 6 salmon fillets with skin attached; 6 oz fillets
- ⅛ teaspoon salt
- ⅛ teaspoon pepper
- 2 tablespoon vegetable oil
- 1 tablespoon Sesame oil
- 3 cloves garlic mined; or ½ teaspoon garlic powder
- 2 tablespoon ginger fresh; grated
- ½ cup Thai chili sauce sweet
- ¼ cup light brown sugar firmly packed
- 3 tablespoon soy sauce
- 3 tablespoon balsamic vinegar
- 2 tablespoon lime juice freshly squeezed
Instructions
- Dice white parts of scallions and put in a bowl for later. Chop green part of scallions on a diagonal and save for later.
- Rise and dry the salmon fillets. In a 12″ skillet heat the vegetable oil on medium / high heat.
- Sear the salmon fillets with skin side up for 4 minutes. Turn filets over and cook until salmon is translucent.
- Take salmon out of the skillet and cover with aluminum foil. Wipe out the skillet and add the sesame oil, garlic, ginger and white part of scallions. Cook for 1 to 2 minutes over medium / high heat. It will start to smell amazing. Add the chili sauce, brown sugar, soy sauce and vinegar. Mix until it becomes the consistency of a syrup.
- Serve salmon with glazed brushed on top. Add green tops of scallions to each fillet.
Notes
- Preheat for Crispy Skin: A hot pan ensures a golden, crispy crust that locks in flavor. Don’t forget to let it cook on one side for the full four minutes before moving it is the secret to success!
- Don’t Overcrowd the Pan: Cook in batches to avoid steaming and ensure even searing.
- Internal Temp for Doneness: Use a thermometer for perfect results—125°F for medium-rare or 145°F for fully cooked.
Nutrition
Dutch Oven Daddy is not a dietician or nutritionist, and any nutritional information shared is only an estimate. We recommend running the ingredients through an online nutritional calculator if you need to verify any information.


Cami says
I’m not usually a big fan of fish but the glaze made this so yummy! It was also fast and easy which is helpful on a busy night.
David says
This is easily one of the best salmon recipes I've tried because the balance of sweet and spicy is spot on. It was a huge hit at our family gathering, and I’ll definitely be keeping this on my regular rotation.
Samantha says
I loved how quickly this came together in my cast iron skillet, and the glaze caramelized perfectly on the fish. The skin was incredibly crispy while the inside stayed tender and flaky, just as promised.
Jordan says
The combination of the tangy balsamic and the kick from the Thai chile glaze is absolutely incredible. It turned a regular weeknight salmon dinner into something that tasted like it came straight from a high-end restaurant.
Spencer Adams says
Tried this recipe and it was amazing! The sweet heat and tangy glaze make every bite super flavorful and satisfying.
Natalie says
I made this dish for dinner, and we loved it! My husband isn't a big fan of spicy foods and was afraid the "chili" flavoring would be too strong for him, but he was pleasantly surprised. The sauce was so tangy and delicious. I also shared some with my in-laws, and they raved about this dish. The searing of the salmon really helps keep it tender. This recipe will definitely be going into our regular dinner rotation.
Ned says
One of my favorite recipes in cast iron! Was so delicious to make this for our last party. Thank you for the recipe!