


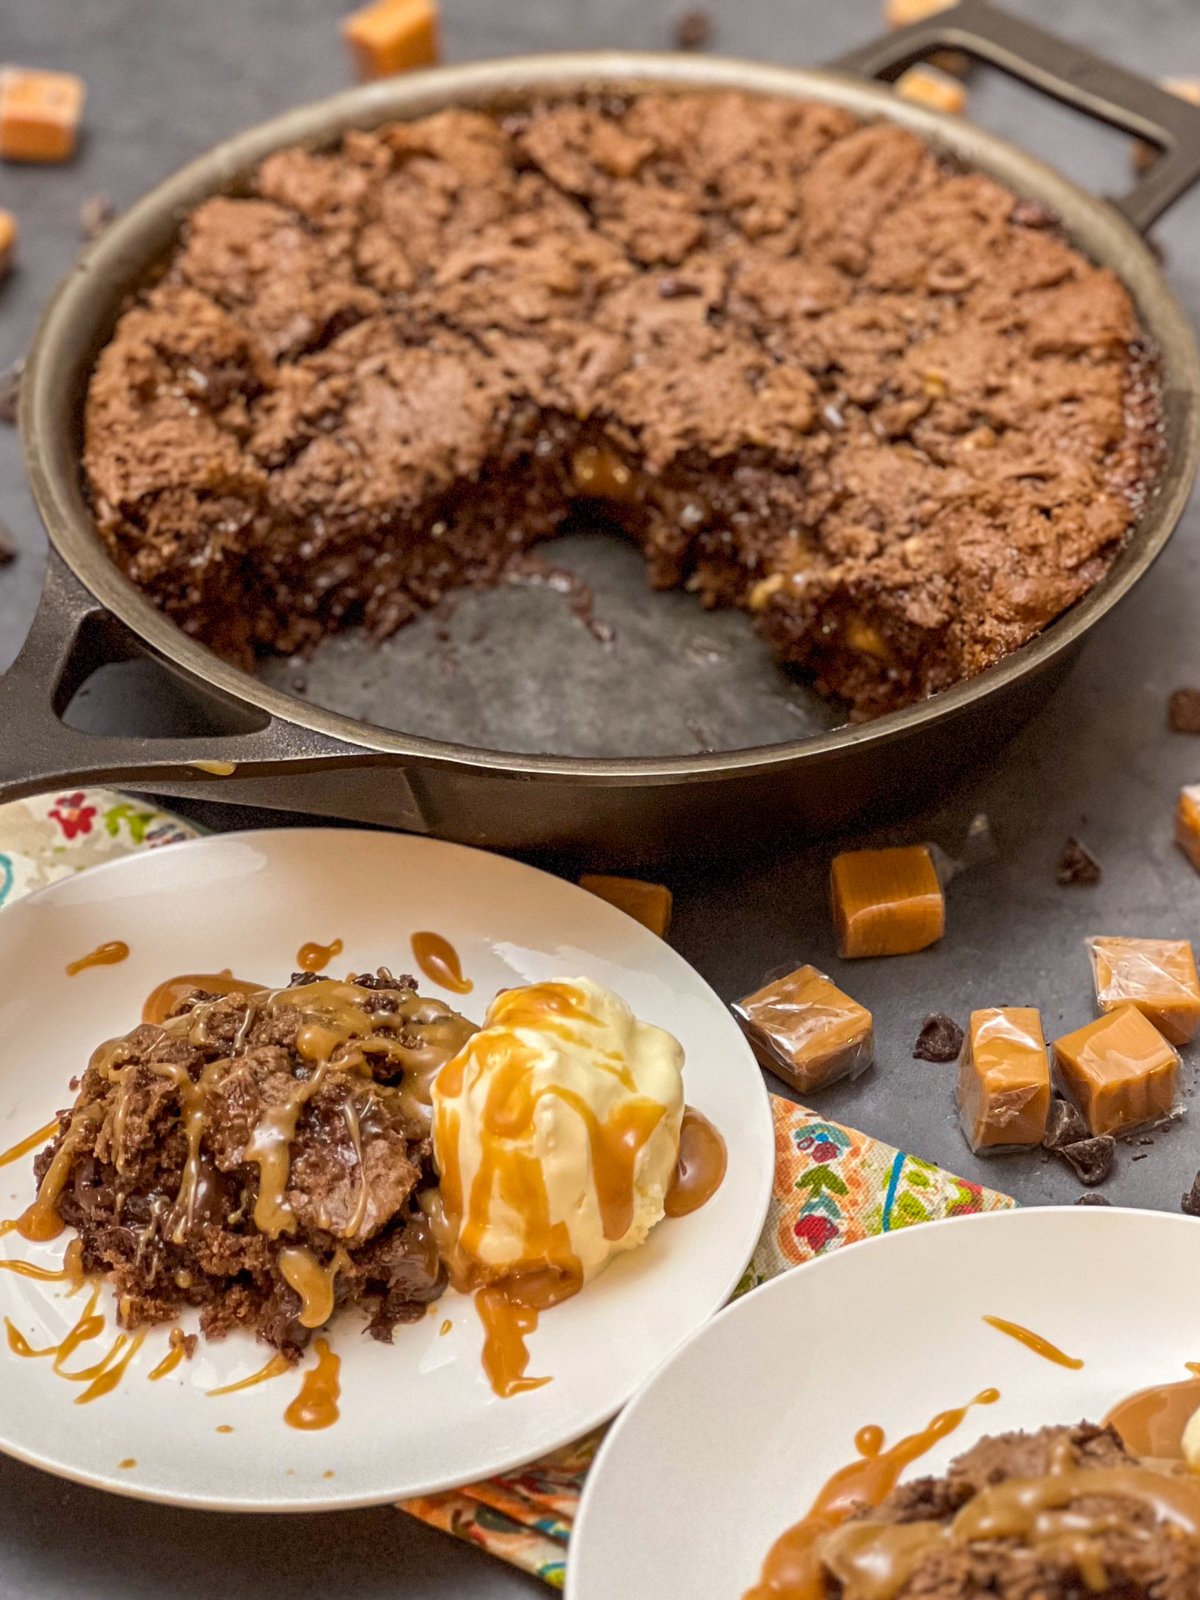
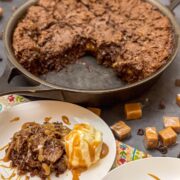
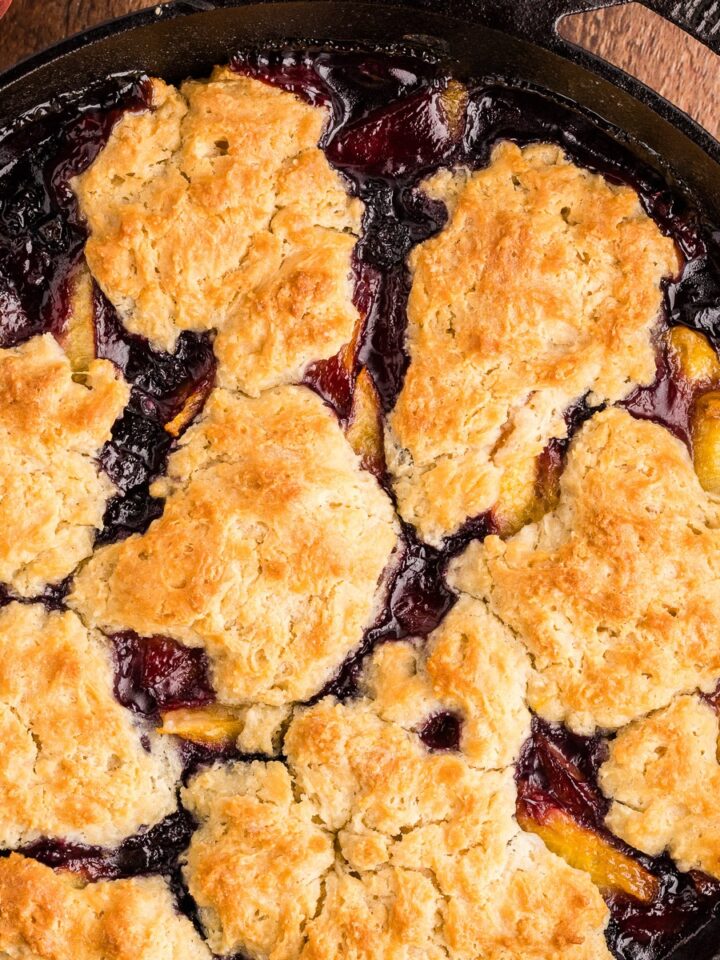
Caramel Brownies baked in a cast iron skillet are one of those desserts that never last long. Rich chocolate brownie layers with a gooey caramel center, ready in under an hour with just a handful of ingredients. This beloved family recipe started with my grandma, who made these for every holiday gathering. The whole family looked forward to them, and once you try them, you will too.
If you enjoy easy cast iron desserts, you will also love our Chocolate Chip Cookie Brownie or if it's caramel you're after, try our Caramel Apple Dump Cake.
Quick Look at this Recipe
- ✅ Recipe Name: Caramel Brownies
- 🕒 Ready In: 50 minutes (10 prep, 40 cook)
- 👪 Serves: 8 people
- 🥣 Main Ingredients: German chocolate cake mix, caramel candies, evaporated milk, butter, walnuts, chocolate chips
- 📖 Dietary Info: Contains dairy, tree nuts (walnuts optional)
- ⭐ Why You'll Love It: A beloved family recipe that turns a cake mix into rich, gooey brownies with a hidden caramel center, baked in a cast iron skillet.
Summarize and Save the Recipe
Jump to:
- Quick Look at this Recipe
- Why You'll Love Caramel Brownies
- What Makes These Caramel Brownies Different
- Ingredients for Caramel Brownies
- How to Make Caramel Brownies
- Variations and Swaps
- Expert Tips for Perfect Caramel Brownies
- What to Serve with Caramel Brownies
- How to Store Caramel Brownies
- Caramel Brownies FAQs
- More Delicious Cast Iron Dessert Recipes
- Get the Recipe
Why You'll Love Caramel Brownies
- Grandma's proven recipe. This isn't a random internet brownie. It's a family recipe passed down through generations, refined by dozens of holiday gatherings and cookouts.
- Cake mix shortcut, from-scratch taste. German chocolate cake mix gives these brownies a depth of flavor that tastes anything but boxed. Five minutes of hands-on prep and you're done.
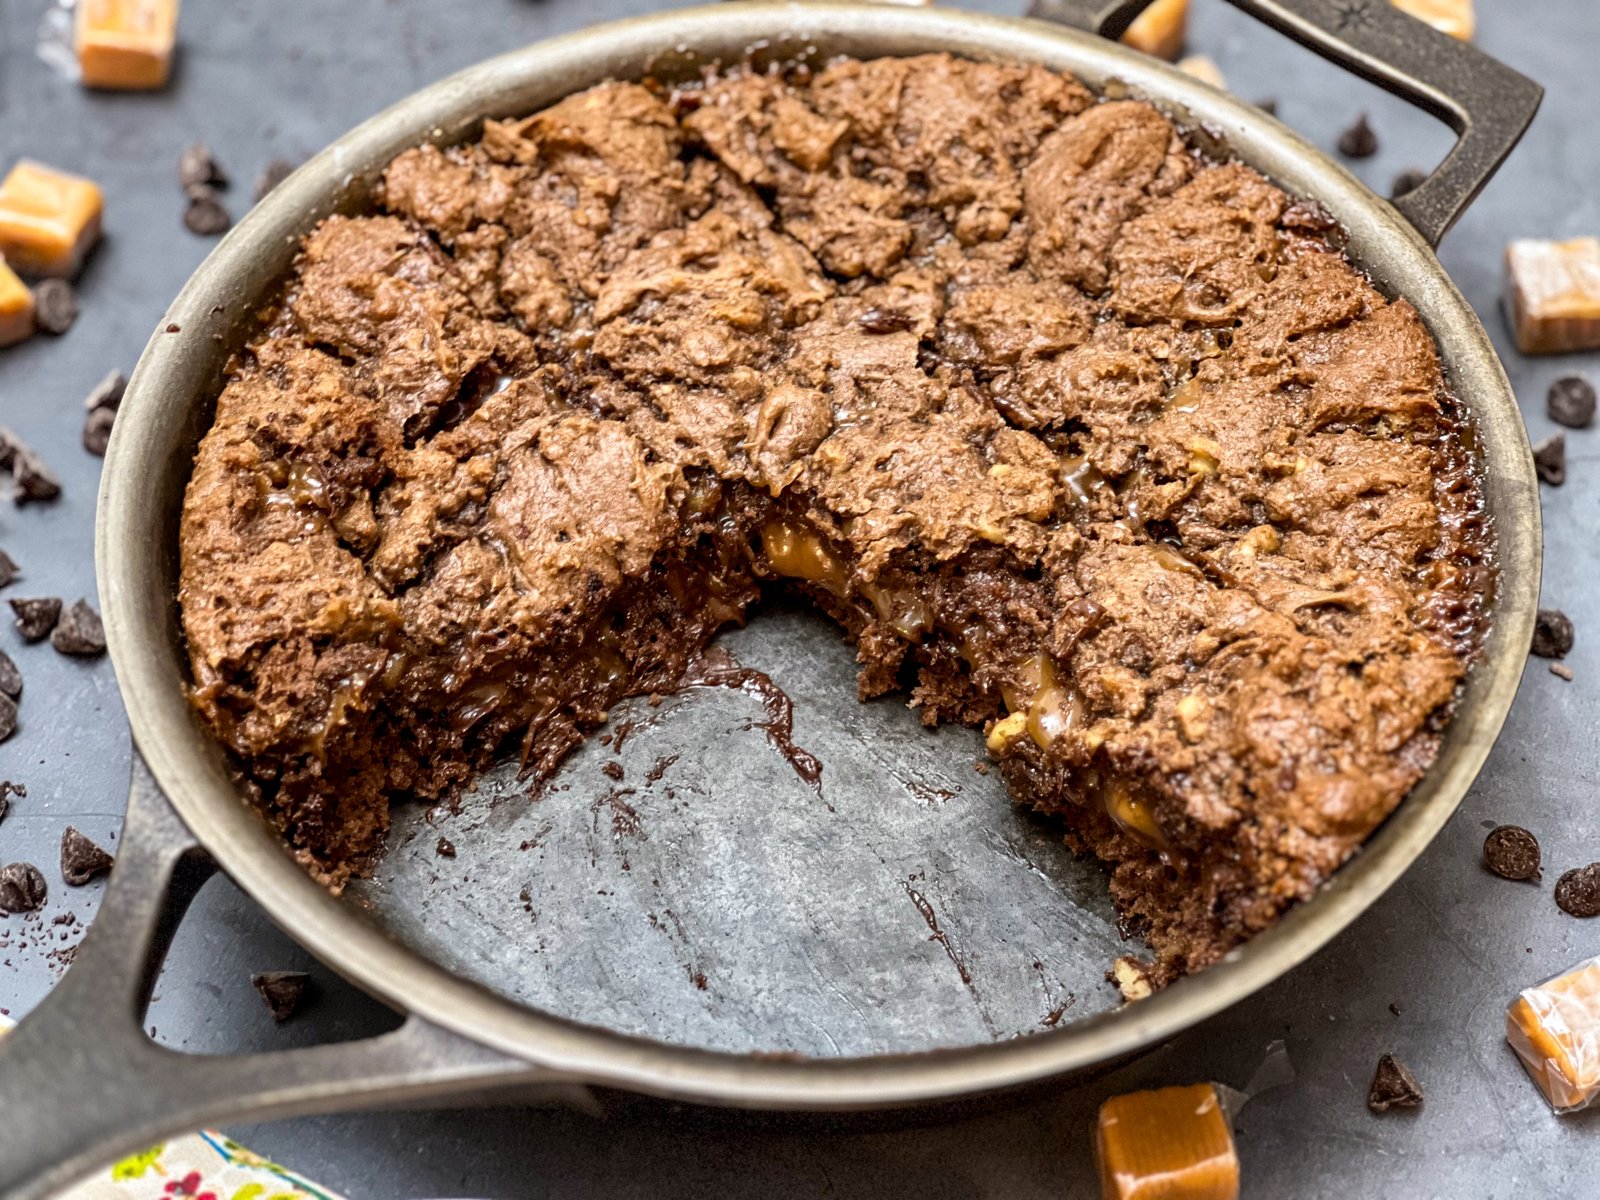
- Hidden caramel center. A gooey ribbon of melted caramel sits between two layers of dense, fudgy brownie. Every bite delivers that chocolate-meets-caramel combination.
- Cast iron makes the difference. The skillet gives you crispy edges and an evenly baked center that a standard baking pan can't match.
What Makes These Caramel Brownies Different
Most caramel brownie recipes start with a from-scratch cocoa batter and bake in a standard 8x8 pan. This recipe takes a different approach. A German chocolate cake mix is the base, which brings a subtle malty cocoa flavor you won't get from regular cocoa powder or even a standard chocolate cake mix.
The caramel layer is built from real chewy caramel candies melted with evaporated milk. Unlike jarred caramel sauce (which is too thin and sinks into the batter), this method creates a thick, gooey center that holds its shape between the brownie layers.
Baking in cast iron gives you something a glass or metal baking dish simply cannot: cast iron's heat retention creates crispy, slightly caramelized edges while keeping the center fudgy. The skillet also goes from oven to table, which makes serving easy and looks impressive at a cookout or holiday dinner.
Ingredients for Caramel Brownies
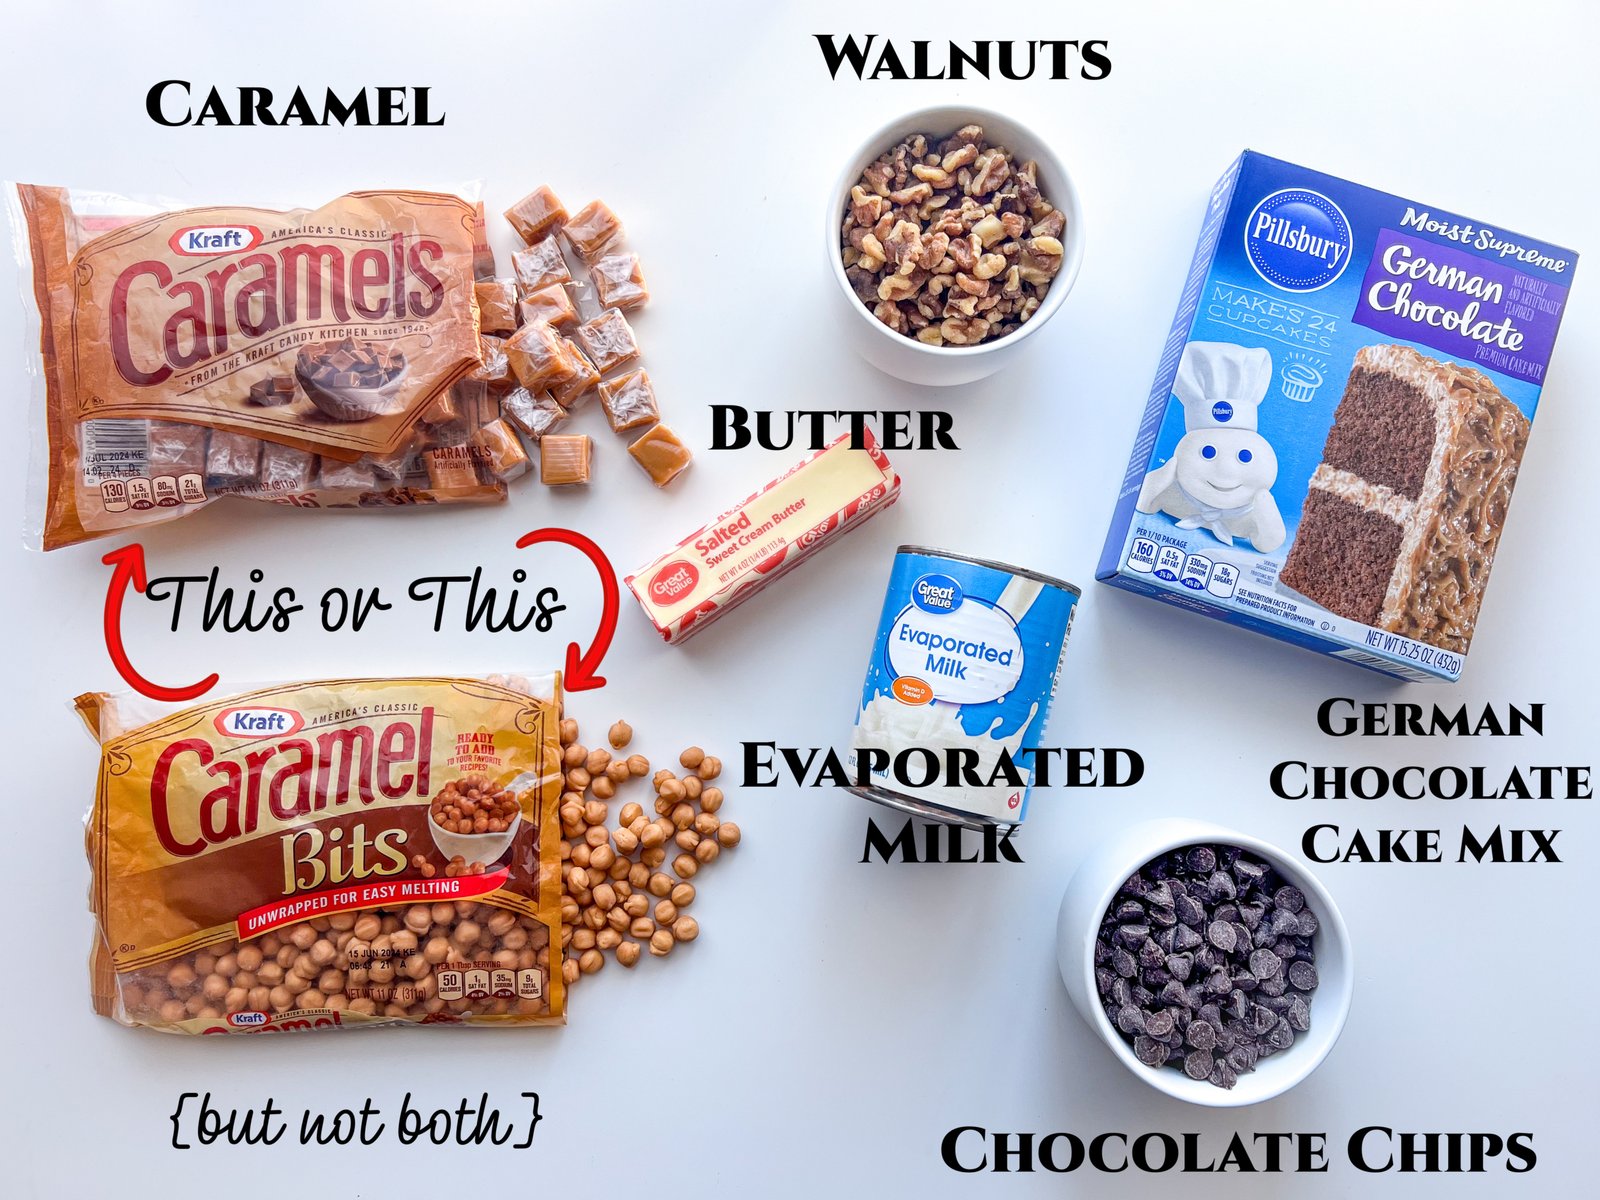
- German Chocolate Cake Mix: Any brand works. This is the foundation of the brownie batter. You can swap in regular chocolate cake mix, devil's food, or dark chocolate if German chocolate isn't available.
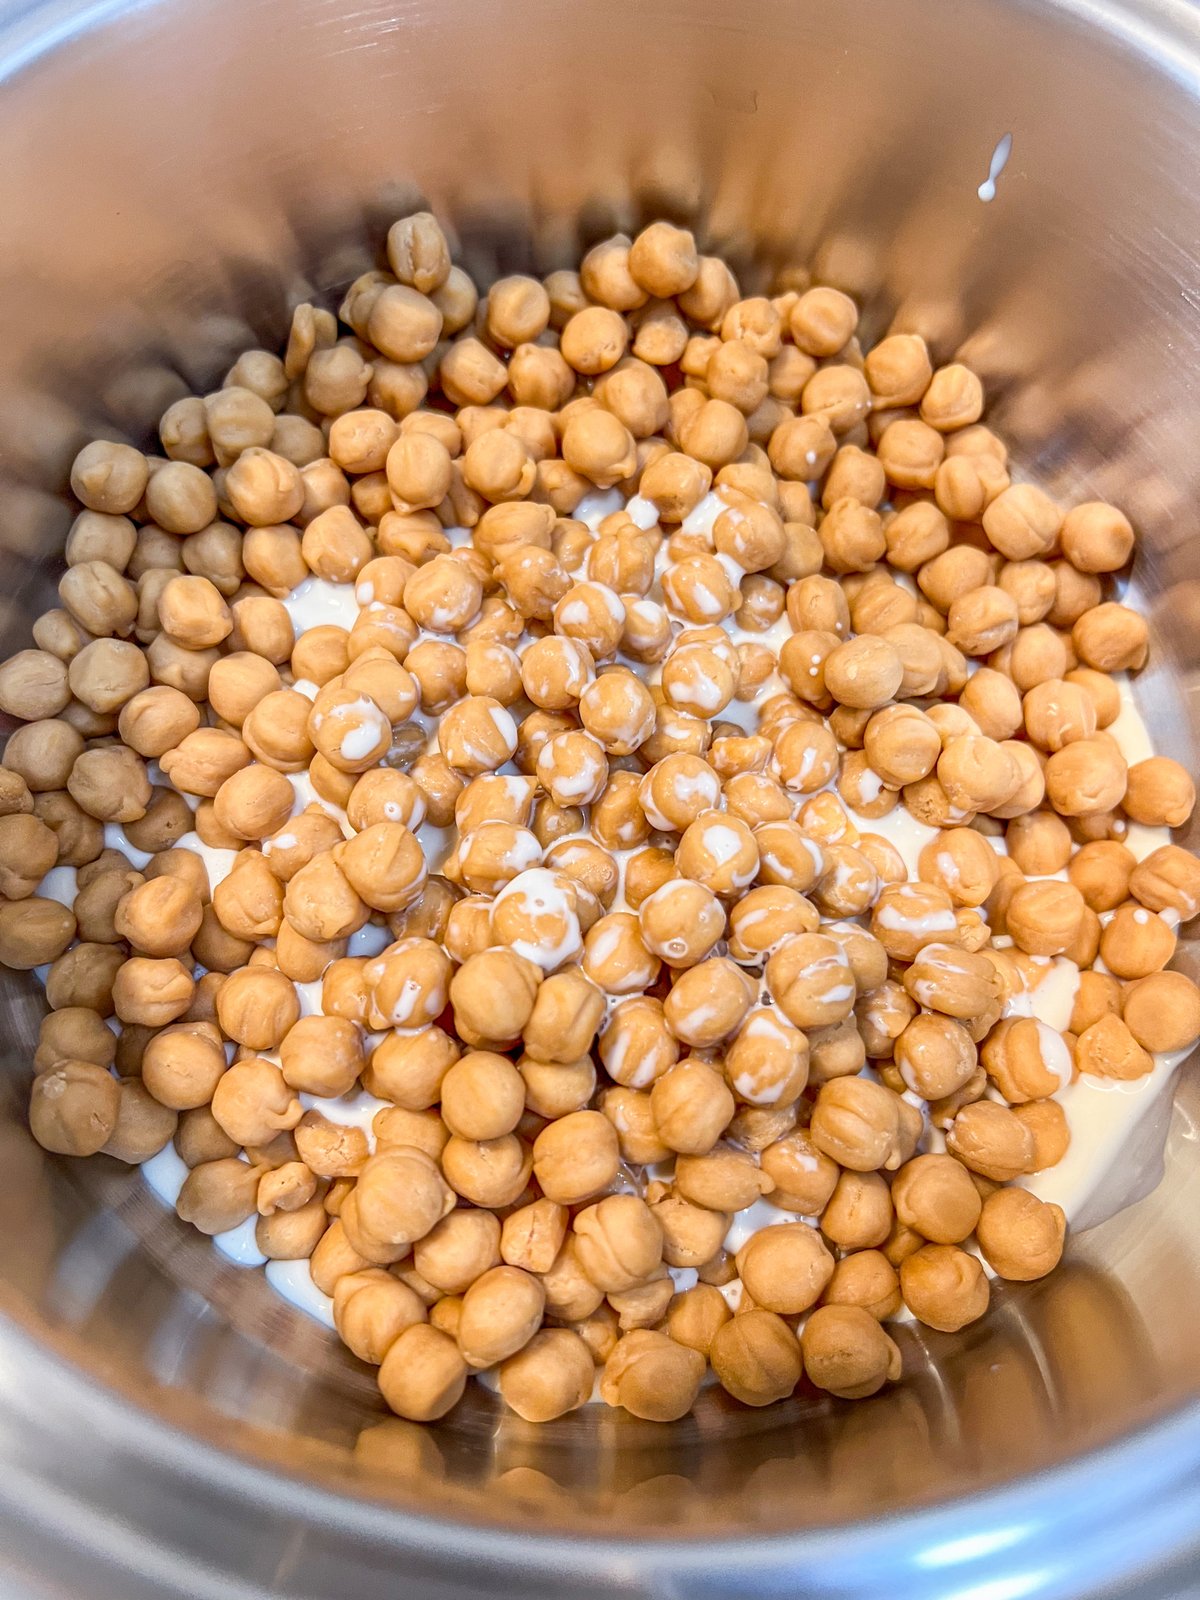
- Caramels: Use chewy caramel candies like Kraft caramels (the individually wrapped squares) or caramel bits. Caramel bits save you the time of unwrapping. Do not use jarred caramel sauce: it's too thin and won't set into a distinct layer.
- Evaporated Milk: Not sweetened condensed milk. You'll use part of the can in the brownie batter and the rest to melt the caramels into a sauce.
- Butter: Softened salted butter for greasing the skillet and melted unsalted butter for the batter. Either type works for both if you only have one on hand.
- Semi-Sweet Chocolate Chips: These create pockets of melted chocolate between the brownie and caramel layers. Dark chocolate or milk chocolate chips work as substitutes.
- Walnuts: Chopped. They add crunch that contrasts the fudgy brownie texture. Completely optional: leave them out for a nut-free version.
See the recipe card below for full measurements. If you love brownies in cast iron, also try our Peanut Butter Brownies.
How to Make Caramel Brownies
These photos walk you through the key moments. For complete step-by-step instructions, scroll down to the recipe card.
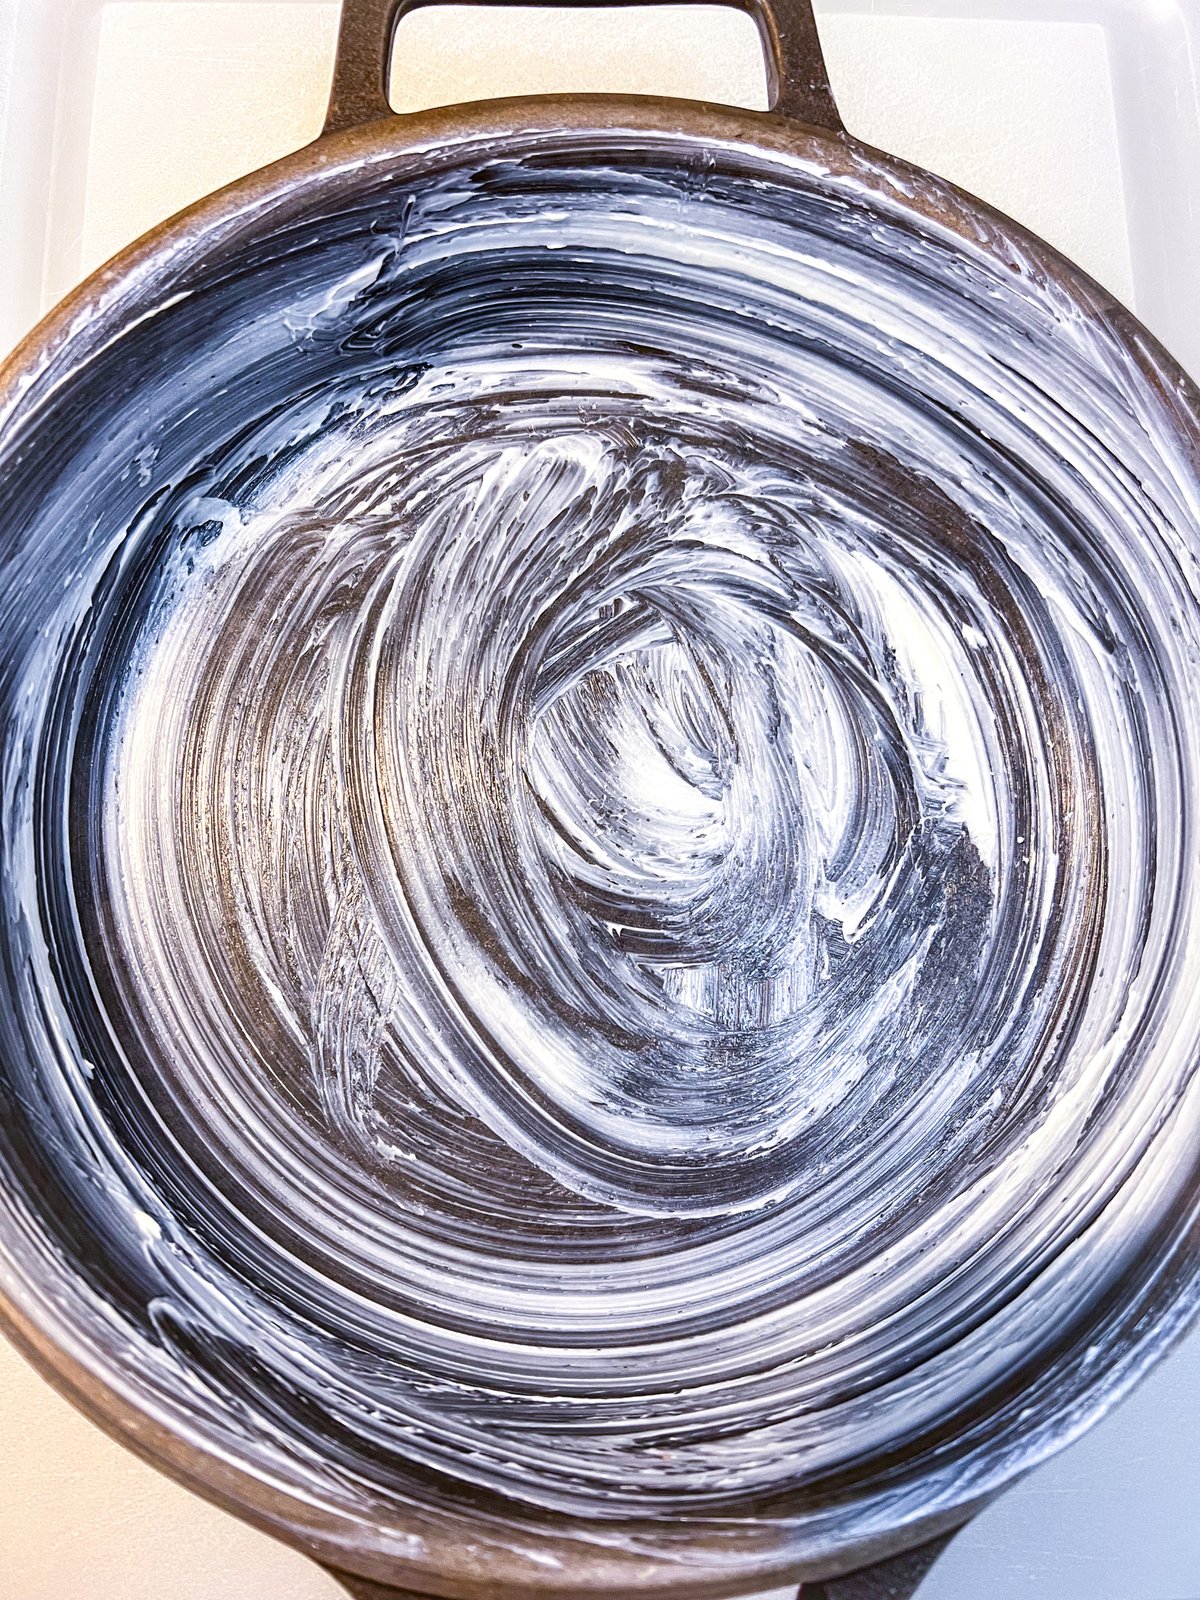
- Step 1: Grease the skillet. Coat a 10-inch cast iron skillet with softened butter.
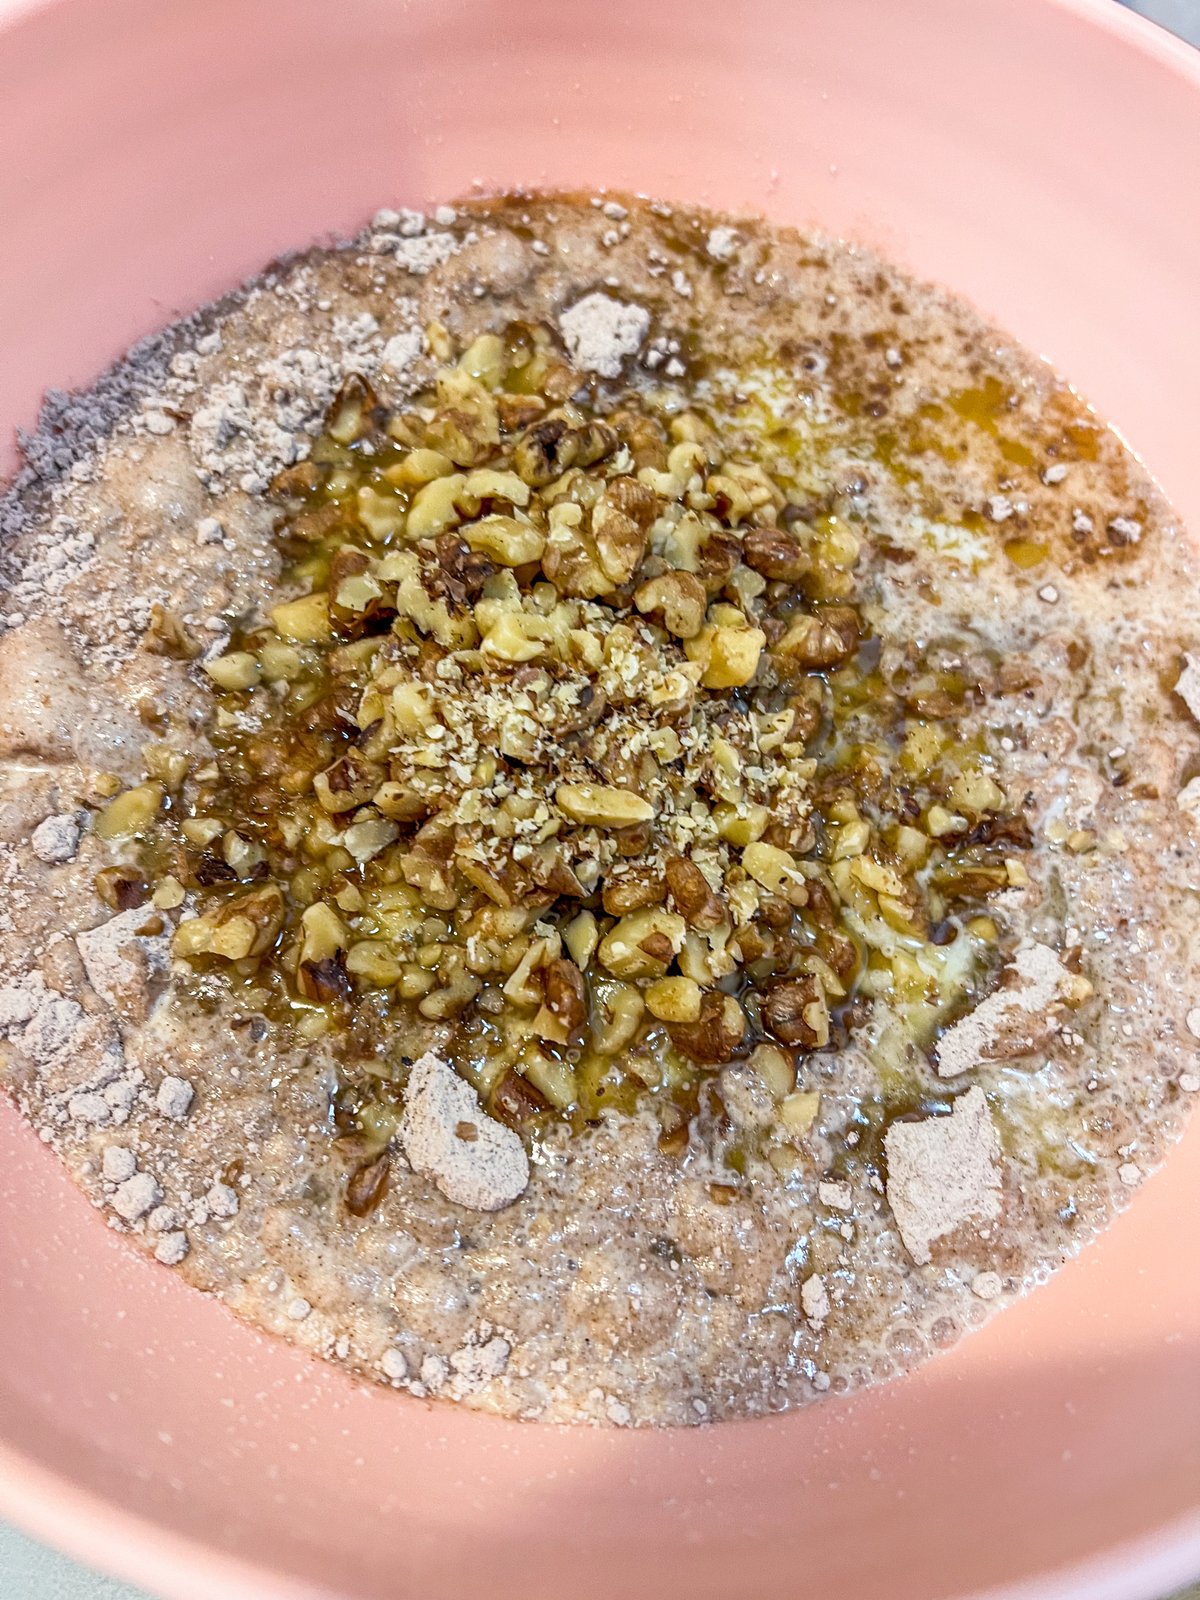
- Step 2: Mix the batter. Combine the cake mix, evaporated milk, melted butter, and walnuts.
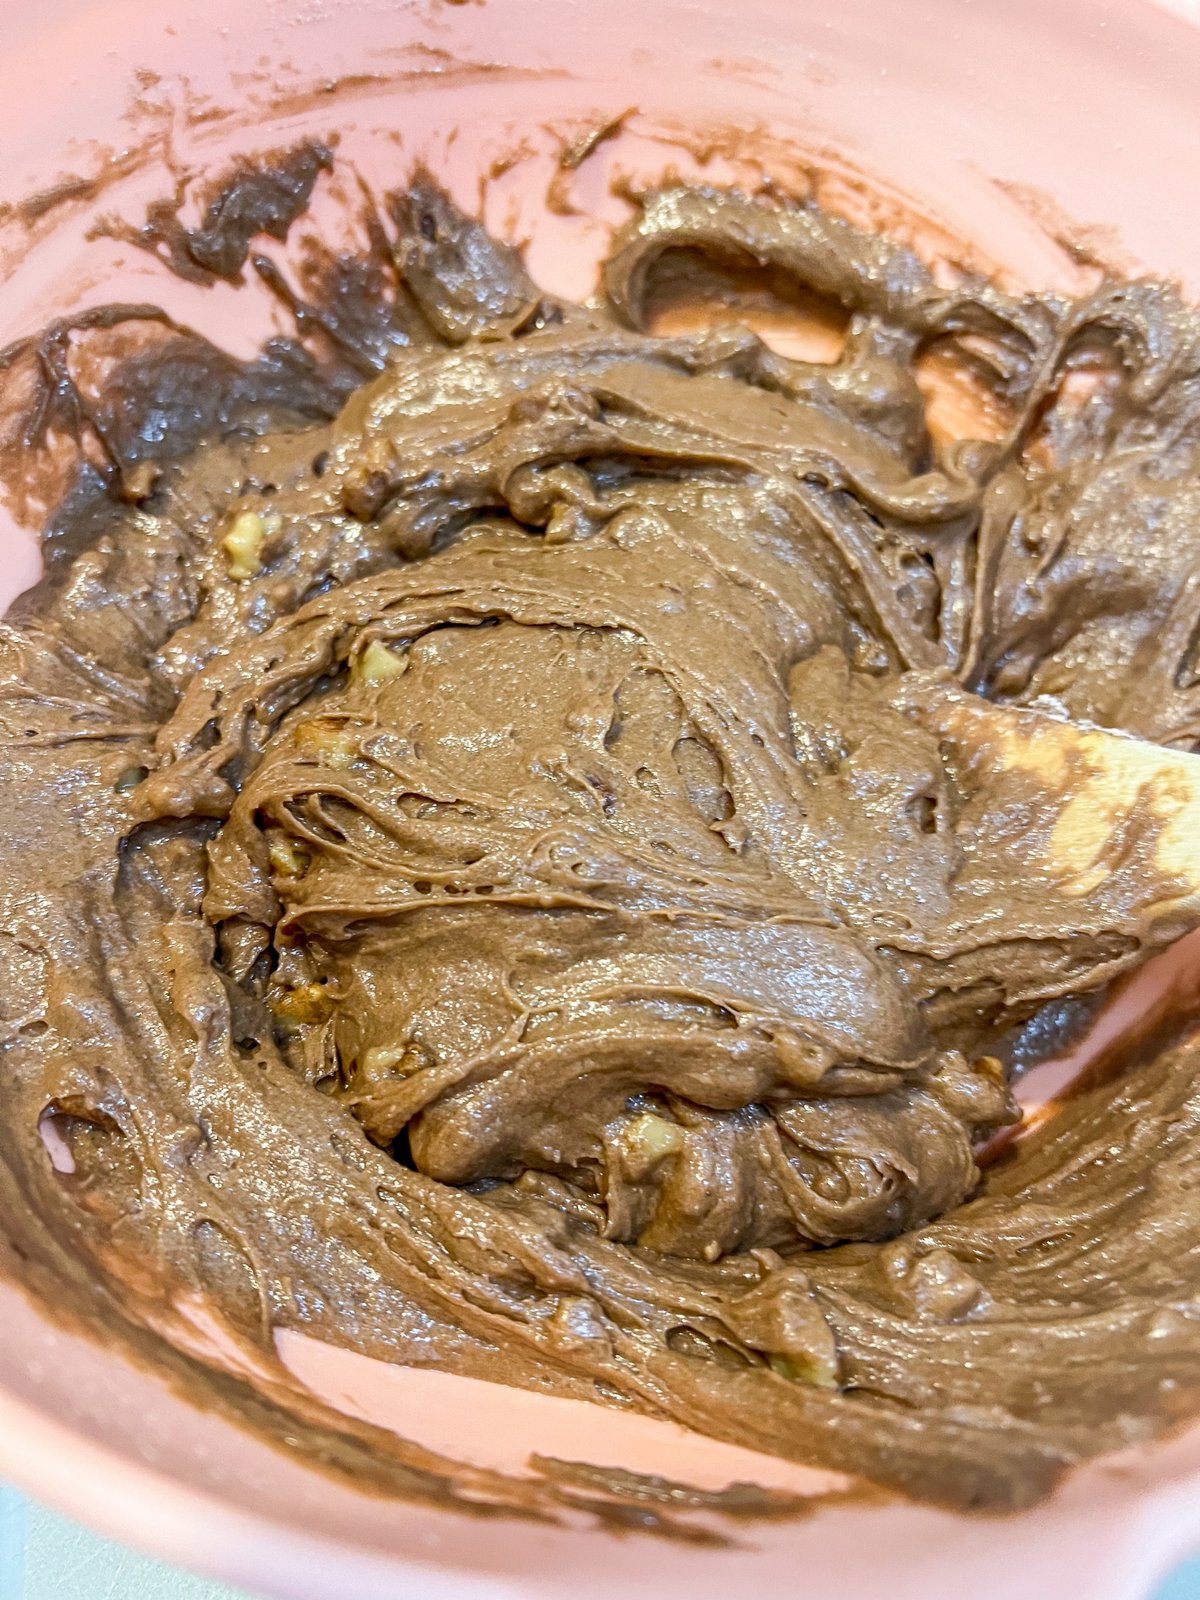
- Step 3: Thick batter. The batter will be thick and coarse looking. That's exactly right.

- Step 4: First layer. Spread half the batter into the prepared skillet and bake for 15 minutes.
- Step 5: Melt the caramel. While the brownies bake, melt caramels with evaporated milk in a saucepan.
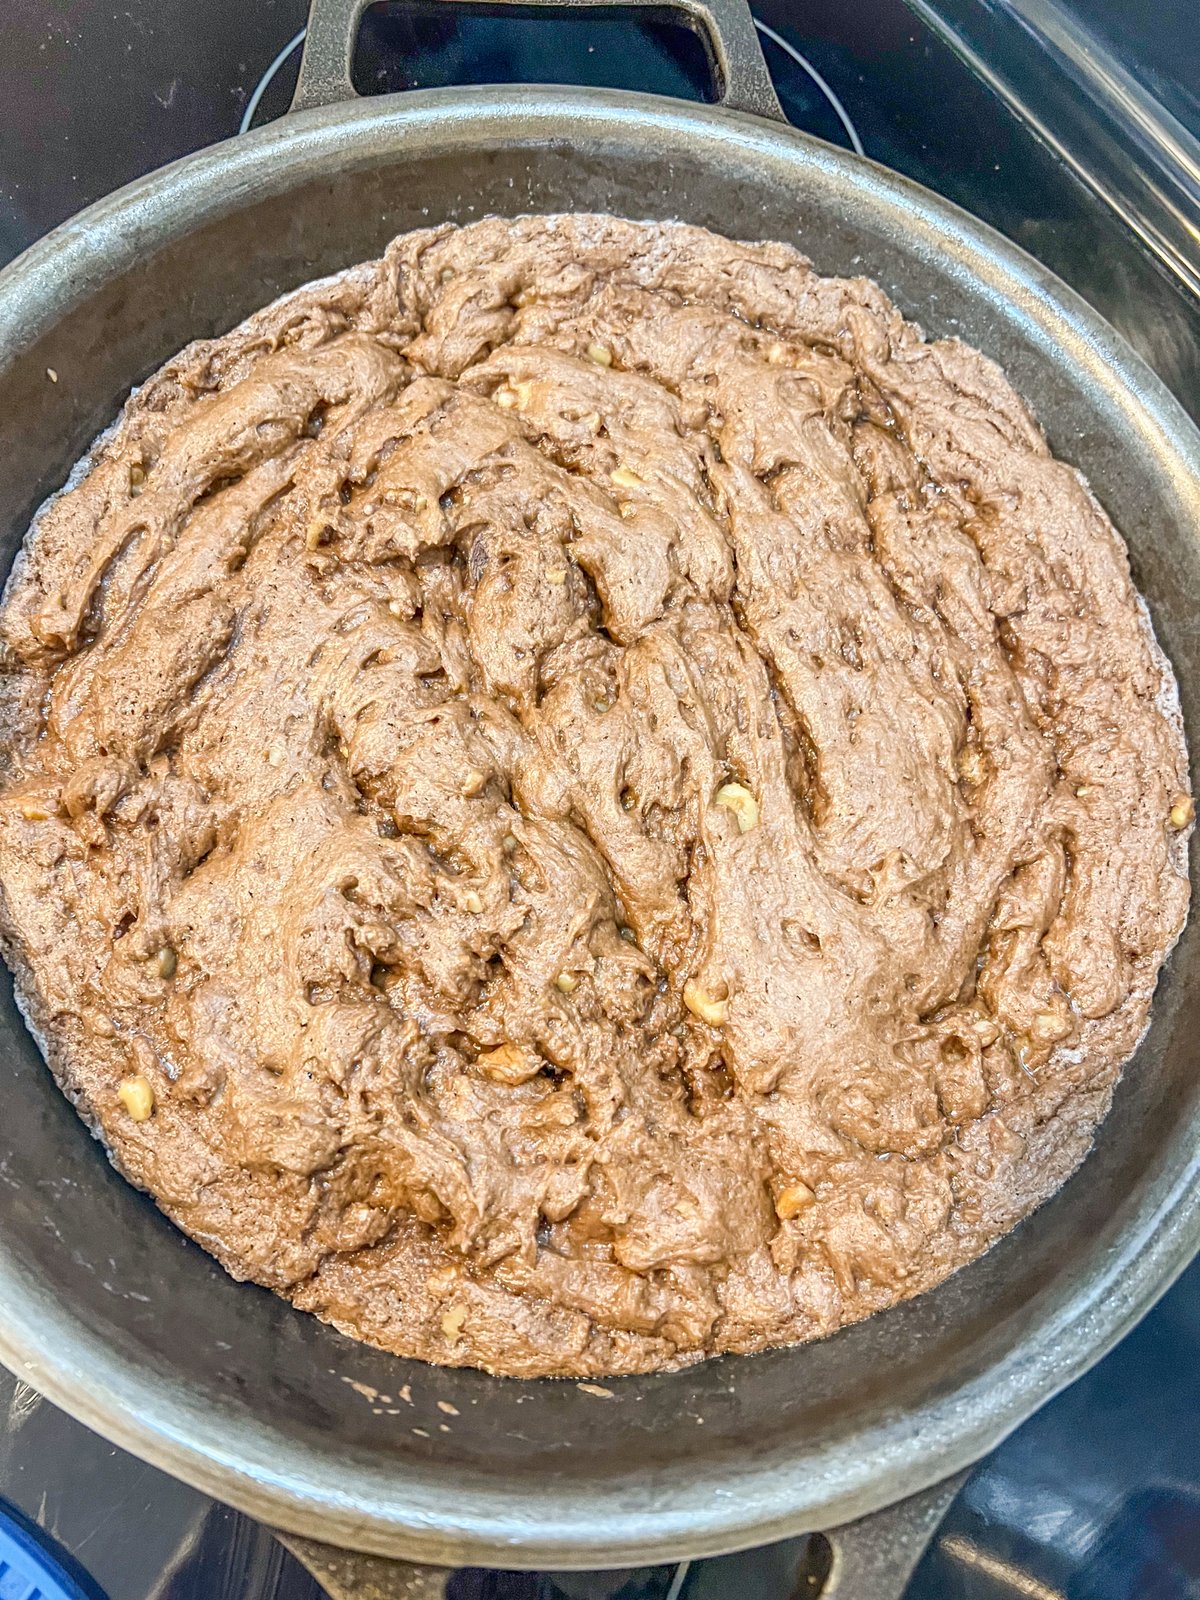
- Step 6: Remove from oven. After 15 minutes, pull the half-baked brownie layer out.
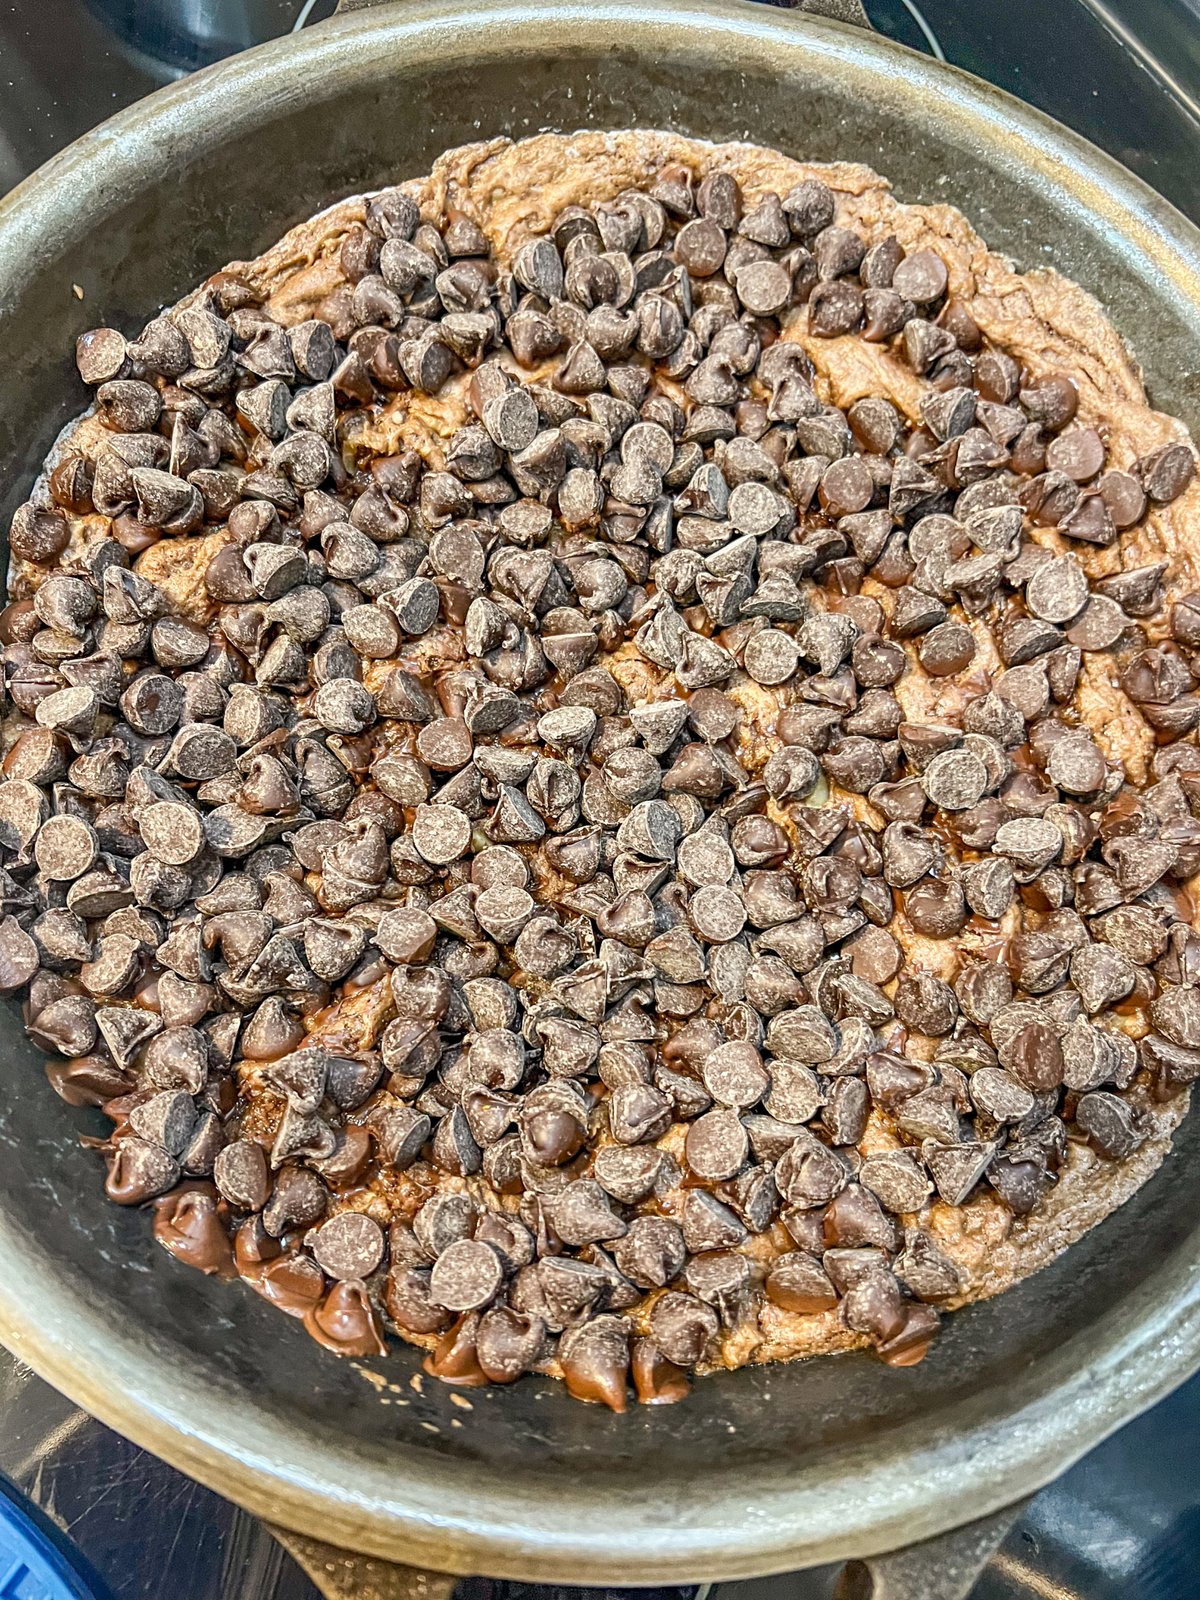
- Step 7: Add chocolate chips. Sprinkle chips evenly over the half-baked brownie layer.
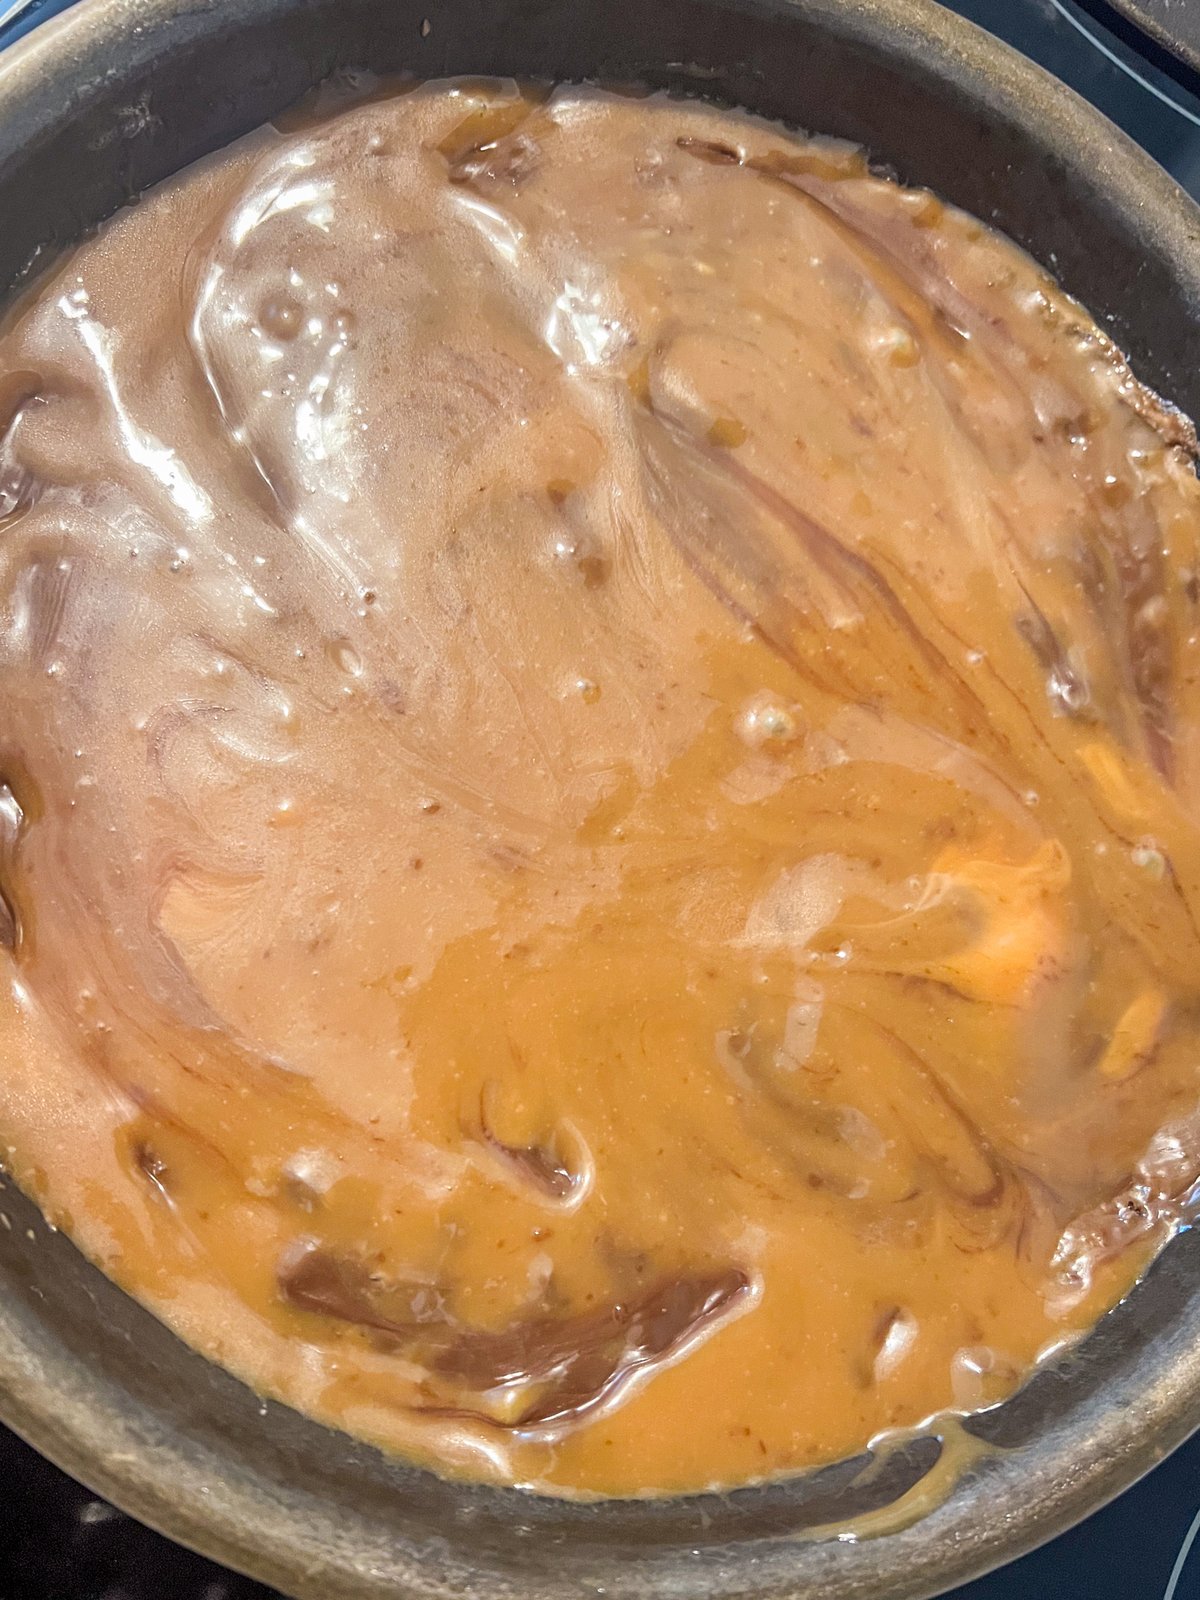
- Step 8: Pour the caramel. Spread the caramel sauce over the chocolate chips in an even layer.
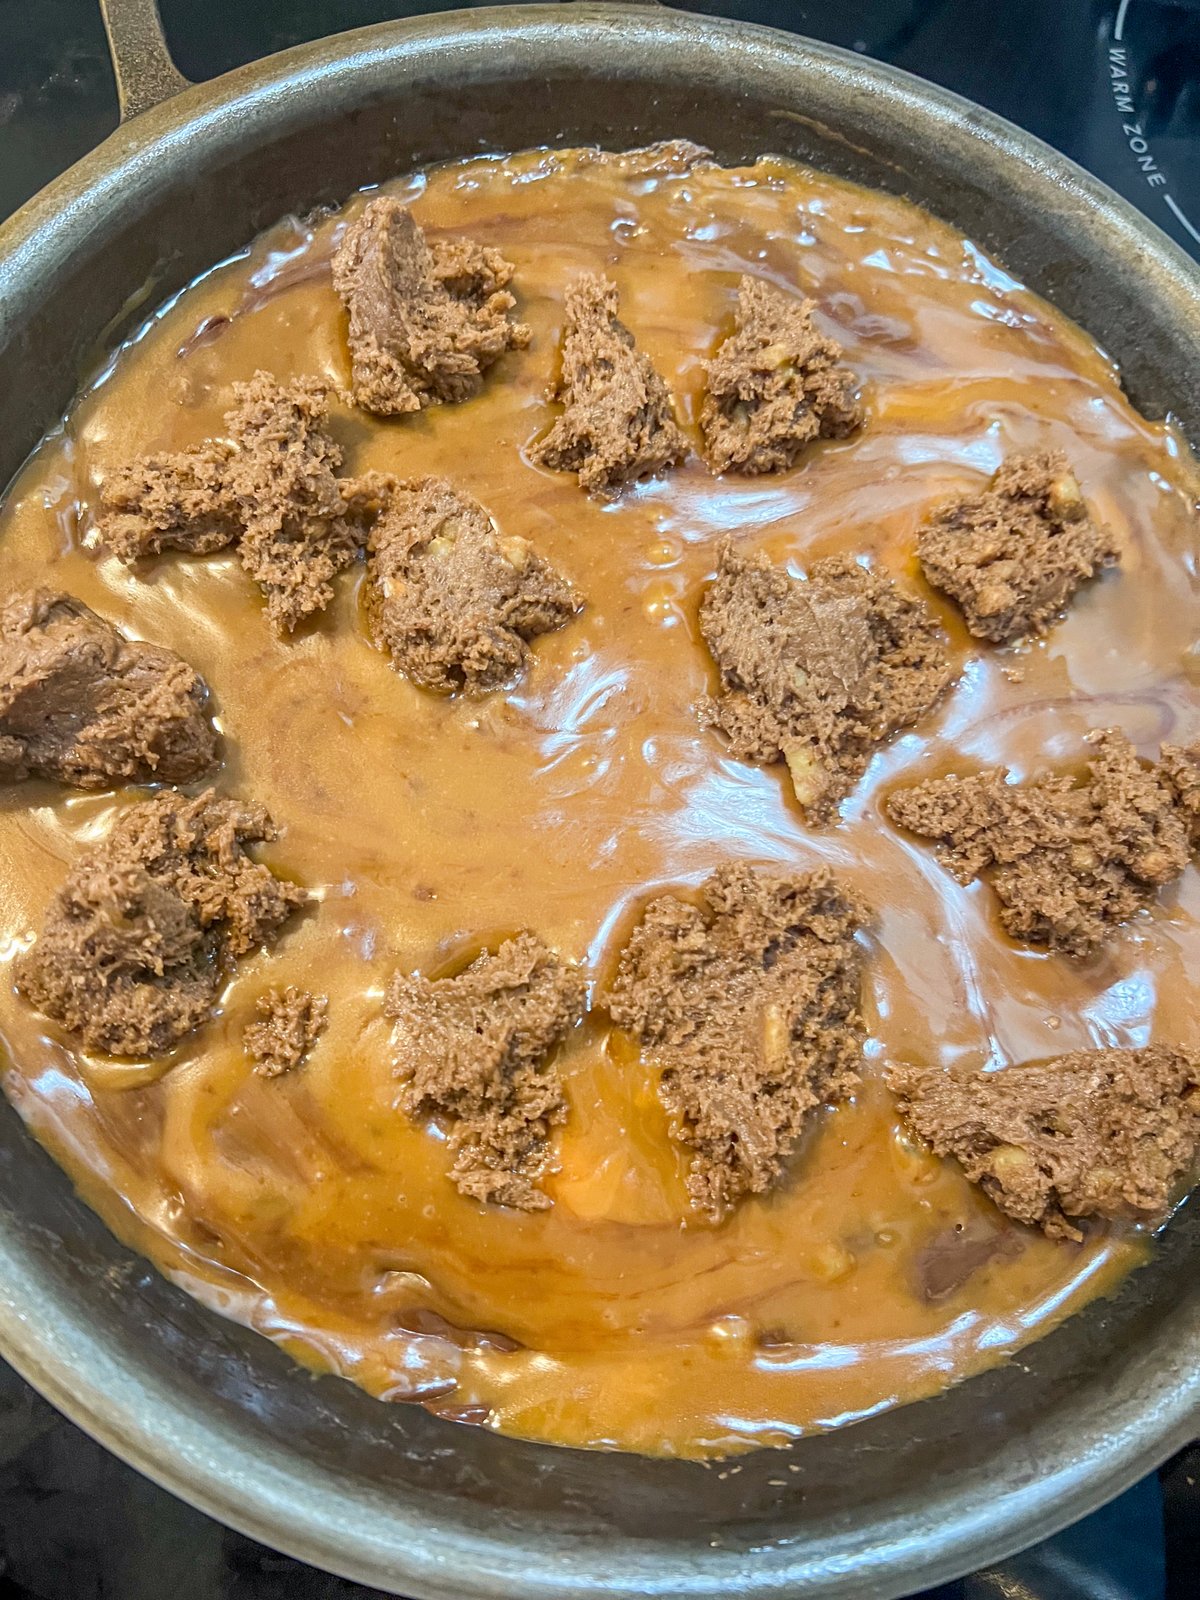
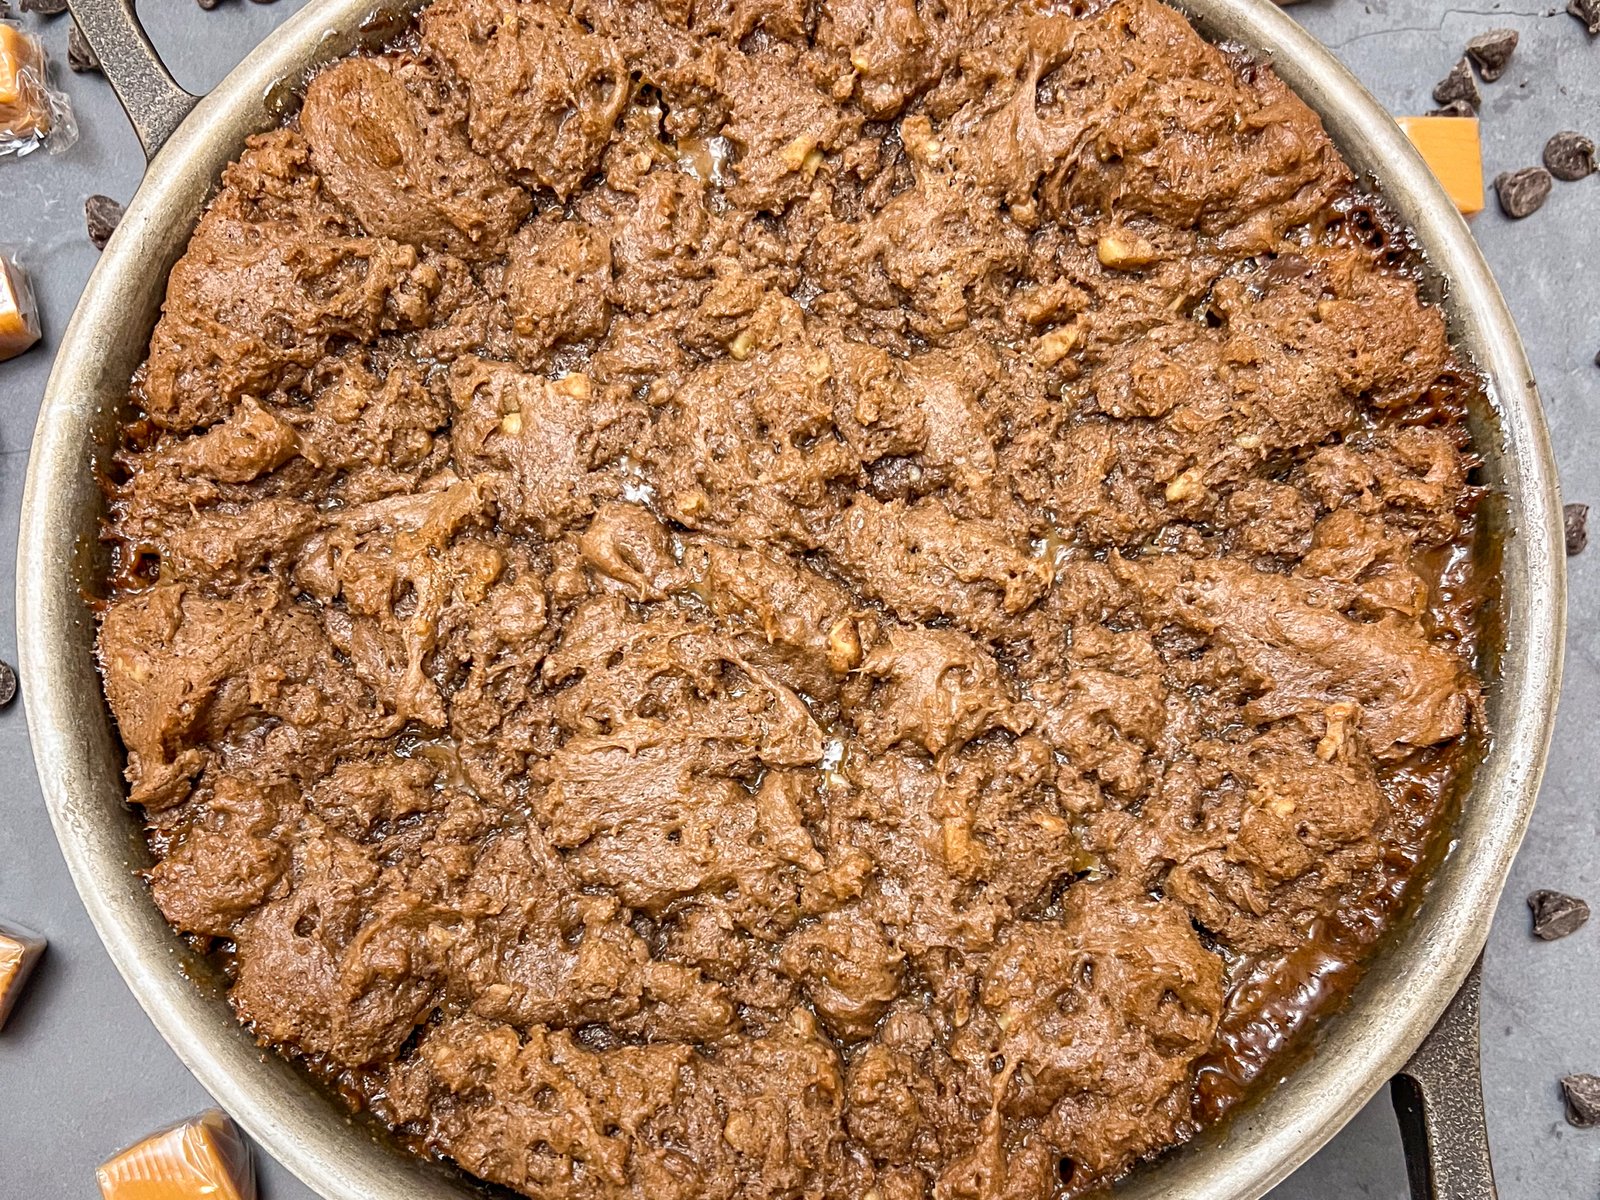
Step 9: Top with remaining batter. Spoon the rest of the brownie batter over the caramel in dollops. No need to smooth it out. Bake for another 25 minutes, then let it cool completely before cutting.
Variations and Swaps
- Cake mix swaps: Regular chocolate cake mix, devil's food, or dark chocolate cake mix all work. Each gives a slightly different flavor profile, but the technique stays the same.
- Chocolate chip options: Semi-sweet is classic, but dark chocolate chips, milk chocolate chips, or even white chocolate chips are all fair game. Mix two types for extra variety.
- Salted caramel version: Sprinkle a pinch of flaky sea salt or kosher salt over the caramel layer before adding the top batter. The salt-caramel-chocolate combination is hard to beat.
- Nut-free: Simply leave out the walnuts. The recipe works perfectly without them.
- Nut swaps: Pecans or almonds in place of walnuts for a different crunch.
- Pan alternatives: A 9x13, 8x8, or 9x9 baking dish works if you don't have a cast iron skillet. Grease it the same way. Adjust bake time: a larger pan means thinner brownies that may need 5 fewer minutes.
Expert Tips for Perfect Caramel Brownies
- Melt the caramel low and slow. Keep the heat at medium-low and stir constantly. High heat scorches the caramel and makes it grainy. Patience here pays off with a smooth, pourable sauce.
- Let it cool completely before cutting. The caramel layer is molten when the brownies come out of the oven. Cutting too early means the layers fall apart. Give them at least 30 minutes to set up.
- Grease generously. Caramel sticks to everything. A thick coat of softened butter on the skillet prevents a cleanup headache.
- Use caramel bits to save time. If unwrapping 30+ individual caramels doesn't sound fun, caramel bits (like Kraft) work identically and skip the tedious step.
- Make a caramel drizzle from the leftovers. You'll have a tablespoon or two of evaporated milk left in the can. Reserve a couple tablespoons of caramel sauce when building the layers, thin it with that leftover milk, and drizzle over the cooled brownies. It's incredible over vanilla ice cream.
What to Serve with Caramel Brownies
The classic move is a scoop of vanilla ice cream on top while the brownies are still warm. The cold ice cream against the gooey caramel center is the whole point. Whipped cream works too, especially with a drizzle of the leftover caramel sauce. For a cookout, serve these straight from the skillet at the table with a big spoon and let everyone dig in. A glass of cold milk on the side doesn't hurt either.
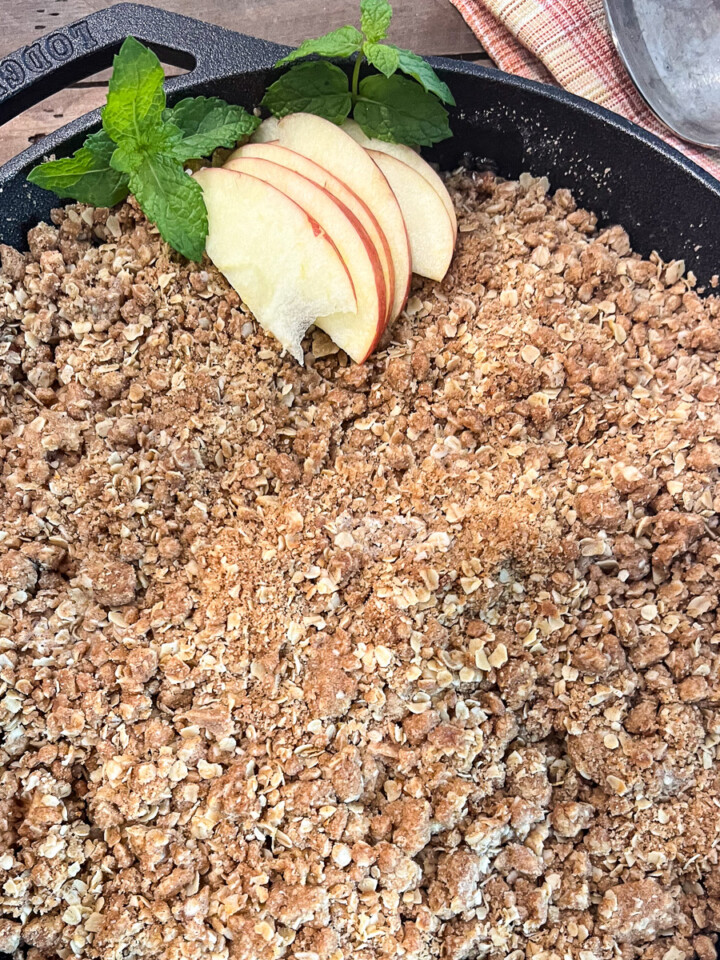
For another crowd-pleasing cast iron dessert, try our Skillet Apple Crisp.
How to Store Caramel Brownies
Room temperature: Cover with plastic wrap or foil directly on the skillet, or transfer to an airtight container. They'll keep for 3 to 4 days.
Refrigerator: Store in an airtight container for up to 5 days. Serve them chilled straight from the fridge or bring to room temperature before eating.
Freezer: Wrap individual slices in plastic wrap, then place in a freezer-safe bag or container. They'll keep for up to 3 months. Thaw at room temperature for 1 to 2 hours before serving.
Reheating: Microwave individual slices for 15 to 20 seconds to bring back the gooey caramel center. You can also warm the whole skillet in a 300°F oven for 8 to 10 minutes.
Caramel Brownies FAQs
Yes, the walnuts are completely optional. They add a bit of crunch against the fudgy brownie and gooey caramel, but the recipe works just as well without them. Leave them out for a nut-free version.
You can, but the texture will be different. Caramel candies melted with evaporated milk create a thick, gooey layer that holds its shape between the brownie layers. Homemade caramel sauce is thinner and may sink into the batter rather than forming a distinct ribbon. If you go homemade, cook it to a thicker consistency before layering.
Yes. Combine the caramel candies and evaporated milk in a microwave-safe bowl. Heat on medium power in 30-second bursts, stirring after each one, until the caramels are fully melted and the sauce is smooth. This typically takes 2 to 3 minutes total.
Stored in an airtight container, they last 3 to 4 days at room temperature or up to 5 days in the refrigerator. For longer storage, wrap individual slices in plastic wrap and freeze for up to 3 months.
Yes. A 9x13, 8x8, or 9x9 baking dish works. Grease it with butter before adding the batter. The bake time may vary slightly depending on the pan size: a larger pan spreads the batter thinner and may need 5 fewer minutes, while a smaller pan may need 5 more.
The most likely cause is gaps in the bottom brownie layer. If the first layer of batter doesn't fully cover the skillet, the caramel seeps through the holes and settles underneath. Spread the bottom layer as evenly as possible, pressing it into the edges, before the first bake.
More Delicious Cast Iron Dessert Recipes


If you tried these Caramel Brownies or any other recipe on my blog, please leave a 🌟 star rating and let me know how it went in the 📝 comments below. Thanks for visiting!
Get the Recipe
Caramel Brownies
Equipment
- 10-inch cast iron skillet
Ingredients
- 2 tablespoon salted butter softened
- 15.25 oz German chocolate cake mix
- 1 cup evaporated milk
- ½ cup unsalted butter melted
- 1 ½ cup semi-sweet chocolate chips
- 1 cup walnuts chopped
- 11 oz caramels squares or bits
- ⅓ cup evaporated milk
Instructions
- Preheat oven to 350°F. Grease a 10-inch skillet with the softened butter.
- Add the dry cake mix, 1 cup of evaporated milk, melted butter, and the walnuts to a medium size bowl. Mix everything together. The batter will be thick and kind of coarse looking.
- Add half the batter to the prepared skillet, smooth it out evenly. Bake for 15 minutes.
- While the brownies are baking, in a medium sauce pan melt the caramels while mixing in ⅓ cup evaporated milk. Stir until everything has combined to create a thickened sauce.
- After baking for 15 minutes, remove the brownies from the oven and evenly sprinkle chocolate chips over the half-baked brownies.
- Pour the caramel sauce evenly over the chocolate chips, smoothing it out creating a complete layer..
- Spoon the remaining brownie batter on top of the caramel layer in dollops. There’s no need to smooth it out.
- Bake for 25 minutes. Once done, allow it to completely cool before serving.
Notes
- Melt the caramel low and slow. Keep the heat at medium-low and stir constantly. High heat scorches the caramel and makes it grainy.
- Let it cool completely before cutting. The caramel layer is molten when the brownies come out of the oven. Give them at least 30 minutes to set up.
- Grease generously. Caramel sticks to everything. A thick coat of softened butter on the skillet prevents a cleanup headache.
- Use caramel bits to save time. Caramel bits work identically to individually wrapped squares and skip the tedious unwrapping step.
- Make a caramel drizzle from the leftovers. Reserve a couple tablespoons of caramel sauce, thin it with leftover evaporated milk, and drizzle over the cooled brownies or vanilla ice cream.
Nutrition
Dutch Oven Daddy is not a dietician or nutritionist, and any nutritional information shared is only an estimate. We recommend running the ingredients through an online nutritional calculator if you need to verify any information.
Holley says
These are the most gooey, delicious, brownies I have ever had! So easy to make and absolutely heavenly!
Dannii says
These brownies were incredible. So gooey and delicious.
Andrea says
Wow! Ooey, gooey, chocolatey caramel bliss right here! I can't wait to dig in!
Saif says
Caramel and chocolate are two of the best combo for brownies. Now I am craving to make one. Thanks for the recipe.
Anjali says
Making these skillet brownies out of cake mix was such a great idea!! Mine turned out perfectly, they were gooey, moist, and sweet - everything a brownie should be!
MacKenzie says
I made this for a Christmas dessert. Everyone loved it! I can’t wait to make again. Yum!
Beth says
These brownies look amazing! I love all that goey caramel, and skillet brownies always have the best texture.
Andrea says
These irresistible and delicious brownies are so easy to make. I love that the recipe uses a cake mix and that I can use either type of caramels depending on which one I can find.
Kim says
These were perfect for Christmas. We just have appetizers and a dessert and everyone loved these!
Casey says
This looks absolutely delicious! I've never had skillet brownies before but I can't wait to try them!
Chenee says
Skillet brownies are my favorite, especially in the summer months. You get to enjoy a sweet treat instead of heating up the house with the oven. Yum!
Christian says
Love this. I make it all the time. Better served right when done. I usually take ingredients with me and make at party cause of that.
Dutch Oven Daddy says
You're so right, hot from the oven is best!