
Most people think Pork Belly Burnt Ends require a smoker, a full day of babysitting, and a backyard big enough to park a trailer. They don't. Your cast iron Dutch oven does every single thing a smoker does: it builds bark with a hard stovetop sear, renders the fat low and slow in a covered braise, and caramelizes a sticky BBQ glaze in a high-heat uncovered finish. Same sticky, smoky, melt-in-your-mouth result, all from one pot.
If you love easy, practical cast iron cooking, you will also love our Dutch Oven Ribs and Simple Coleslaw Recipe for a full backyard BBQ spread. For more one-pot ideas, browse our Best Dutch Oven Recipes.
Quick Look at this Recipe
- ✅ Recipe Name: Dutch Oven Pork Belly Burnt Ends
- 🕒 Ready In: 3 hours 30 minutes (15 min prep, 3 hrs 15 min cook)
- 👪 Serves: 8 as appetizer, 4-6 as a main
- 🥣 Main Ingredients: pork belly, smoked paprika, BBQ sauce, butter, honey
- 📖 Dietary Info: Gluten-free (with GF BBQ sauce)
- ⭐ Why You'll Love It: Sticky, smoky, caramelized meat candy from one pot, no smoker needed
Summarize and Save the Recipe
Jump to:
- Quick Look at this Recipe
- Why You'll Love These Pork Belly Burnt Ends
- What Are Pork Belly Burnt Ends?
- Ingredients You'll Need
- How to Cut Pork Belly for Burnt Ends
- The Dry Rub: Why You Should Let It Sit Overnight
- How the Dutch Oven Replicates a Smoker
- How to Make Pork Belly Burnt Ends
- Tips for the Best Pork Belly Burnt Ends
- Variations
- Troubleshooting
- Storage and Make-Ahead
- What to Serve with Pork Belly Burnt Ends
- Frequently Asked Questions
- More Delicious Recipes
- Get the Recipe
This post is sponsored by Heritage Craft Butchers. All opinions expressed are my own.
Why You'll Love These Pork Belly Burnt Ends
- One pot, start to finish. Sear, braise, and caramelize all in the same Dutch oven. Minimal cleanup, maximum flavor.
- No smoker, no problem. Smoked paprika in the rub plus cast iron's heat retention give you the same smoky bark you'd get from a 6-hour smoke session, in a fraction of the time.
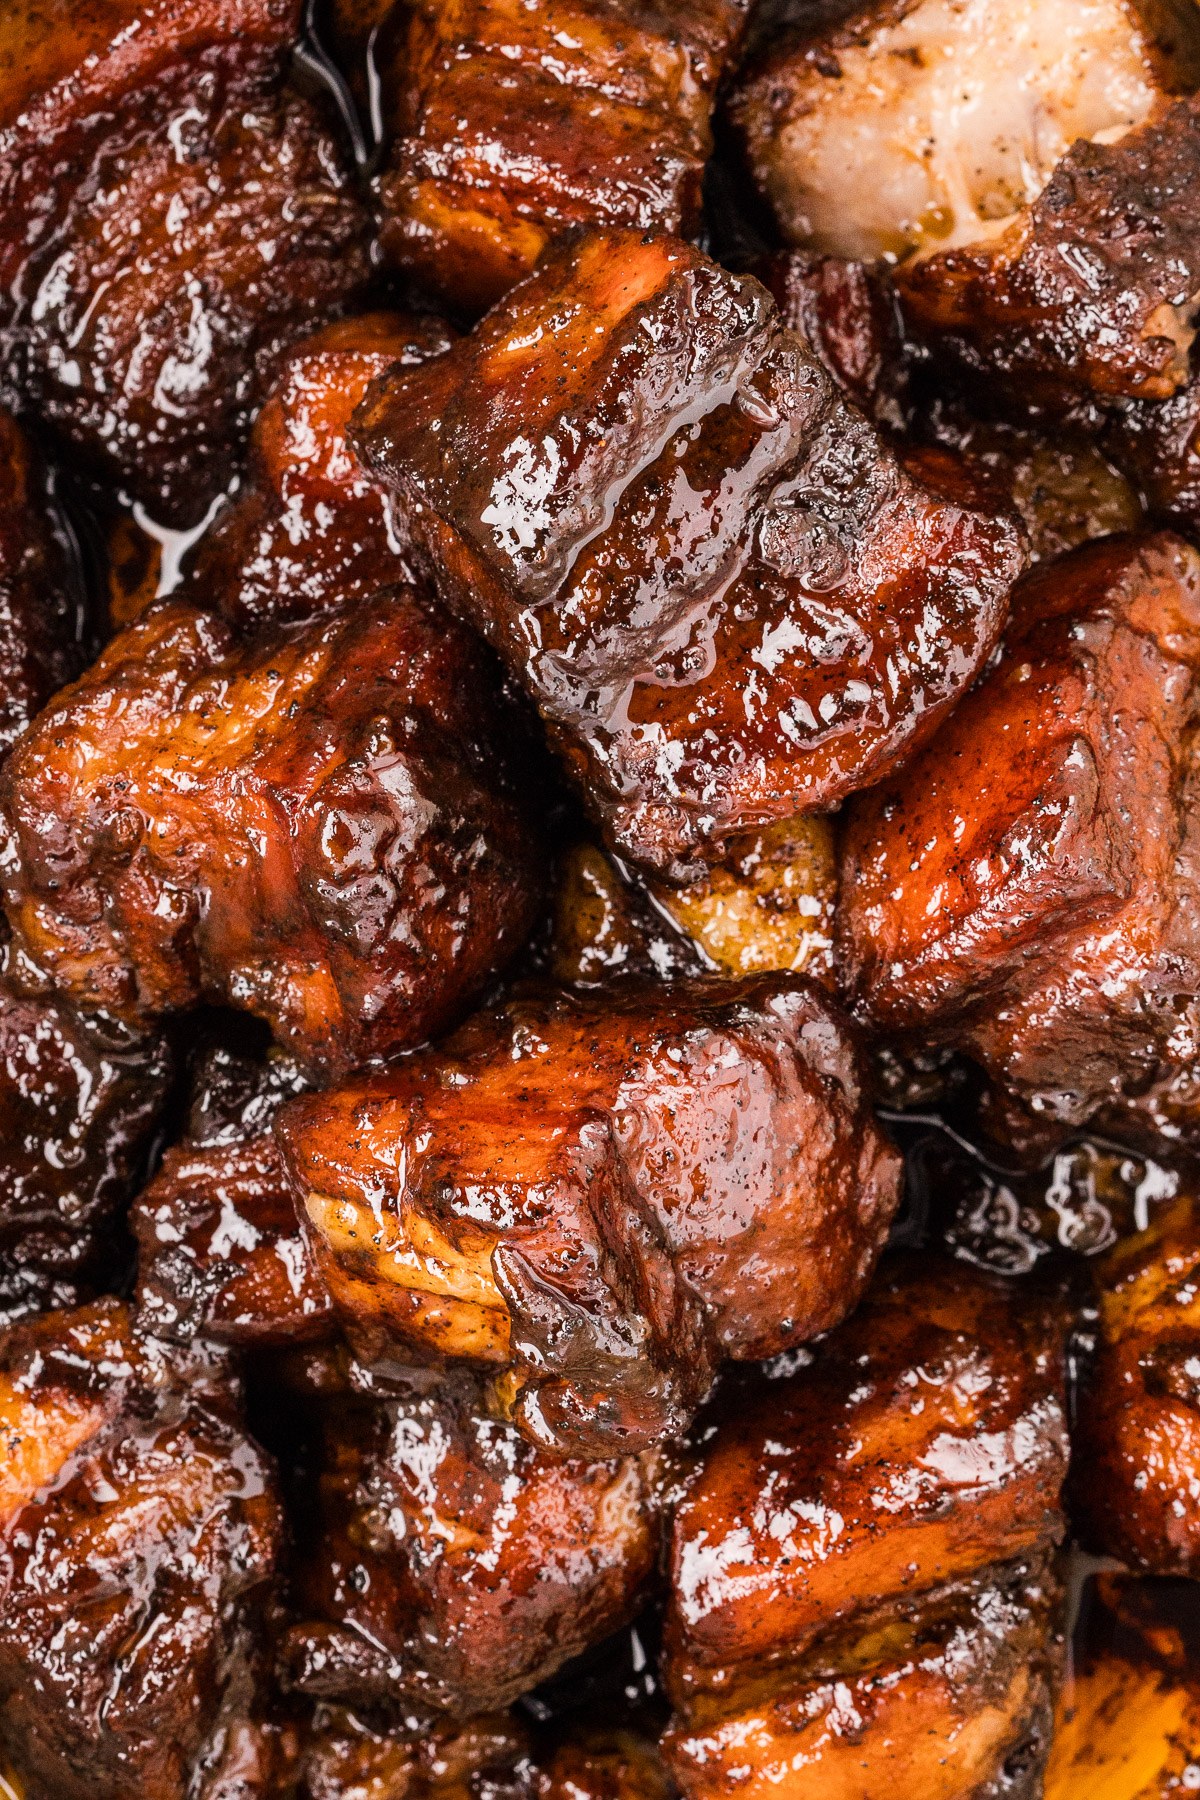
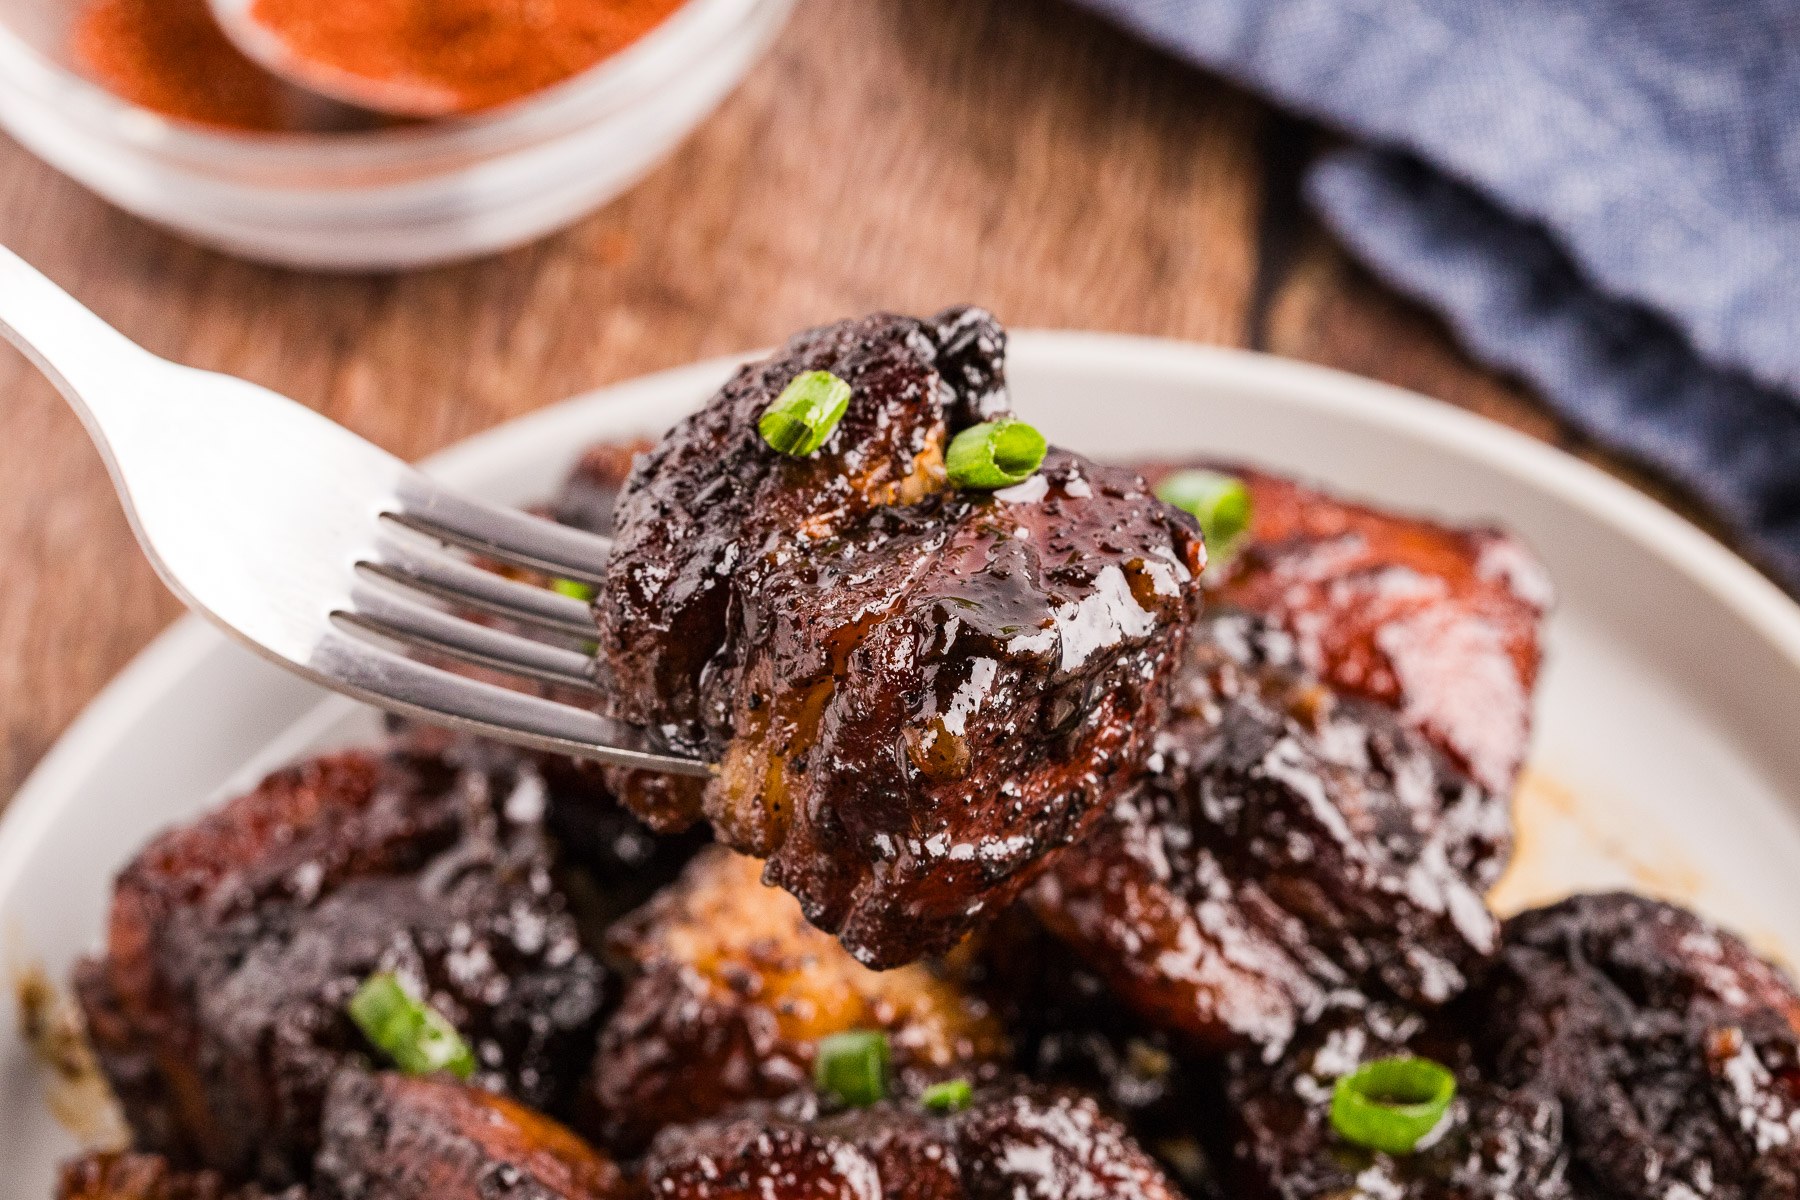
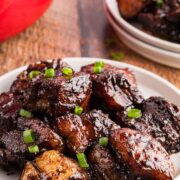
- Genuine "meat candy." The pork belly fat renders into rich gelatin, the exterior caramelizes in a honey-BBQ glaze, and every cube delivers that crispy-sticky-tender contrast that makes burnt ends famous.
- Made for a crowd. From a single 3-4 lb pork belly slab you get enough two-bite cubes to feed a party. Perfect as a BBQ appetizer, slider filling, a mac and cheese topping, or piled on loaded chips like our Pulled Pork Nachos.
What Are Pork Belly Burnt Ends?
Burnt ends were born at Arthur Bryant's Barbeque in Kansas City, Missouri. When slicing smoked brisket, the fatty, irregular "point" end yielded uneven scraps with charred exteriors. Rather than discard them, Bryant saved these trimmings, chopped them up, and handed them out free to waiting customers. They were so popular they became the draw, and eventually the signature dish of Kansas City BBQ.
Pork belly became the modern standard because brisket point requires a full 12-15 lb packer brisket and 10+ hours of smoking. Pork belly has the same fat-to-meat structure (layers of fat tightly bound with collagen), delivers the same unctuous result, cooks in 3-4 hours, and costs a fraction of the price. Many BBQ lovers now argue they're better than the original.
What makes a great pork belly burnt end comes down to three elements: the bark (that deep mahogany crust formed by the Maillard reaction on the exterior), the fat rendering (collagen breaks down into rich gelatin, giving you that melt-in-your-mouth interior), and the caramelization (a sticky-sweet glaze finish that turns every cube into meat candy). The Dutch oven method achieves all three through technique rather than smoke.
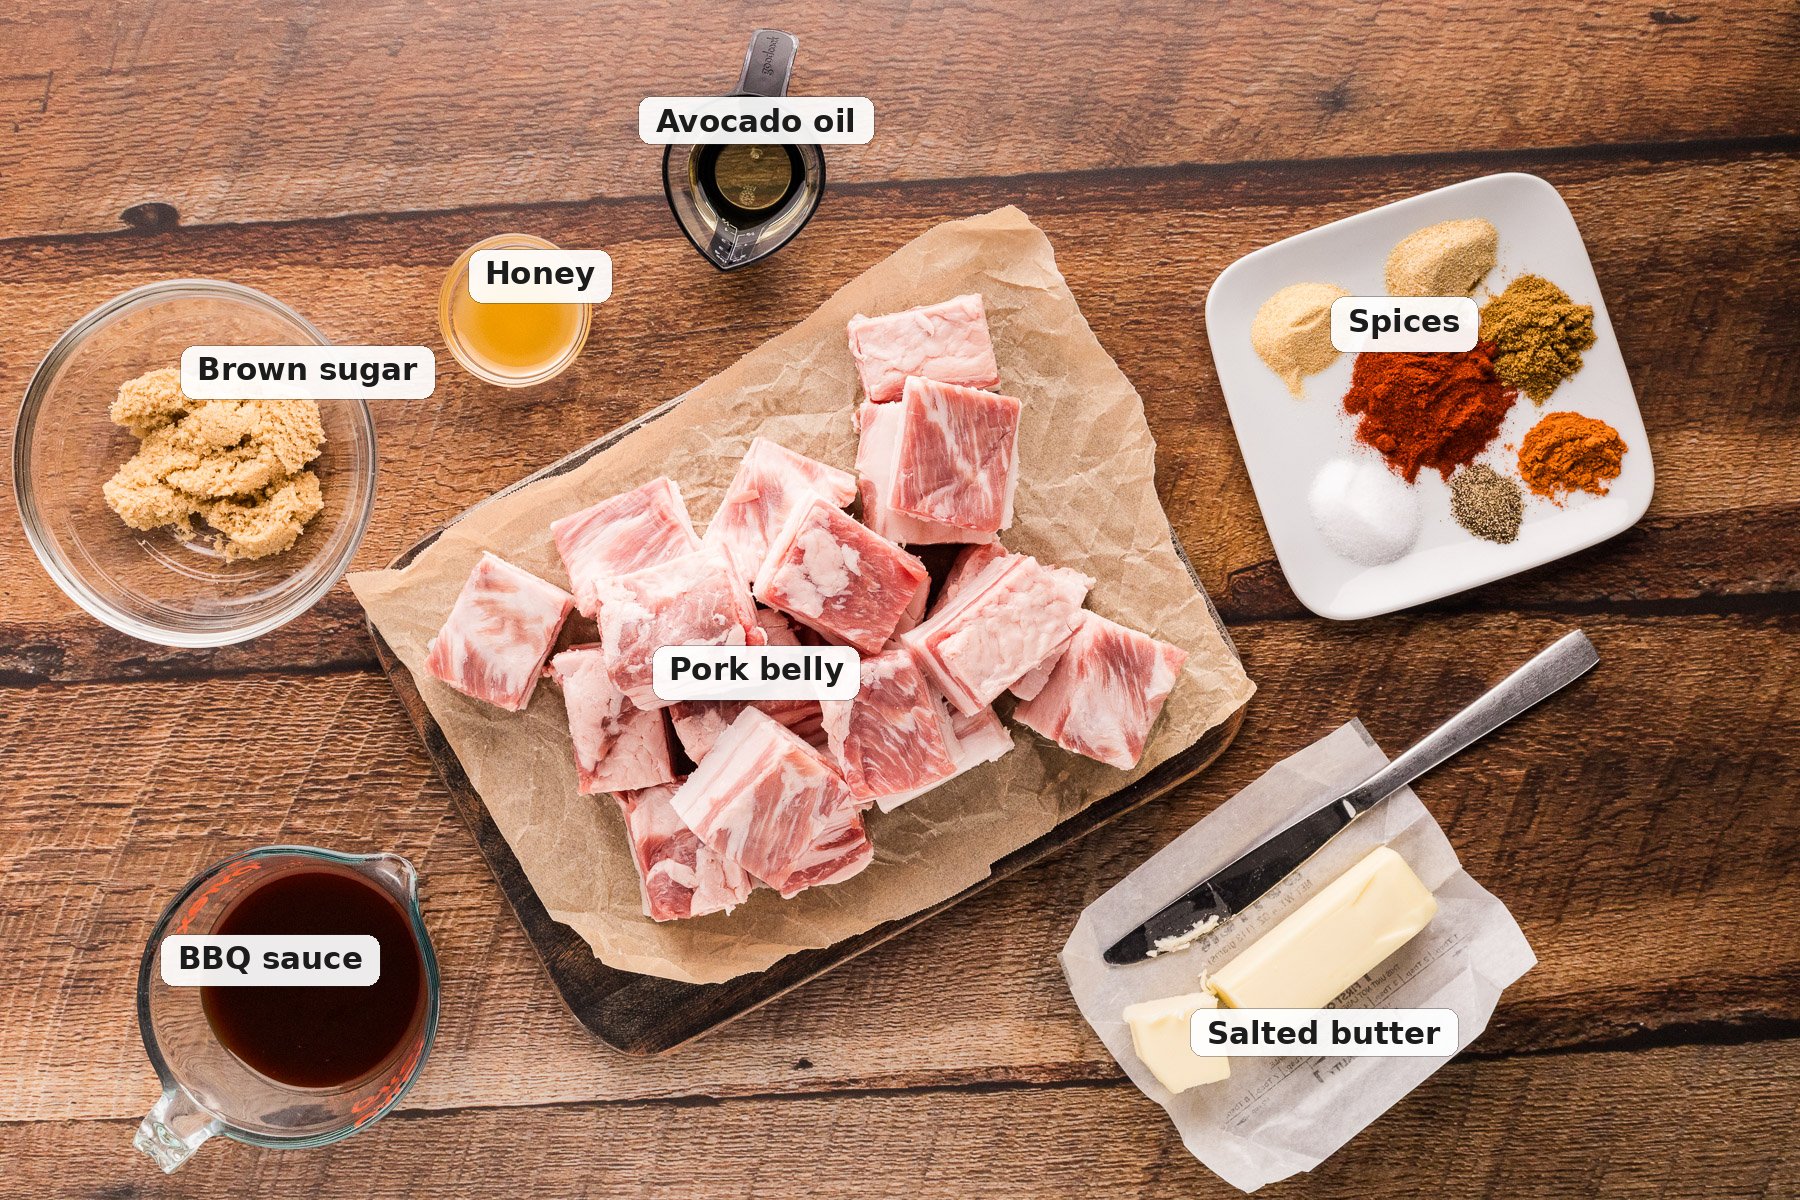
Ingredients You'll Need
Serve these pork belly burnt ends alongside our Simple Coleslaw Recipe or pile them on Dutch Oven Ribs night for a full BBQ spread.
The Pork
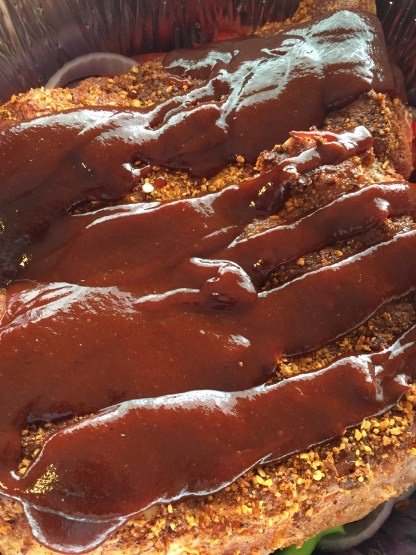
You need 3-4 lbs of skin-off pork belly, cut into 1½-inch cubes. Skin-off is essential because pork skin doesn't render the same way as the fat and turns leathery during cooking. Most grocery store pork belly comes skin-off; if not, ask the butcher to remove it. The cubes will shrink about 25-30% during cooking, so they'll look large raw but end up as perfect two-bite pieces.
The Dry Rub
The rub is a sweet-forward BBQ blend built around one critical ingredient: smoked paprika. This is what replaces wood smoke flavor in the Dutch oven method, so don't substitute regular paprika. Brown sugar fuels the caramelization and helps pull moisture to the surface for better crust formation. Garlic powder, onion powder, chili powder, and cayenne round out the heat and depth. See the full recipe card below for exact measurements.
The Braising Glaze
A thick, Kansas City-style BBQ sauce is the base. KC-style caramelizes best due to its molasses content, creating that signature sticky, lacquered exterior. Butter creates an emulsified glaze that clings to the cubes (without it, the sauce stays watery). Honey adds viscosity and a second layer of caramelization. Apple cider vinegar provides brightness and acid to balance the sweetness. An optional teaspoon of liquid smoke deepens the smoky character if you want it.
How to Cut Pork Belly for Burnt Ends
Buy a full skin-off pork belly slab from the refrigerated meat case or ask at the butcher counter. Cut the slab into 1½-inch strips lengthwise first, then crosscut into 1½-inch cubes. You want consistent size so every piece cooks evenly. Pat each cube completely dry with paper towels before applying the rub. Surface moisture is the enemy of crust formation, and that crust is your bark substitute.
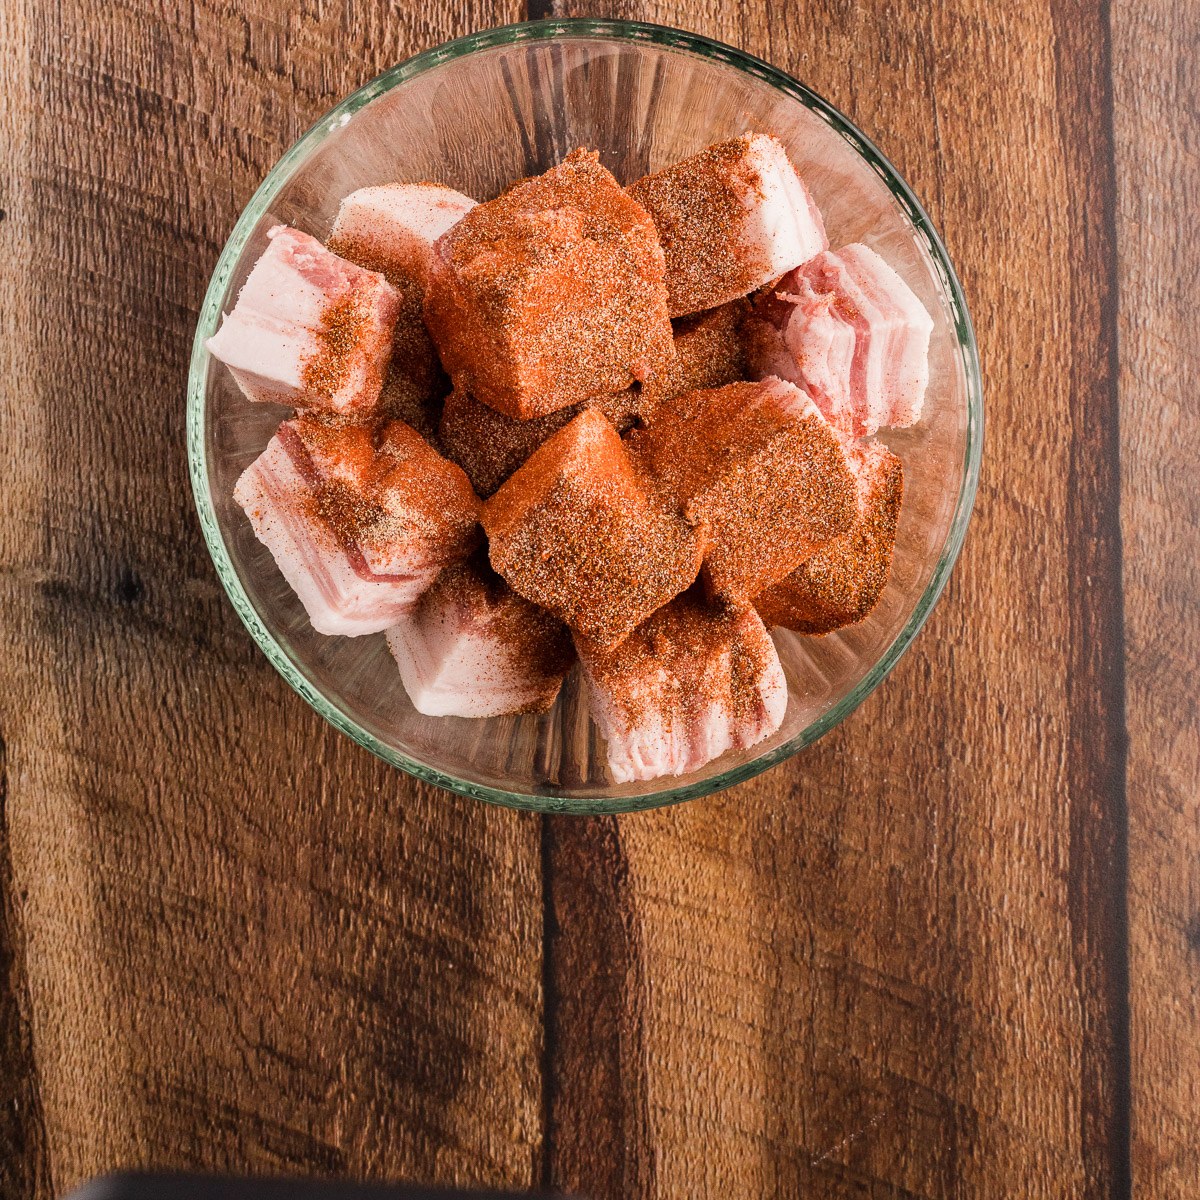
The Dry Rub: Why You Should Let It Sit Overnight
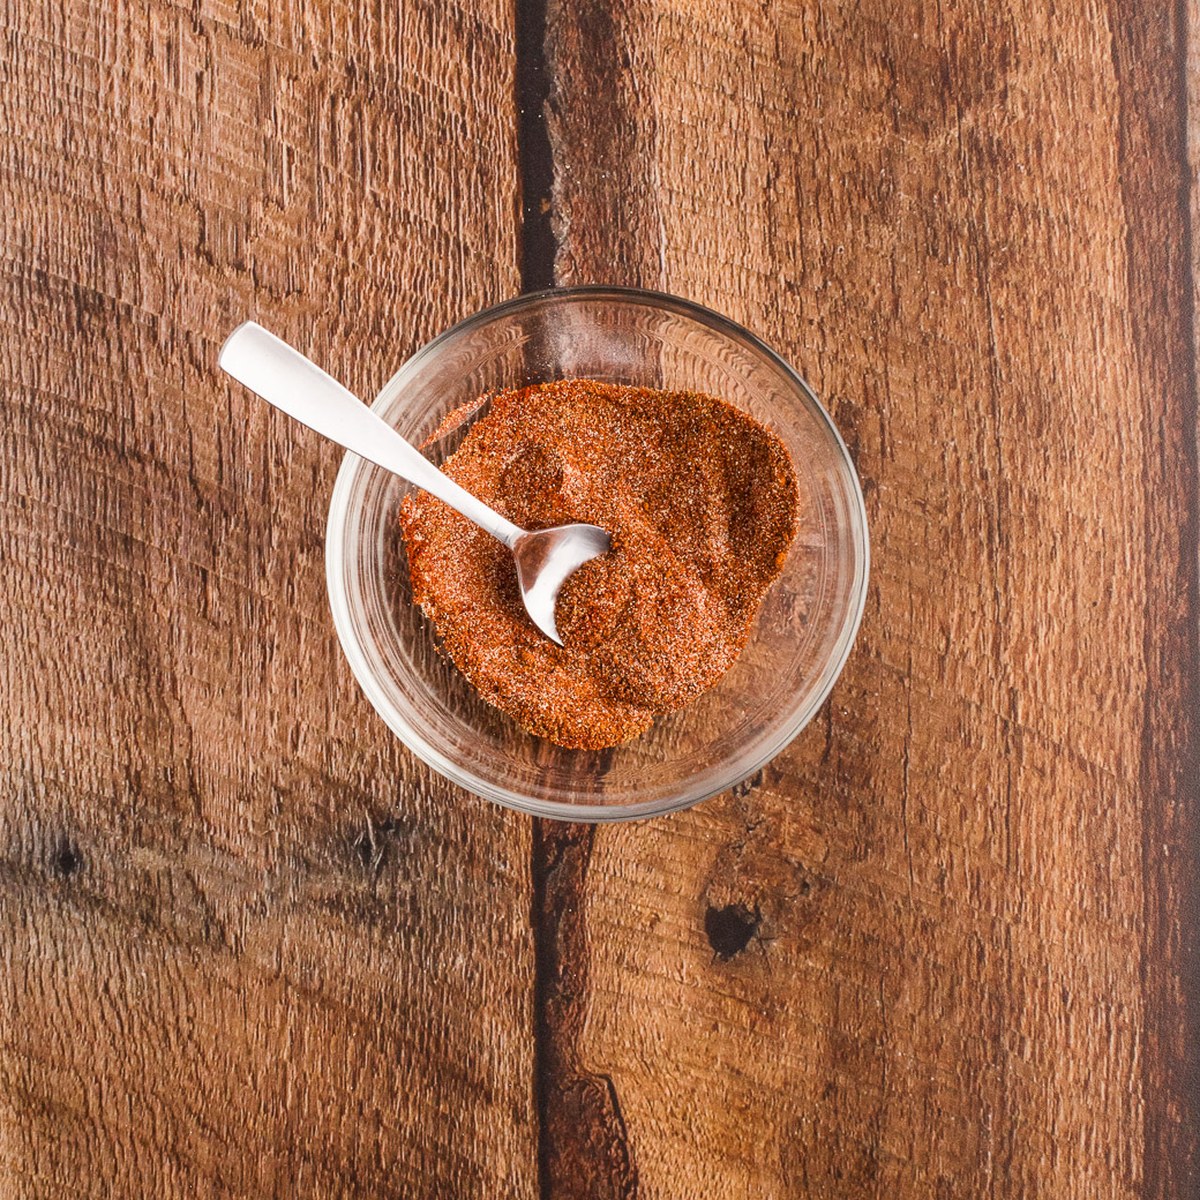
Toss the cubes in a large bowl with the dry rub until every surface is coated. Don't be shy. When salt in the rub contacts the meat surface, it draws moisture out initially, then the meat reabsorbs that brine back in through osmosis. This seasons the meat through to the center and draws moisture to the surface, which, when dried, creates a significantly better crust. Thirty minutes is the minimum, but overnight in the fridge is ideal.
For the overnight method, place the coated cubes on a wire rack over a sheet pan, uncovered, in the fridge. The cold air further dries the surface (restaurant chefs call this "pellicle formation") and it's exactly what smokers do with their low-and-slow airflow. This is one of the two most impactful steps in the entire recipe.
How the Dutch Oven Replicates a Smoker
Most people think the Dutch oven is a compromise when you don't have a smoker. It isn't. Here's what a smoker actually does and how your cast iron Dutch oven handles every single one of those jobs.
| What a Smoker Does | What Your Dutch Oven Does |
|---|---|
| Low 225-275°F ambient heat | Oven set to 275°F: same temperature range |
| Dry air circulation that forms bark | Hard sear in the Dutch oven: Maillard reaction creates the same mahogany crust |
| Smoke flavor from wood chips | Smoked paprika in the rub + optional liquid smoke |
| Long low-heat fat render | Covered braise in the Dutch oven, 2-2.5 hours |
| Final uncovered caramelization | Lid off at 375°F for 15-20 minutes |
Cast iron is actually the ideal vessel for Dutch oven pork belly burnt ends, not a workaround. Cast iron retains heat more consistently than a thin roasting pan, meaning the braise temperature stays stable and collagen breaks down more evenly. The heavy lid creates better steam retention during the covered braise phase. And when the lid comes off at high heat, cast iron's thermal mass means the caramelization is fast and even. You get that sticky glaze set in 15-20 minutes rather than the 45+ minutes a thin pan requires. For more on dialing in heat with cast iron, see our Dutch oven temperature guide.
How to Make Pork Belly Burnt Ends
Preheat your oven to 275°F and have all your ingredients ready before you start. The sear goes fast and you'll want the braising glaze prepped and waiting.
- Step 1: Season and Rest. Toss the cubes in the dry rub until every surface is coated, then rest at least 30 minutes at room temperature or overnight uncovered in the fridge. Pat dry before searing.
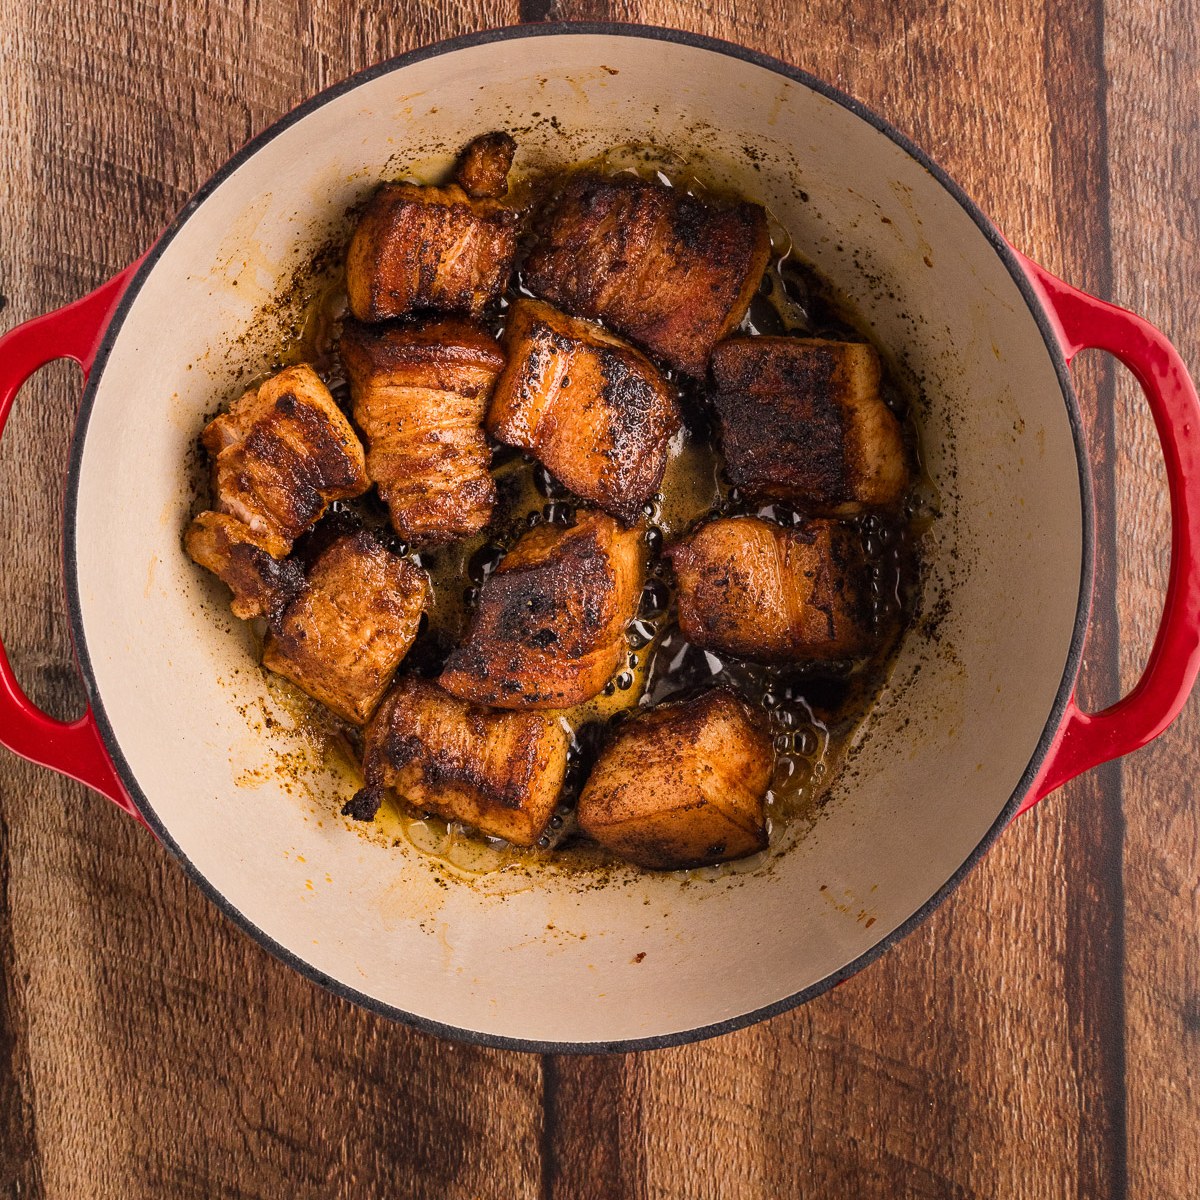
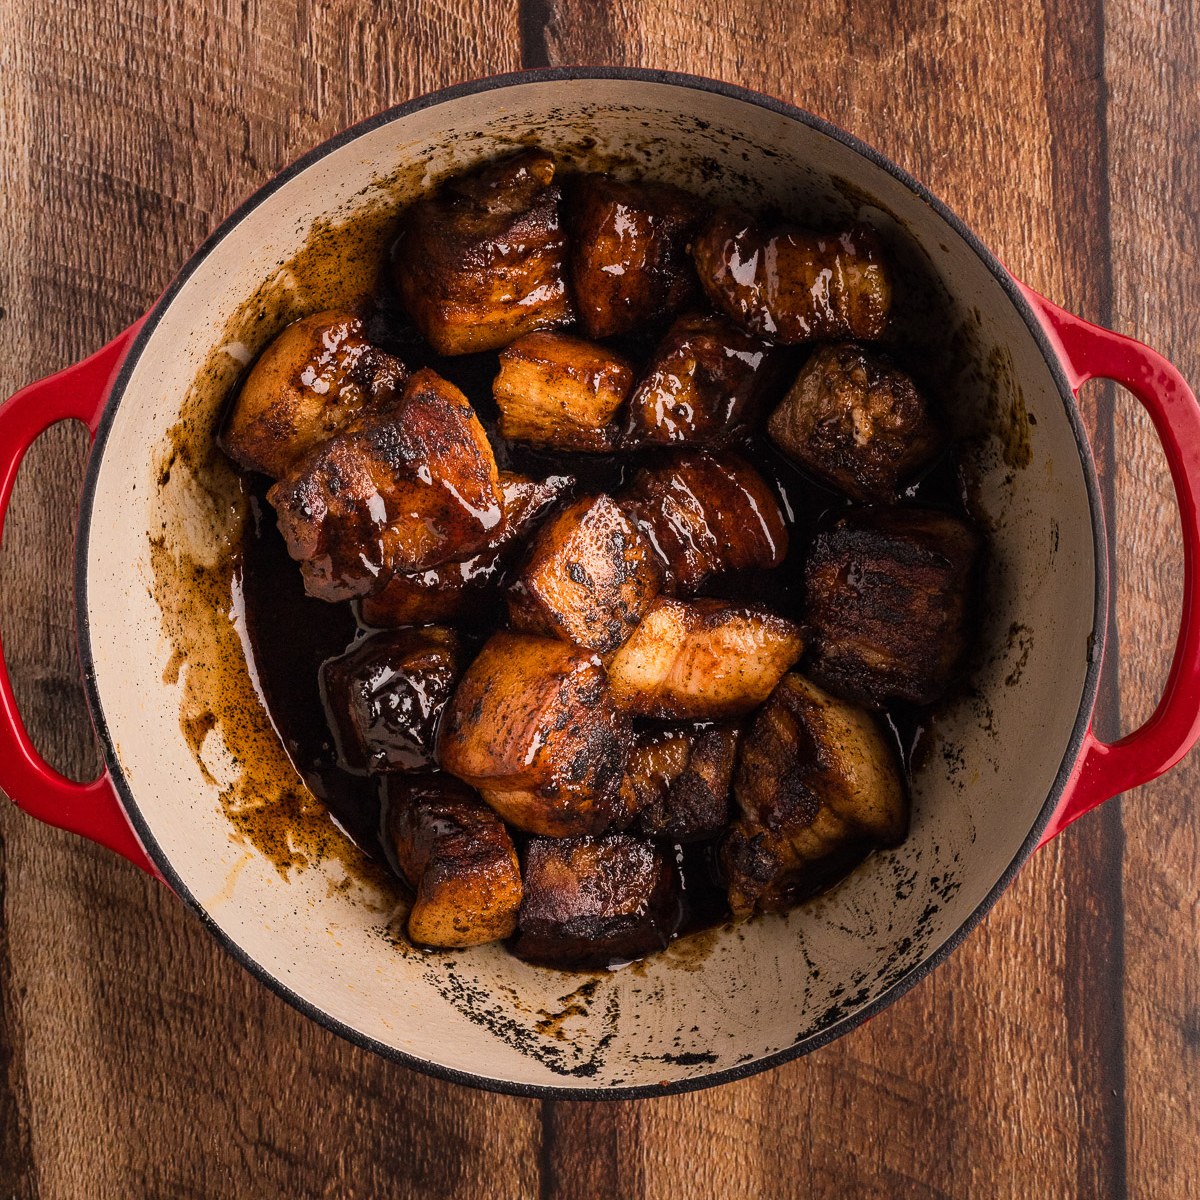
- Step 2: Sear the Pork Belly. Heat the Dutch oven with oil until shimmering and sear the cubes in 2-3 batches on 2-3 sides until a deep mahogany crust forms.
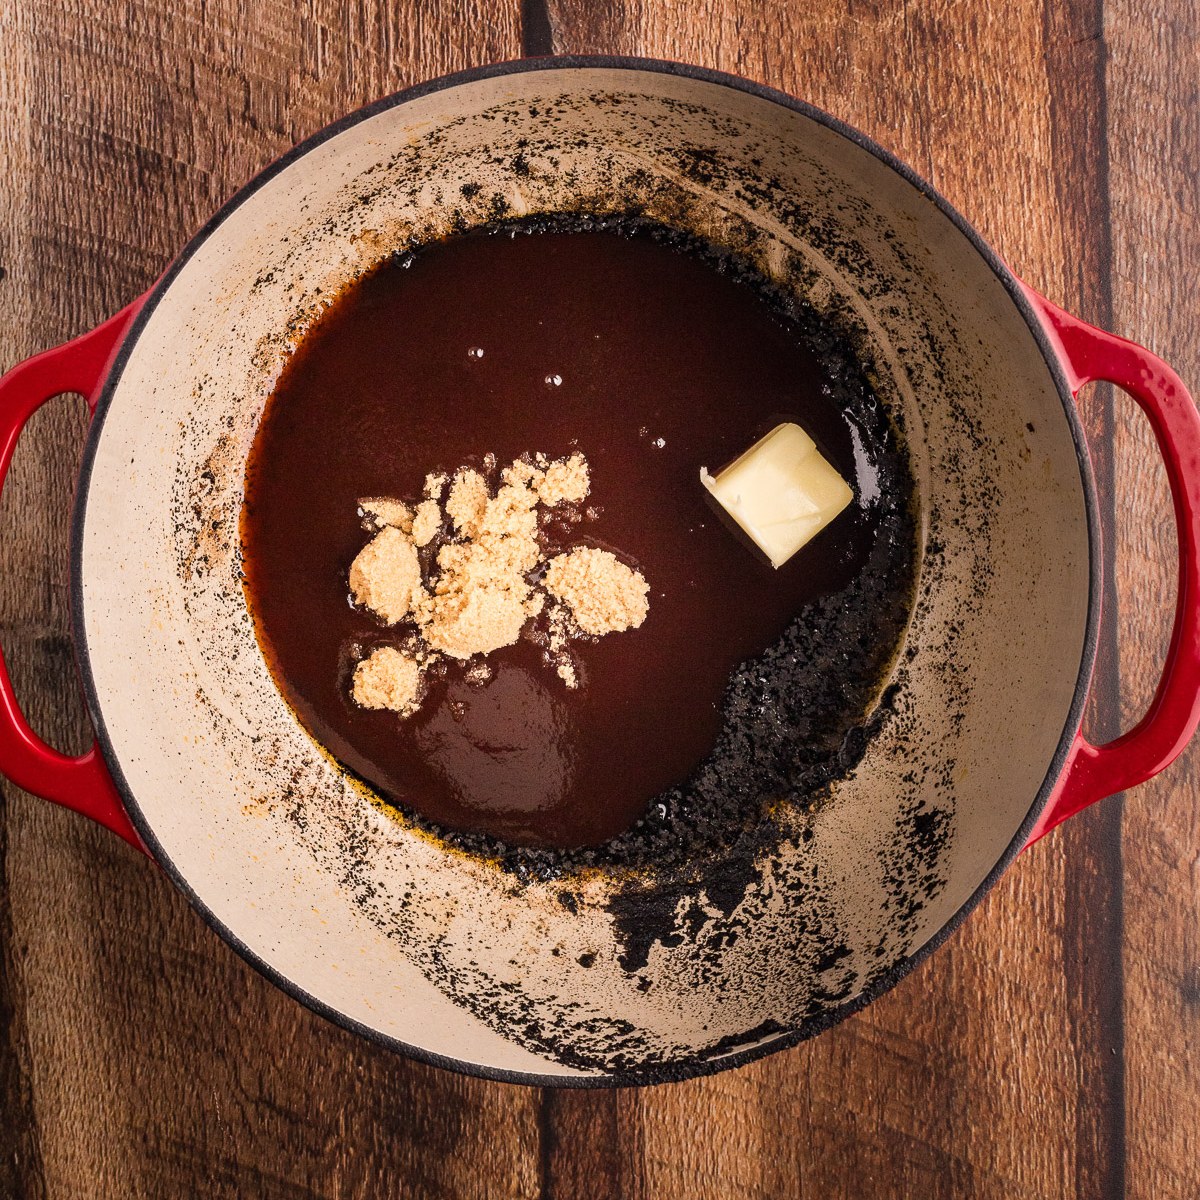
- Step 3: Build the Braising Glaze. Drain most of the rendered fat, return all the cubes, and add the BBQ sauce, butter, honey, apple cider vinegar, and liquid smoke. Stir to coat.
- Step 4: Braise Low and Slow. Cover and braise at 275°F for 2 to 2½ hours, until the cubes reach 200-205°F and are completely fork-tender.
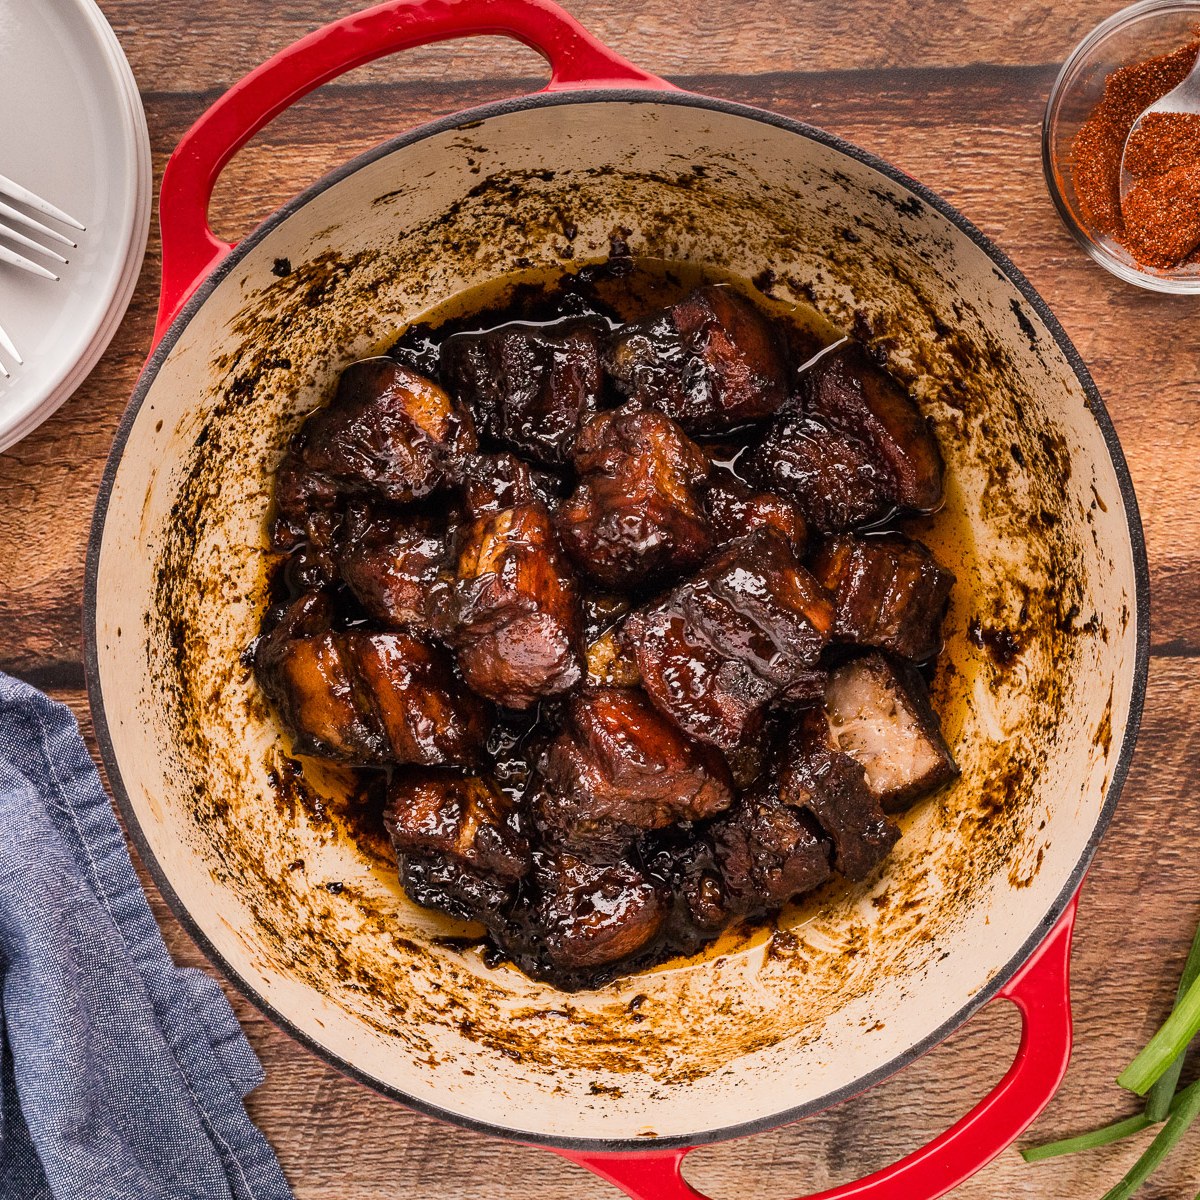
- Step 5: Caramelize Uncovered. Drain excess liquid, raise the oven to 375°F, and bake uncovered for 15-20 minutes, stirring once, until the glaze is thick and sticky.
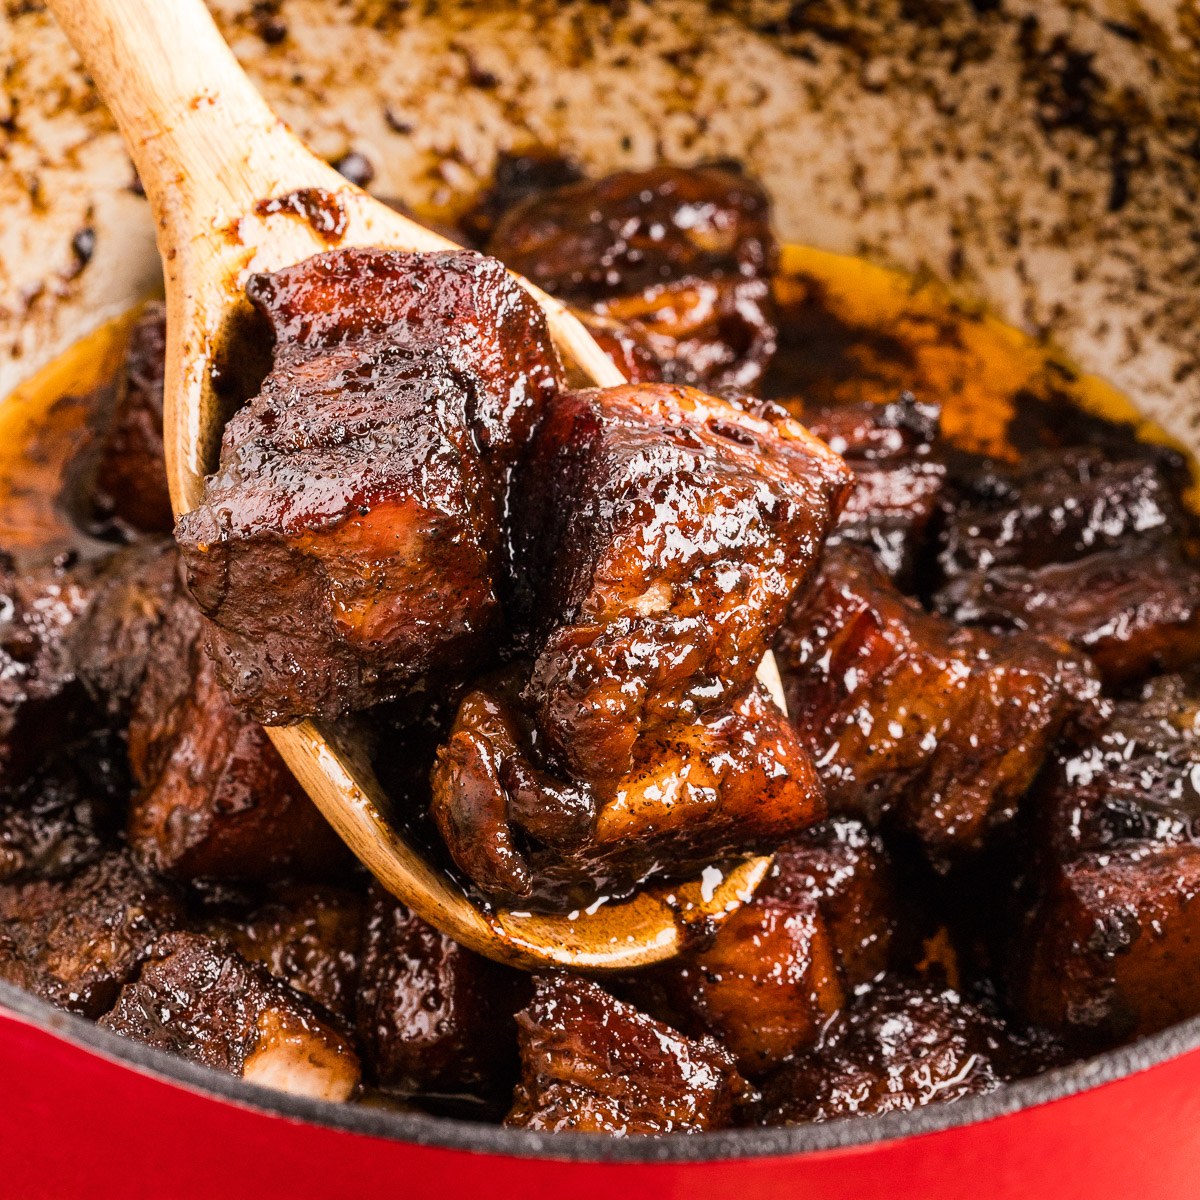
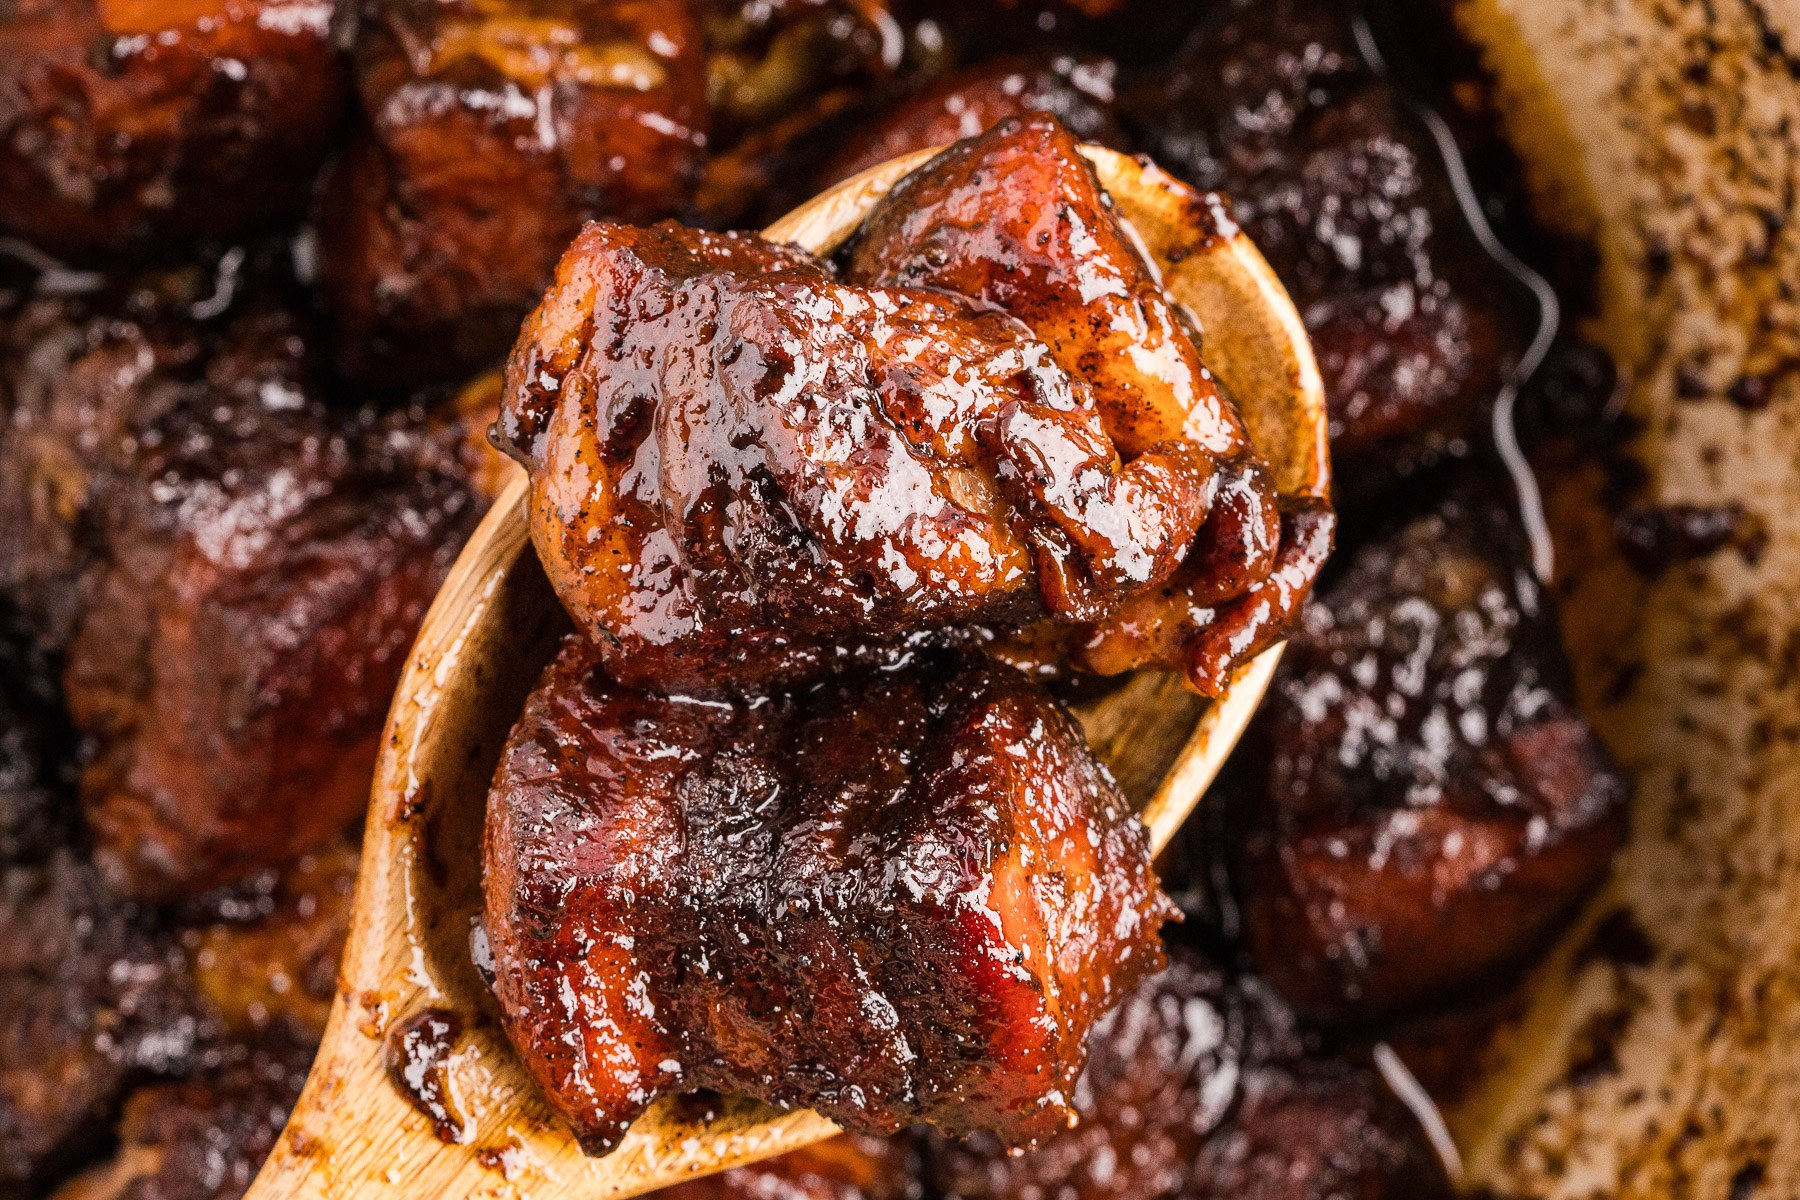
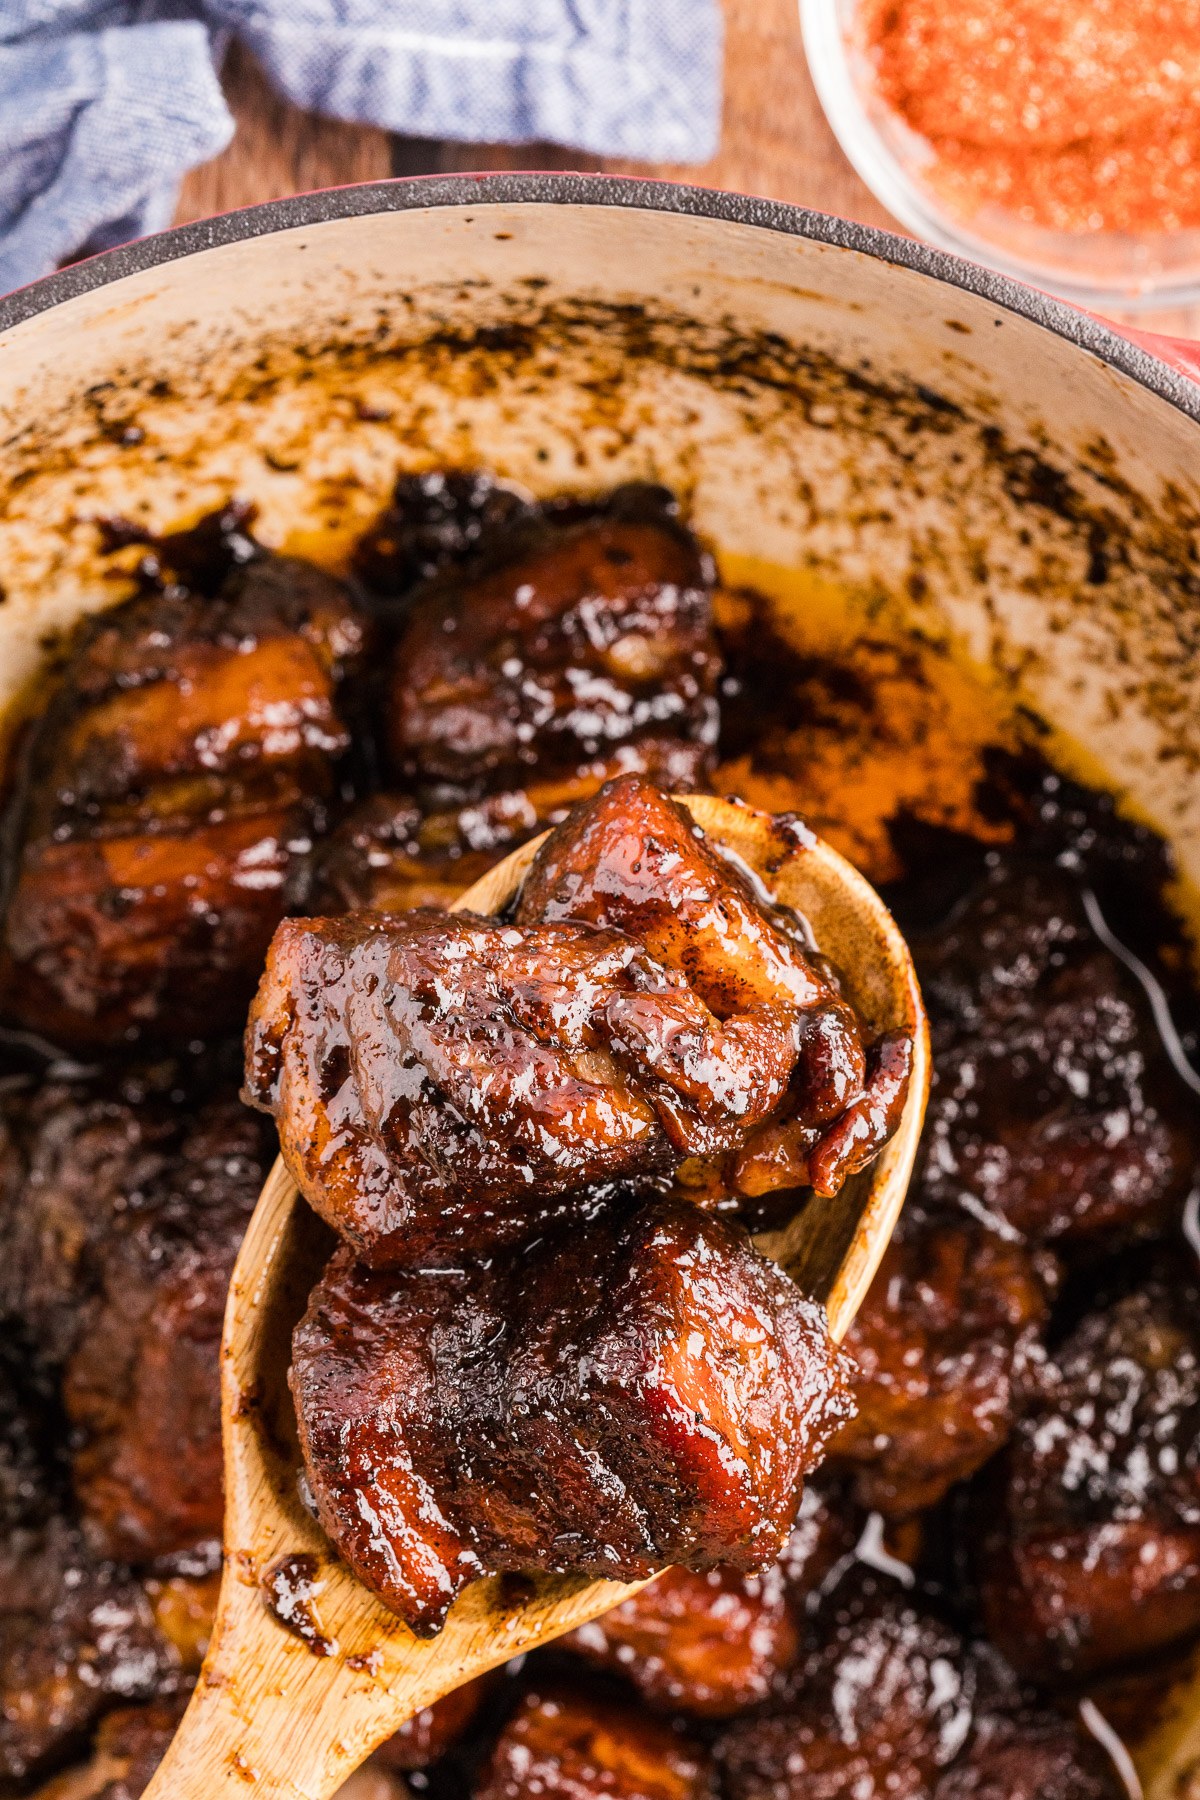
- Step 6: Rest and Serve. Rest 10 minutes so the glaze tightens, then serve from the Dutch oven, on white bread, or piled on slider buns with coleslaw.
Tips for the Best Pork Belly Burnt Ends
- Sear in batches, never crowd the pot. Crowding drops the pan temperature and the meat steams instead of searing. Work in 2-3 batches with space between each cube.
- Get the Dutch oven hot before adding pork. The cast iron should be very hot. A drop of water should evaporate immediately. A hot, quick sear builds better crust than a slow, low sear.
- Don't skip the fat drain. After searing, significant fat will have rendered out. Drain most of it before adding the braising liquid. Leaving too much fat makes the glaze greasy rather than sticky.
- Target 200-205°F internal temperature. Below 195°F the collagen hasn't fully converted and the cubes will be chewy. Above 210°F they start to fall apart. A probe thermometer is the only way to know.
- Watch the finish closely. The final uncovered caramelization step can go from perfect to scorched quickly, especially with honey in the glaze. Check at 10 minutes and stir, then give it the full 15-20 only if the glaze isn't thick enough yet.
- Rest before serving. 10 minutes out of the oven lets the glaze tighten and cool slightly so it clings to the cubes instead of running off.
Variations
Maple Bourbon: Substitute the honey with maple syrup and add 2 tablespoons of bourbon to the braising liquid. The bourbon's water content cooks off during the caramelization phase, leaving a rich, slightly smoky-sweet finish that pairs beautifully with the pork fat.
Spicy: Double the cayenne in the rub and finish with a drizzle of hot honey instead of regular honey. The heat builds slowly as you eat, the kind of slow burn that makes burnt ends addictive.
Pork Shoulder Version: For a leaner result, substitute boneless pork shoulder cut into 1½-inch cubes. Use the same method; the lower fat content means less rendered fat to drain, and the finish time is slightly shorter. Expect a meatier, chewier texture vs. the gelatinous richness of belly. If you want a full pulled-pork cook instead, our Smoked Pork Butt uses the same low-and-slow method.
Extra Crispy: After the caramelization step, transfer cubes to a wire rack over a sheet pan and broil for 2-3 minutes. The broiler caramelizes the outer glaze into a crackly shell. Watch constantly because they go from perfect to burnt in under a minute under the broiler.
Troubleshooting
My burnt ends are chewy/tough after the braise. They haven't reached temperature. Check with a probe: you're looking for 200-205°F internal. Return the Dutch oven covered to the oven for another 20-30 minutes and check again. Collagen conversion requires sustained heat; rushing this phase is the number one cause of chewy burnt ends.
The glaze is watery and not sticking. Two causes: either there's too much fat/liquid in the pot, or the oven temperature isn't high enough for the finish phase. Drain excess liquid until the cubes are just barely coated, increase oven to 400°F, and give them another 10 minutes uncovered.
My sear isn't forming a crust. The Dutch oven wasn't hot enough or the pan was overcrowded. Increase heat and give the pot 2-3 minutes to recover temperature between batches. The surface of the meat must also be dry. Pat the cubes again with paper towels if you forgot.
The exterior is getting too dark before the braise is done. The brown sugar in the rub can over-caramelize. If this happens during the initial sear, you went a bit too dark but it'll still taste fine. During the covered braise this shouldn't happen; if it does, reduce oven to 250°F.
Storage and Make-Ahead
Make ahead: You can complete the sear and braise the day before and refrigerate the cubes in their braising liquid. The next day, remove from the fridge, skim any solidified fat from the top, and run the uncovered caramelization finish in the oven. The result is arguably better because the overnight rest allows the flavors to deepen and the fat to solidify, making it easier to control the final glaze.
Refrigerator: Store leftovers in an airtight container for up to 4 days. The glaze will firm up when cold; this is normal.
Reheating: The best method is a 350°F oven for 10-15 minutes, uncovered, on a sheet pan. This re-crisps the exterior. Microwave reheating works in a pinch but makes them soft and loses the caramelized crust. Add a drizzle of extra BBQ sauce before reheating.
Freezer: Freeze in a zip-lock bag with some of the braising liquid for up to 3 months. Thaw overnight in the fridge before reheating.
If you love low-and-slow pork in the Dutch oven, our Dutch Oven Pork Roast uses the same covered braise technique.
What to Serve with Pork Belly Burnt Ends
- The Kansas City way: Pile them on slices of plain white bread. The bread soaks up the glaze and cuts the richness. This is how they've been served in KC since the beginning.
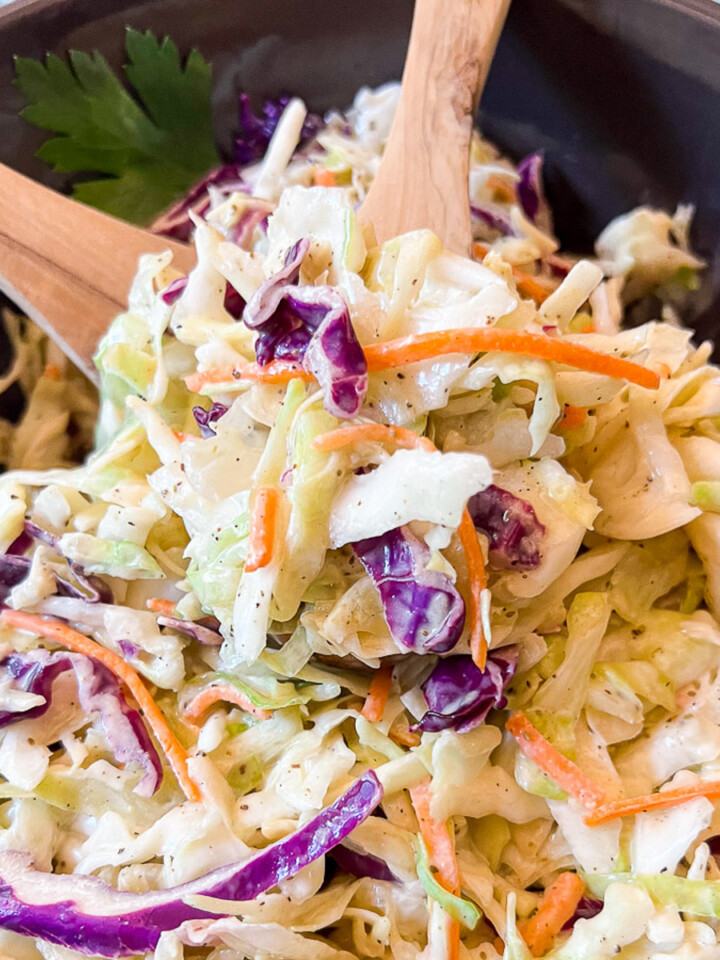
- Coleslaw: The tangy crunch of creamy coleslaw against the fatty, sweet burnt ends is the perfect contrast. Our Simple Coleslaw Recipe comes together in 10 minutes.
- Mac and cheese: Scatter burnt ends over a bowl of Skillet Mac and Cheese for next-level comfort food. The glaze mixes with the cheese sauce in the best possible way.
- Slider buns: Pile 3-4 cubes on a brioche slider bun with a spoonful of coleslaw for the best party food you've ever made.
- Cornbread: A warm wedge of Cornbread with Creamed Corn soaks up the sticky glaze and balances the richness.
- Loaded baked potatoes: Spoon the burnt ends and glaze over Dutch Oven Baked Potatoes for a smoky, over-the-top side.
- Sweet corn: Hot Honey Butter Skillet Corn or Steamed Corn on the Cob adds a fresh contrast to the rich pork.
- Smoky beans: Round out the cookout with a pot of Chuck Wagon Brisket and Beans.
- Pull-apart bread: Build sliders or mop up the glaze with Garlic Parmesan Pull Apart Bread.
- As a side to more BBQ: Burnt ends love company. Serve alongside Dutch Oven Ribs for a full cast iron BBQ spread.
Frequently Asked Questions
No. This recipe is designed specifically for a Dutch oven with no smoker required. The combination of a high-heat sear (which builds bark the way smoke and dry air do), smoked paprika in the dry rub, and a covered low-heat braise replicates every stage a smoker provides.
Skin-off pork belly is the gold standard. Its layered structure of fat and muscle closely mirrors the brisket point that traditional burnt ends are made from. The fat renders into rich gelatin during the long braise, creating that signature melt-in-your-mouth texture. Pork shoulder works as a leaner alternative but the result will be meatier and less unctuous.
Use a meat thermometer. You are looking for an internal temperature of 200-205°F. At this point the collagen has fully converted to gelatin and the cubes will be fork-tender. Time is a rough guide (2-2.5 hours of braising) but temperature is the only reliable indicator.
Yes, and they are arguably better made ahead. Complete the sear and covered braise the day before, then refrigerate the cubes in their braising liquid. The next day, skim any solidified fat from the top and run the final uncovered caramelization in the oven.
A Kansas City-style BBQ sauce (thick, tomato-based, with molasses) caramelizes best for this application. The high sugar content in molasses-based sauces creates a sticky, lacquered glaze when exposed to high heat. Thin, vinegar-forward sauces like Carolina style will work but do not create the same sticky exterior.
Store in an airtight container in the refrigerator for up to 4 days. To reheat, spread on a sheet pan and warm in a 350°F oven uncovered for 10-15 minutes to re-crisp the exterior. Frozen burnt ends keep for up to 3 months; thaw overnight in the fridge before reheating.
More Delicious Recipes


If you tried this Pork Belly Burnt Ends recipe, please leave a 🌟 star rating and let us know how it turned out in the 📝 comments below. Your feedback helps us and other home cooks who are looking for the same great recipes.
Get the Recipe
Pork Belly Burnt Ends
Equipment
- 5-6 quart cast iron Dutch oven
- Meat thermometer
Ingredients
Pork
- 3-4 lbs skin-off pork belly, cut into 1½-inch cubes
- 2 tablespoons neutral oil avocado or vegetable
Dry Rub
- 3 tablespoons brown sugar
- 2 tablespoons smoked paprika
- 1½ teaspoons kosher salt
- 1 teaspoon black pepper
- 1 teaspoon garlic powder
- ½ teaspoon onion powder
- 1 teaspoon chili powder
- ¼ teaspoon cayenne pepper
Braising Glaze
- ½ cup Kansas City-style BBQ sauce thick, tomato-based with molasses
- 3 tablespoons salted butter
- 3 tablespoons honey
- 1 tablespoon apple cider vinegar
- 1 teaspoon liquid smoke optional
Instructions
- Mix all dry rub ingredients in a small bowl. Place pork belly cubes in a large bowl and toss with the rub until every surface is fully coated. Rest at room temperature for at least 30 minutes, or place uncovered on a wire rack over a sheet pan in the fridge overnight for best results.
- Preheat oven to 275°F.
- Heat Dutch oven over medium-high heat. Add oil and heat until shimmering. Working in 2-3 batches, sear pork belly cubes on 2-3 sides until a deep mahogany crust forms, about 3-4 minutes per side. Do not crowd the pot. Transfer seared cubes to a plate.
- Drain excess rendered fat from the Dutch oven, leaving just a thin coating on the bottom.
- Return all seared cubes to the Dutch oven. Add BBQ sauce, butter, honey, apple cider vinegar, and liquid smoke (if using). Stir gently to coat every cube in the glaze.
- Cover the Dutch oven and transfer to the 275°F oven. Braise for 2 to 2½ hours, until internal temperature reaches 200-205°F and cubes are fork-tender. Check temperature at the 2-hour mark.
- Remove the lid. If liquid is excessive, drain until cubes are lightly coated. Increase oven temperature to 375°F. Bake uncovered for 15-20 minutes, stirring once halfway through, until the glaze is thick, sticky, and deeply caramelized.
- Remove from oven and rest 10 minutes before serving. The glaze will tighten as it cools slightly.
Video
Notes
- Sear in batches, never crowd the pot. Crowding drops the pan temperature and the meat steams instead of searing. Work in 2-3 batches with space between each cube.
- Get the Dutch oven hot before adding the pork. The cast iron should be very hot, hot enough that a drop of water evaporates immediately. A hot, quick sear builds a better crust than a slow, low one.
- Don't skip the fat drain. Significant fat renders out during the sear. Drain most of it before adding the braising liquid, or the glaze turns greasy instead of sticky.
- Target 200-205°F internal temperature. Below 195°F the collagen hasn't fully converted and the cubes are chewy. Above 210°F they start to fall apart. A probe thermometer is the only way to know for sure.
- Watch the finish closely. The uncovered caramelization can go from perfect to scorched fast, especially with honey in the glaze. Check at 10 minutes, stir, and give it the full 15-20 only if it needs to thicken.
- Rest before serving. Ten minutes out of the oven lets the glaze tighten and cling to the cubes instead of running off.
Nutrition
Dutch Oven Daddy is not a dietician or nutritionist, and any nutritional information shared is only an estimate. We recommend running the ingredients through an online nutritional calculator if you need to verify any information.
Leave a Reply