
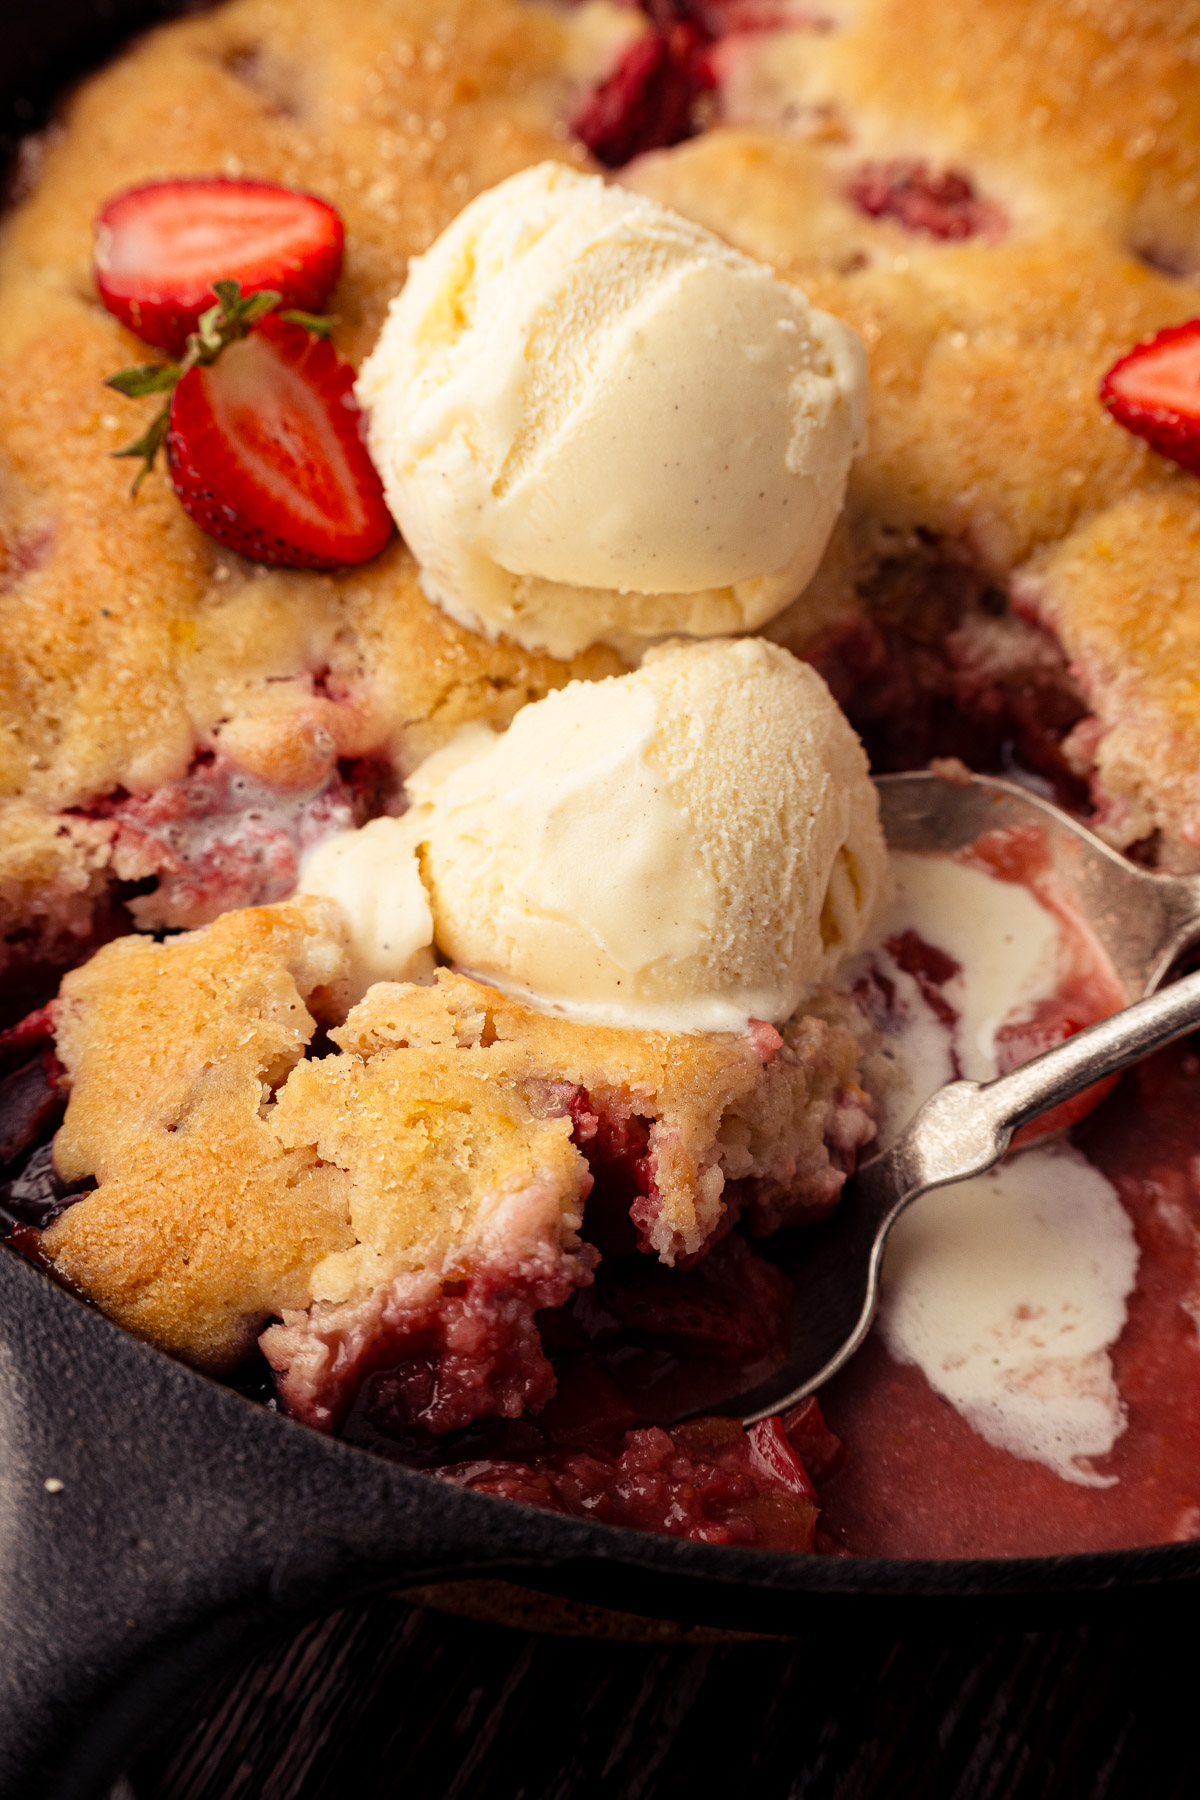
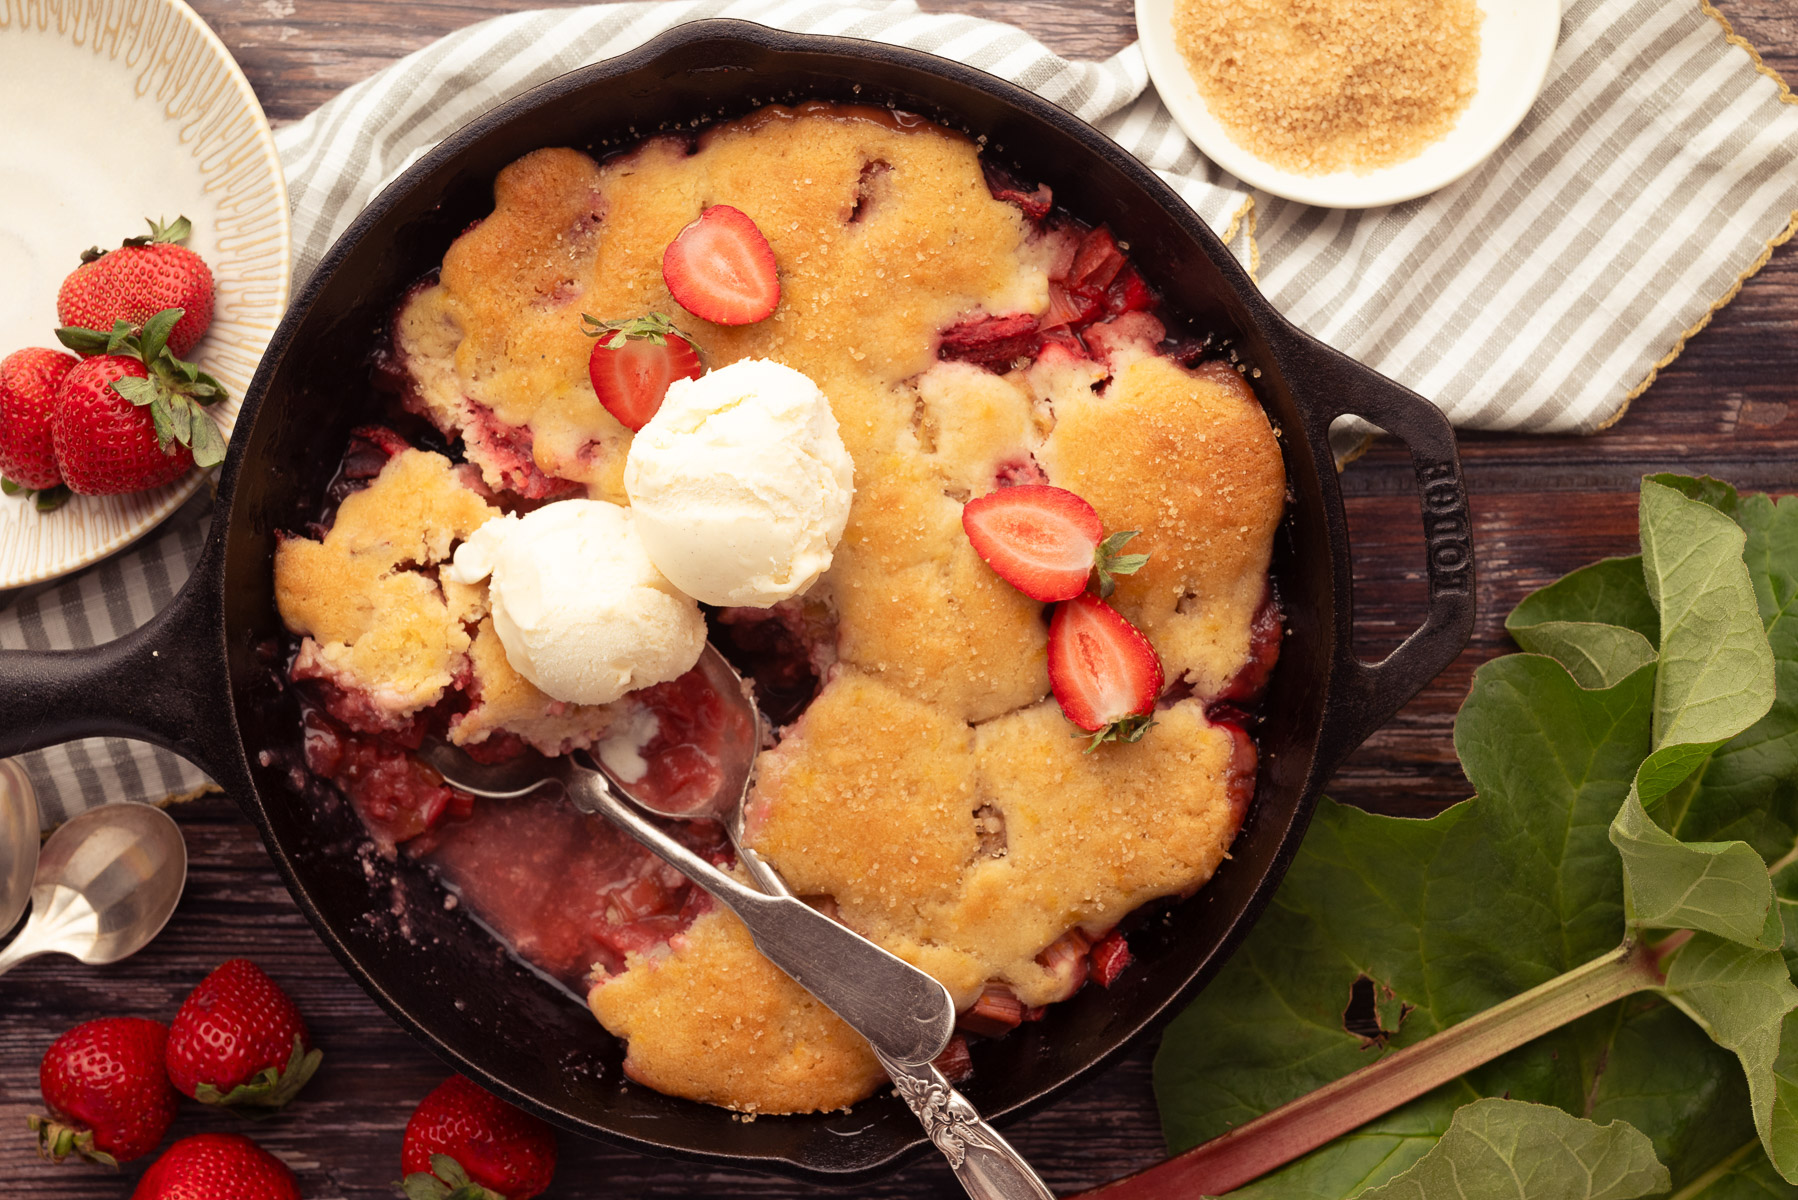
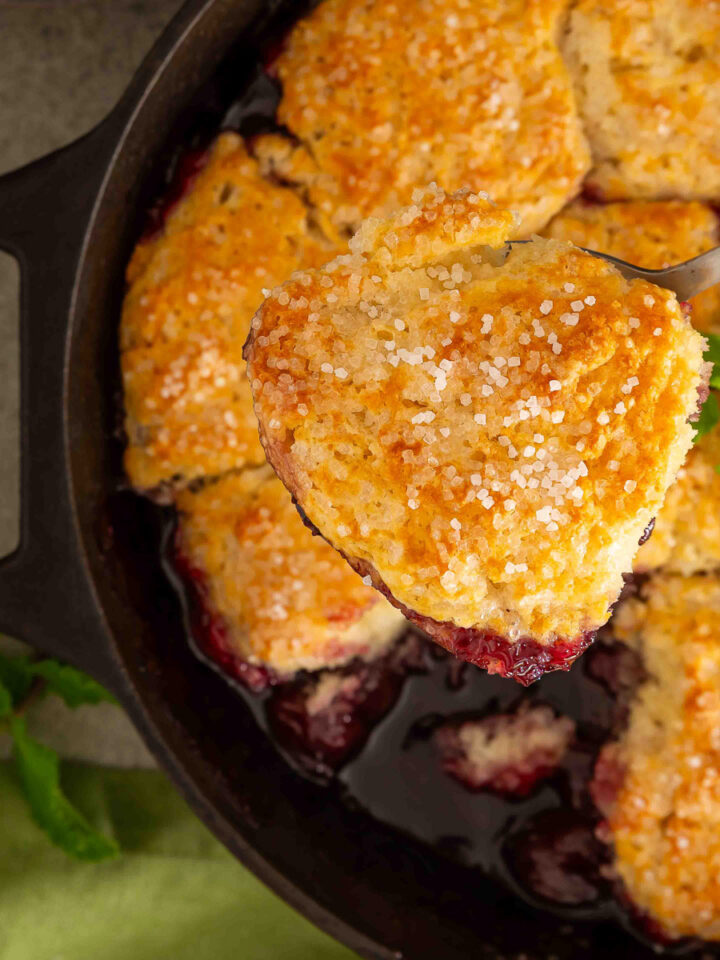
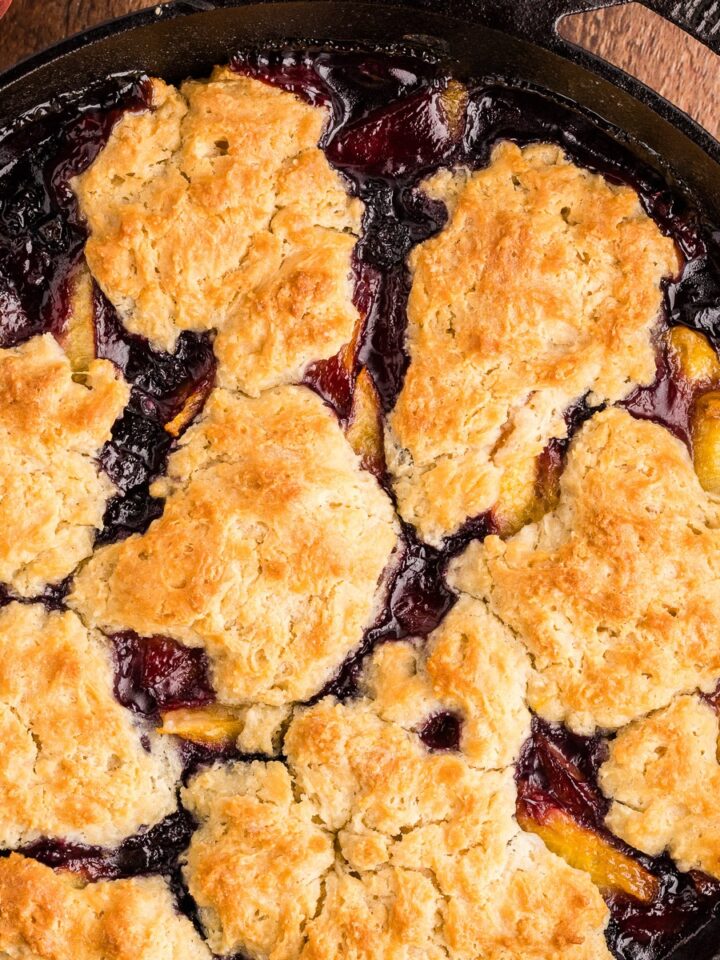
Skillet Strawberry Rhubarb Cobbler is what happens when sweet, ripe strawberries meet tart rhubarb under a golden, tender biscuit topping, all baked in cast iron. This is the kind of spring dessert that disappears before it has a chance to cool.
The cast iron skillet gives you something a glass baking dish never will: lightly crisp edges on the topping while the center stays soft and tender. The fruit filling bubbles up through the gaps in the batter, creating that classic cobbled look that gives this dessert its name. If you love cast iron desserts, you will also love my Dutch Oven Peach Cobbler and Southern Blackberry Cobbler with Pie Crust.
Quick Look at this Recipe
- ✅ Recipe Name: Skillet Strawberry Rhubarb Cobbler
- 🕒 Ready In: About 1 hour (20 min prep, 30-35 min cook)
- 👪 Serves: 6-8 people
- 🥣 Main Ingredients: strawberries, rhubarb, flour, butter, lemon zest
- 📖 Dietary Info: Vegetarian
- ⭐ Why You'll Love It: Sweet-tart fruit filling with a tender, golden biscuit topping baked in cast iron for crispy edges and easy serving.
Summarize and Save the Recipe
Jump to:
- Quick Look at this Recipe
- Why You'll Love Skillet Strawberry Rhubarb Cobbler
- What Makes This Strawberry Rhubarb Cobbler Different
- Ingredients and How to Make It
- Variations
- Expert Tips for the Best Strawberry Rhubarb Cobbler
- What to Serve with Strawberry Rhubarb Cobbler
- How to Store and Reheat Leftovers
- Cobbler vs. Crisp vs. Crumble
- Frequently Asked Questions
- More Delicious Recipes
- Get the Recipe
Why You'll Love Skillet Strawberry Rhubarb Cobbler
- Sweet-tart balance that just works. Strawberries bring natural sweetness while rhubarb cuts through with a bright, tangy bite. No one-note sugar bomb here.
- Cast iron does the heavy lifting. Even heat means the topping bakes golden and tender while the fruit bubbles underneath without scorching. You get lightly crisp edges you cannot get from a glass dish.
- One pan, no fuss. Everything bakes in the skillet and you serve right from it. Fewer dishes, better presentation.
- Spring and summer in every bite. This is peak seasonal eating: fresh strawberries, fresh rhubarb, lemon zest, and warm biscuit topping with a scoop of vanilla ice cream.
What Makes This Strawberry Rhubarb Cobbler Different
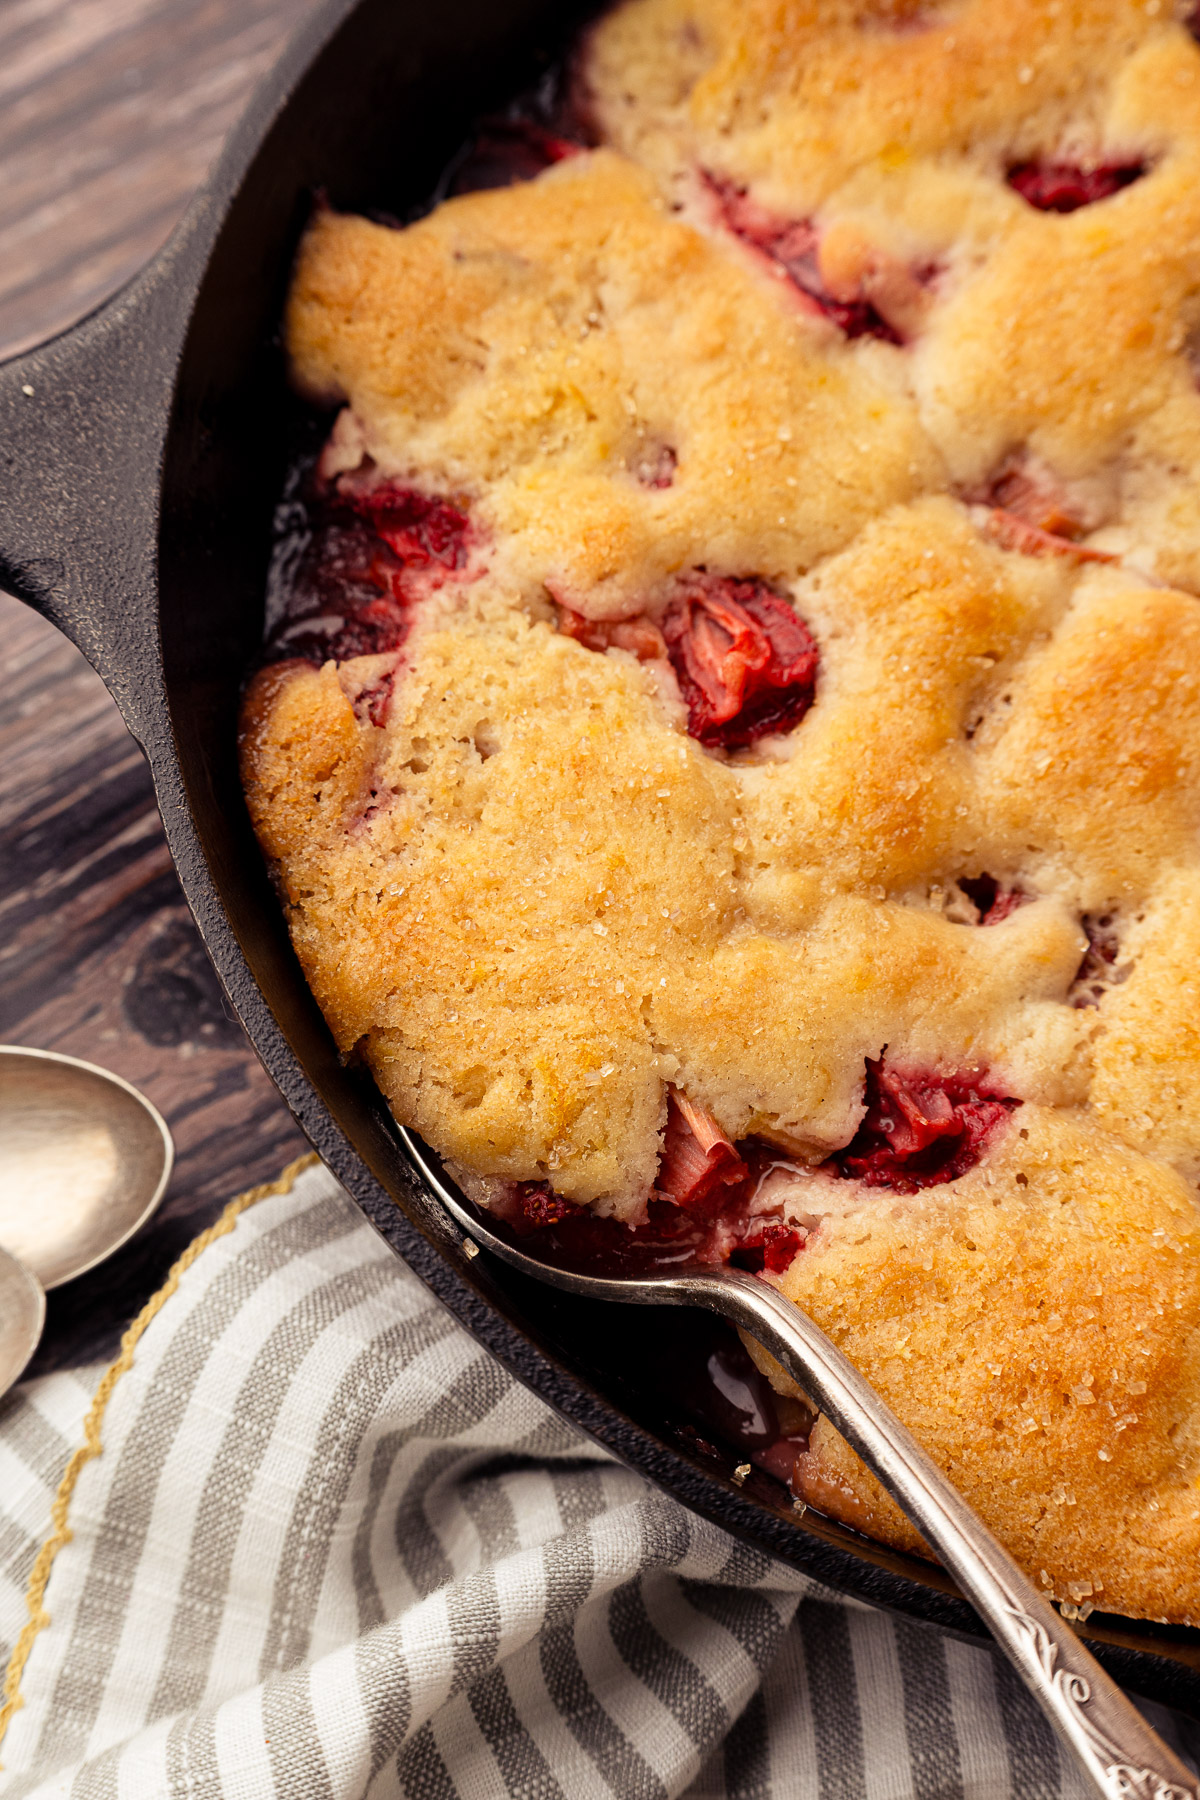
Most strawberry rhubarb cobbler recipes call for a standard baking dish. This one uses a cast iron skillet, and the difference is real. Cast iron retains heat more evenly than glass or ceramic, which means the fruit filling thickens properly while the topping bakes through. The edges of the topping get a light crispness from contact with the hot skillet walls, something you lose entirely in a 9x13 dish.
The topping here is a quick batter, not a pie crust and not a crumble. You dollop it over the fruit and it spreads as it bakes, creating pockets where the fruit bubbles through the surface. That cobbled look is the hallmark of a true rhubarb cobbler, and the turbinado sugar on top adds a subtle crunch that ties the whole thing together.
Ingredients and How to Make It

This strawberry rhubarb cobbler recipe has two components: a fruit filling and a batter topping. The filling is straightforward: fresh strawberries and rhubarb tossed with sugar, cornstarch, lemon juice, and lemon zest. The cornstarch is the key thickener here. It activates at bubbling temperature and creates a glossy, spoonable filling rather than a watery mess. If you prefer, arrowroot starch works as a 1:1 swap, or use 2 tablespoons of flour for a slightly more opaque result.
The topping is a quick batter, not a biscuit dough. No rolling, no cutting, no chilling. You whisk together the dry ingredients (flour, baking powder, baking soda, salt, lemon zest), mix the wet ingredients separately (milk, melted butter, sugar, vanilla), then stir them together just until combined. The lemon zest in the topping echoes the filling and adds a nice fragrance. I used a 10-inch cast iron skillet for this recipe. A 12-inch works too, but the fruit layer will be thinner and the topping will spread more.
For complete ingredient amounts and step-by-step instructions, see the recipe card below.

- Step 1: Season the fruit. Toss the strawberries and rhubarb with sugar, cornstarch, lemon juice, vanilla, lemon zest, and salt.
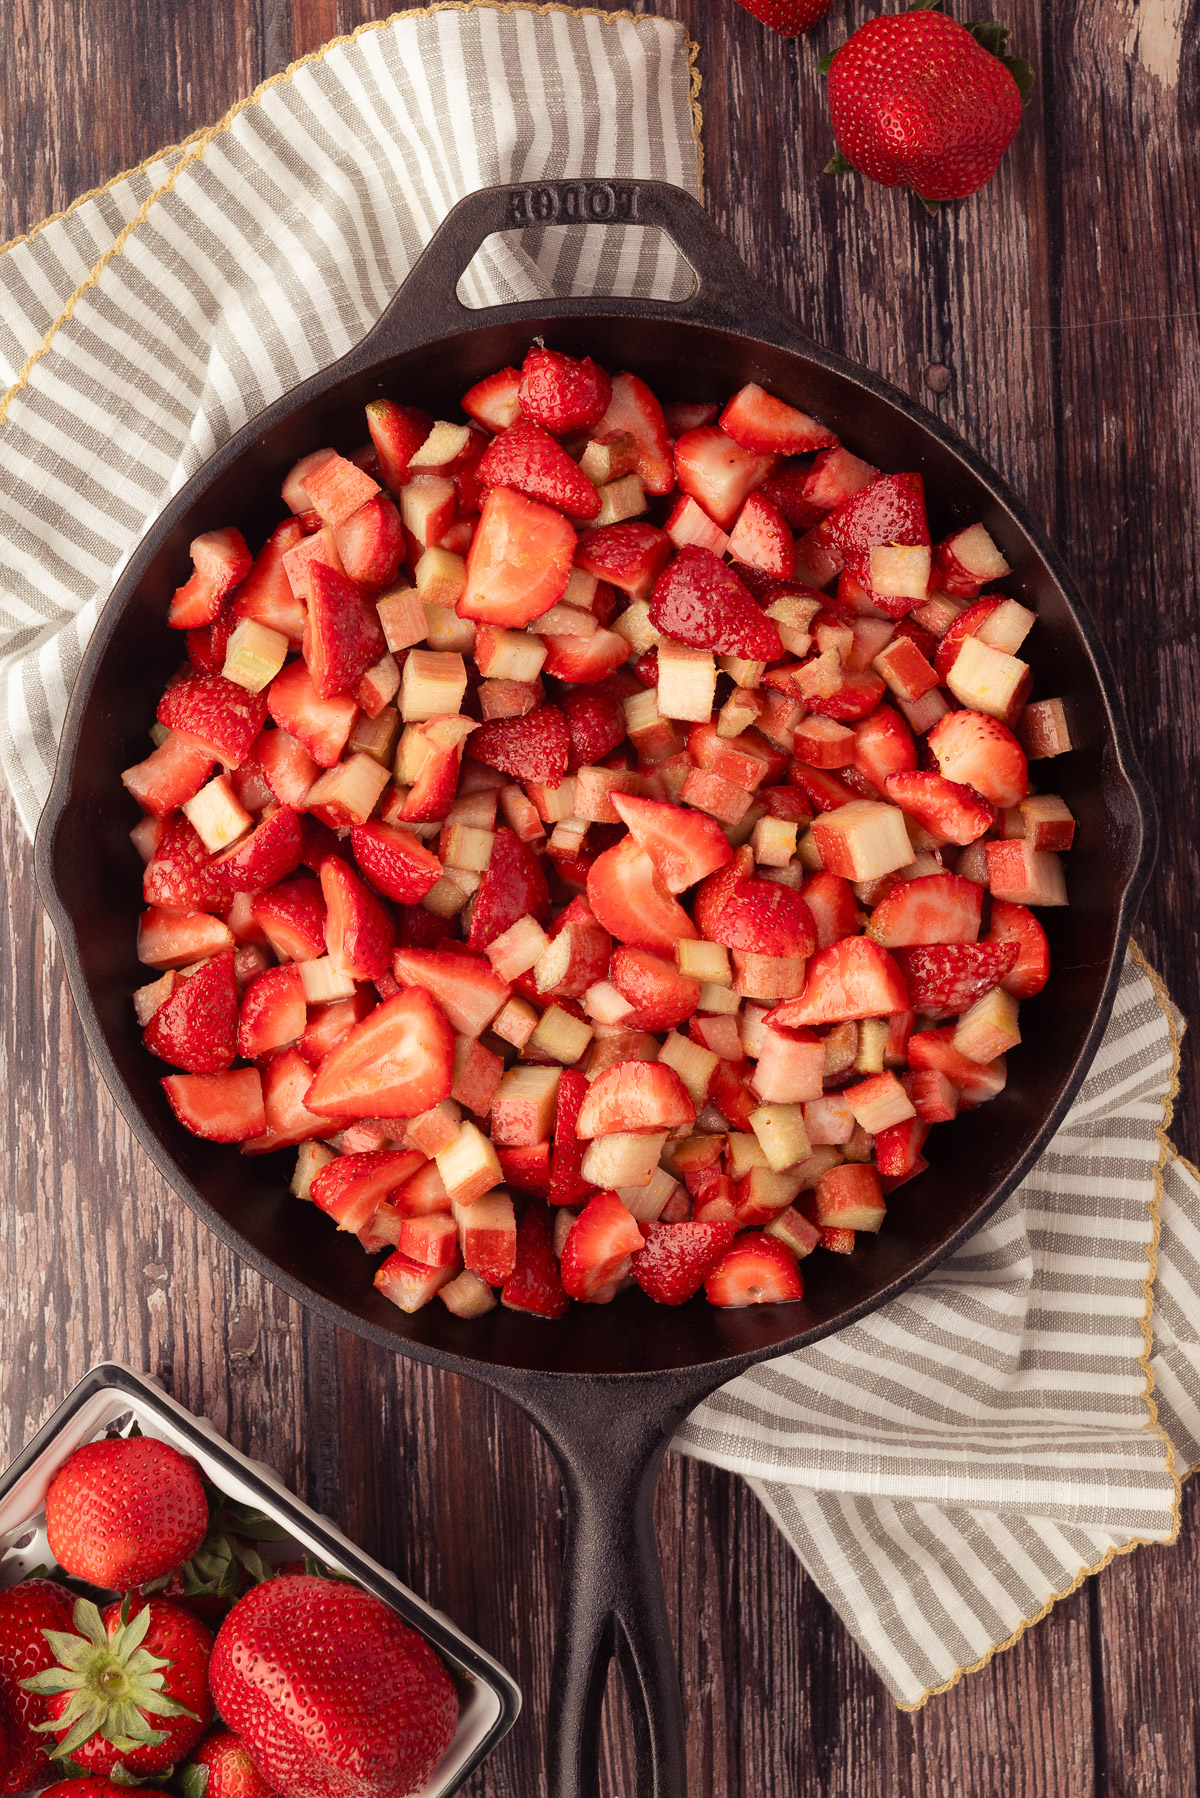
- Step 2: Fill the skillet. Transfer the fruit mixture to the cast iron skillet and spread into an even layer.
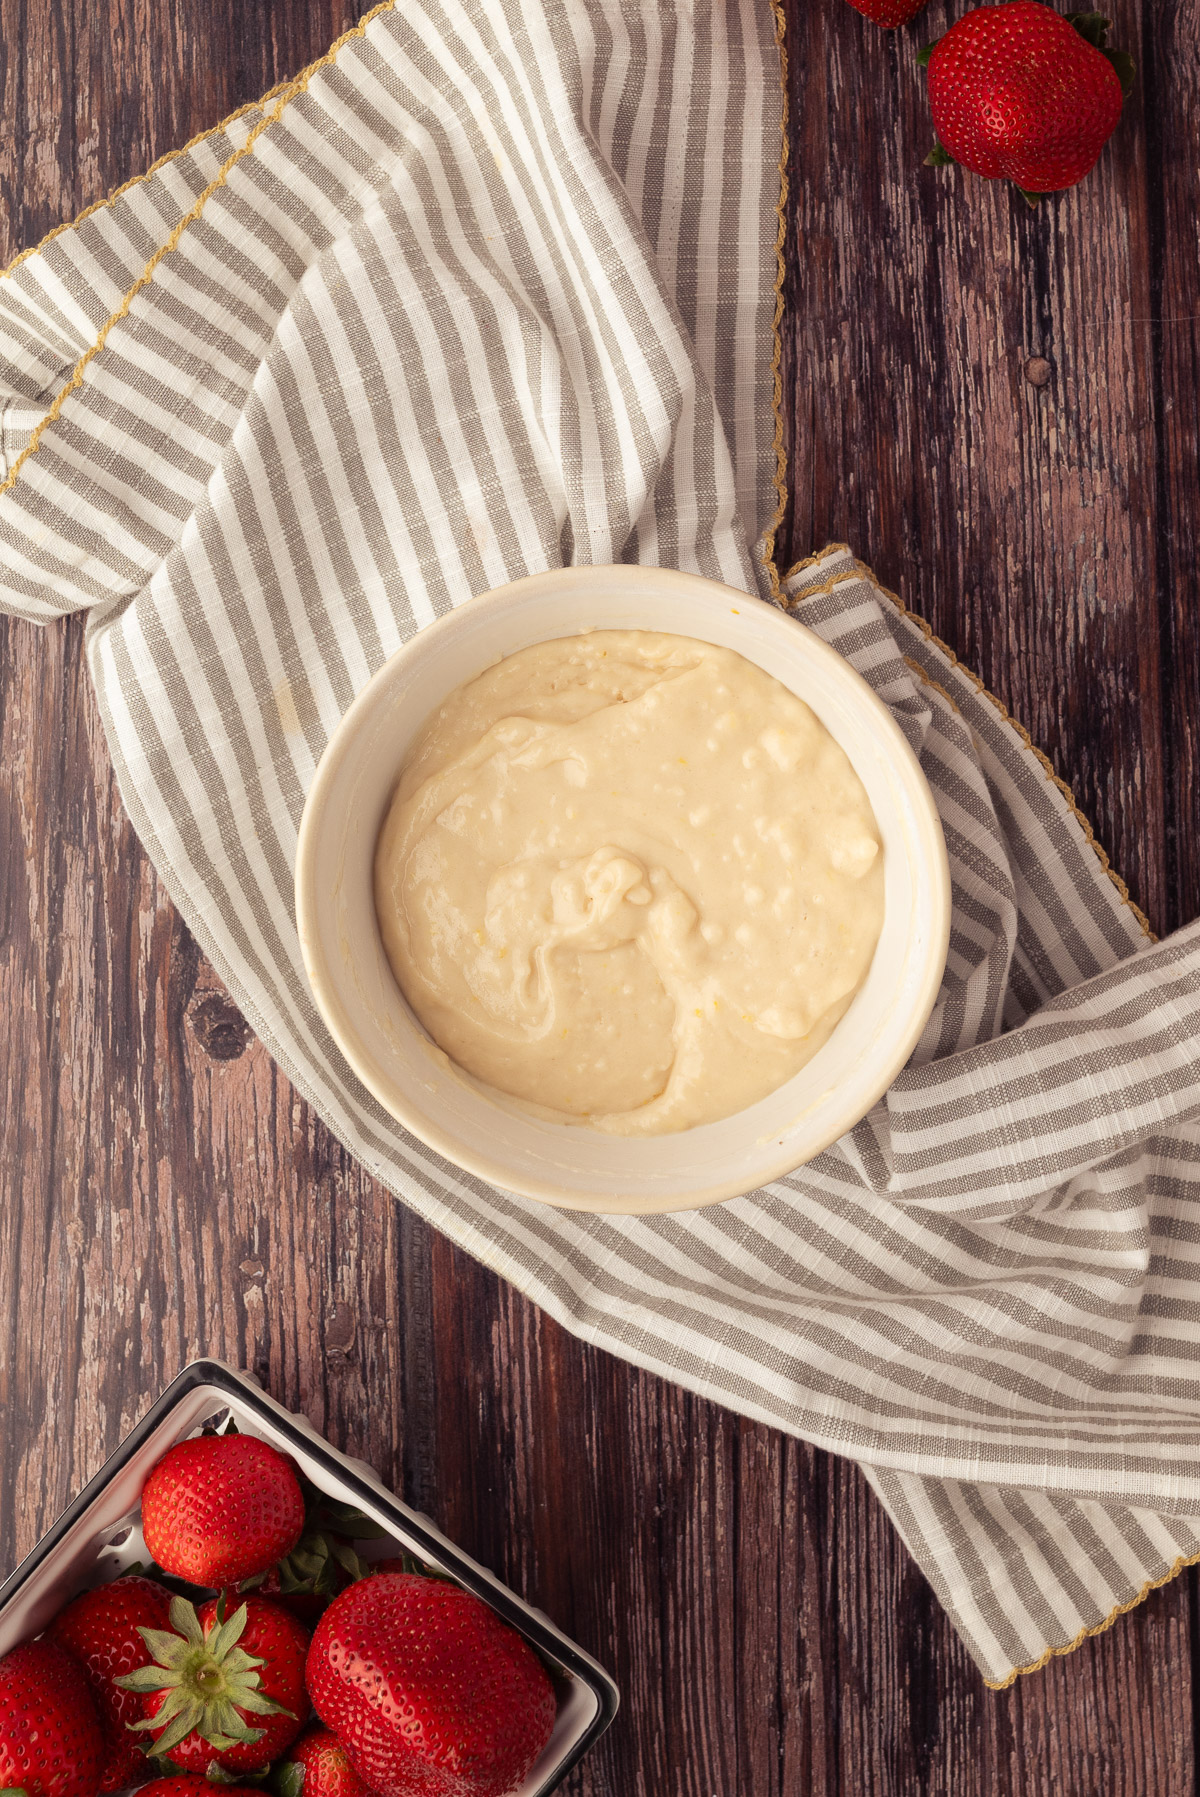
- Step 3: Mix the batter. Whisk the dry ingredients, mix the wet ingredients separately, then stir them together just until combined.
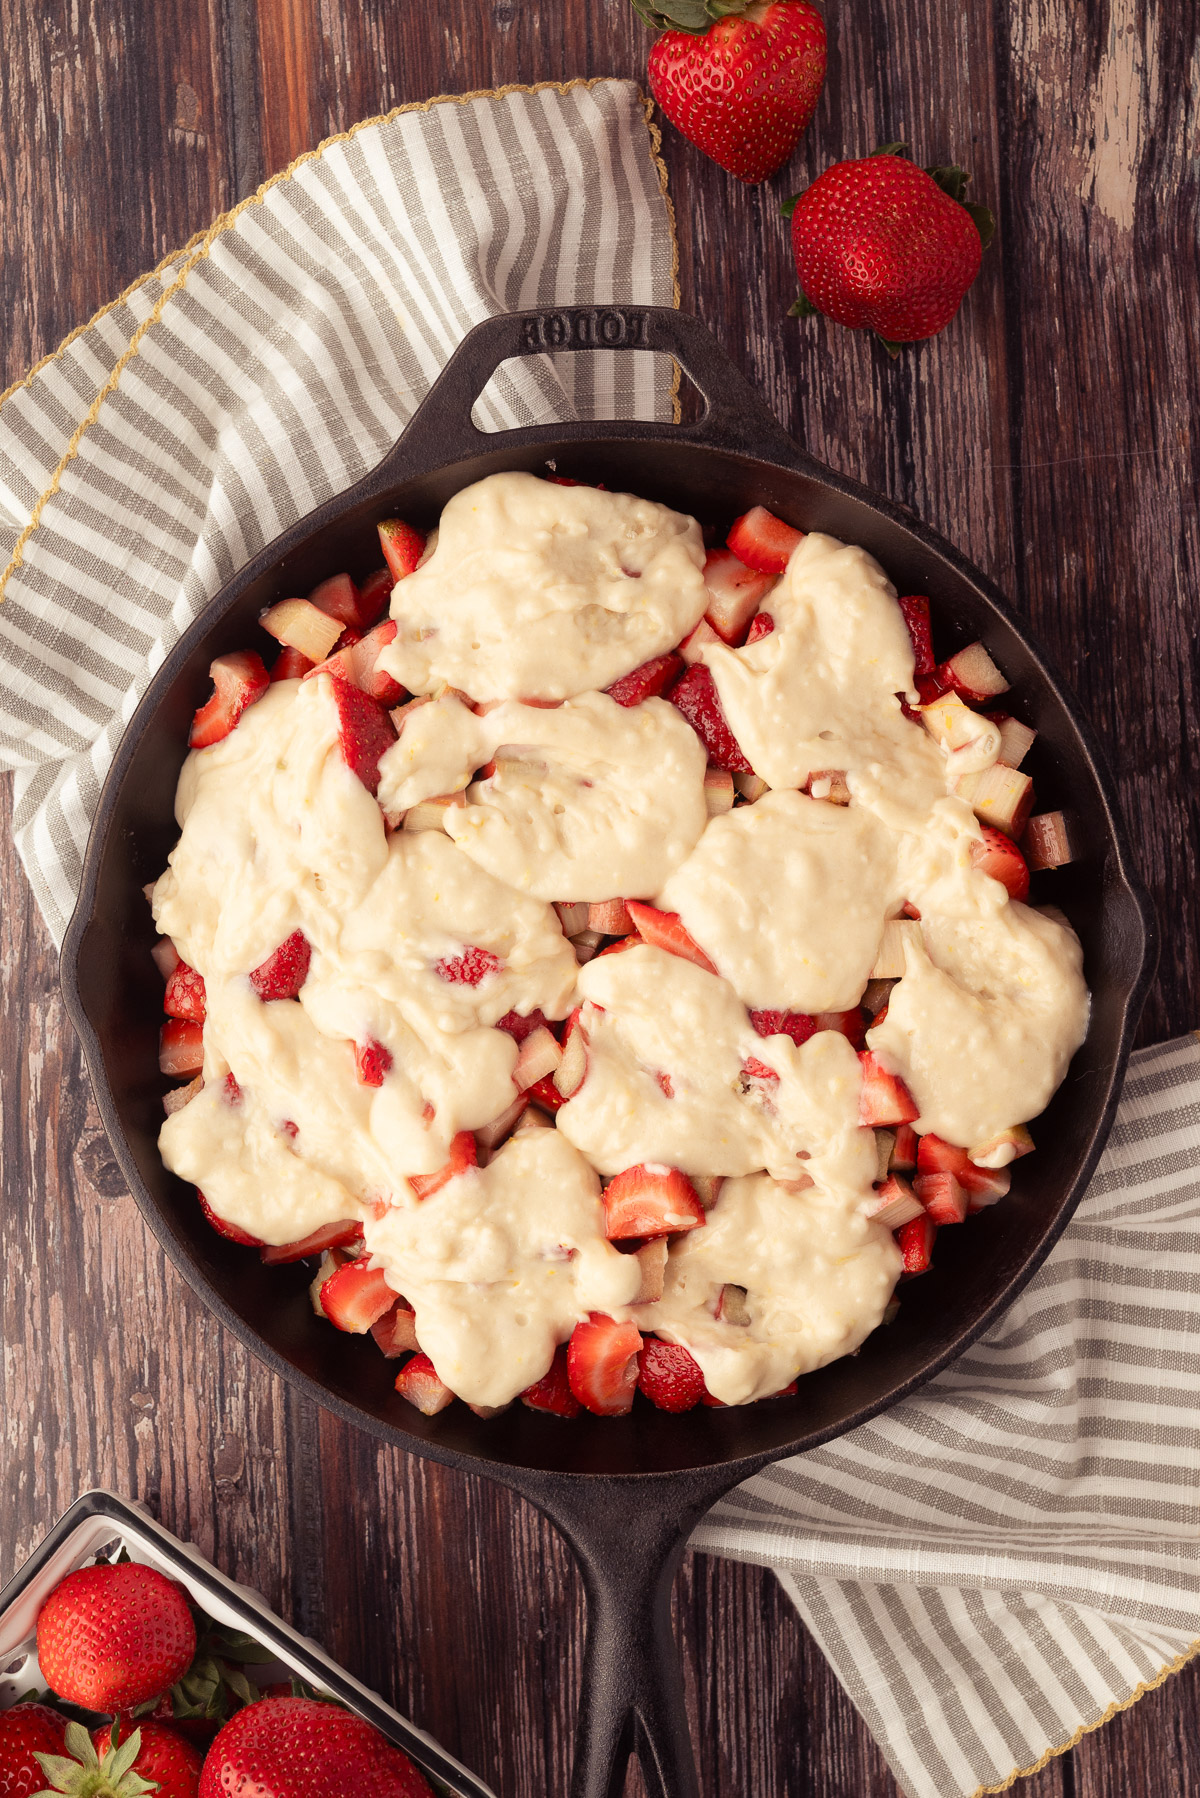
- Step 4: Dollop the batter. Spoon the batter over the fruit, leaving gaps so the fruit can bubble through. Sprinkle turbinado sugar on top.
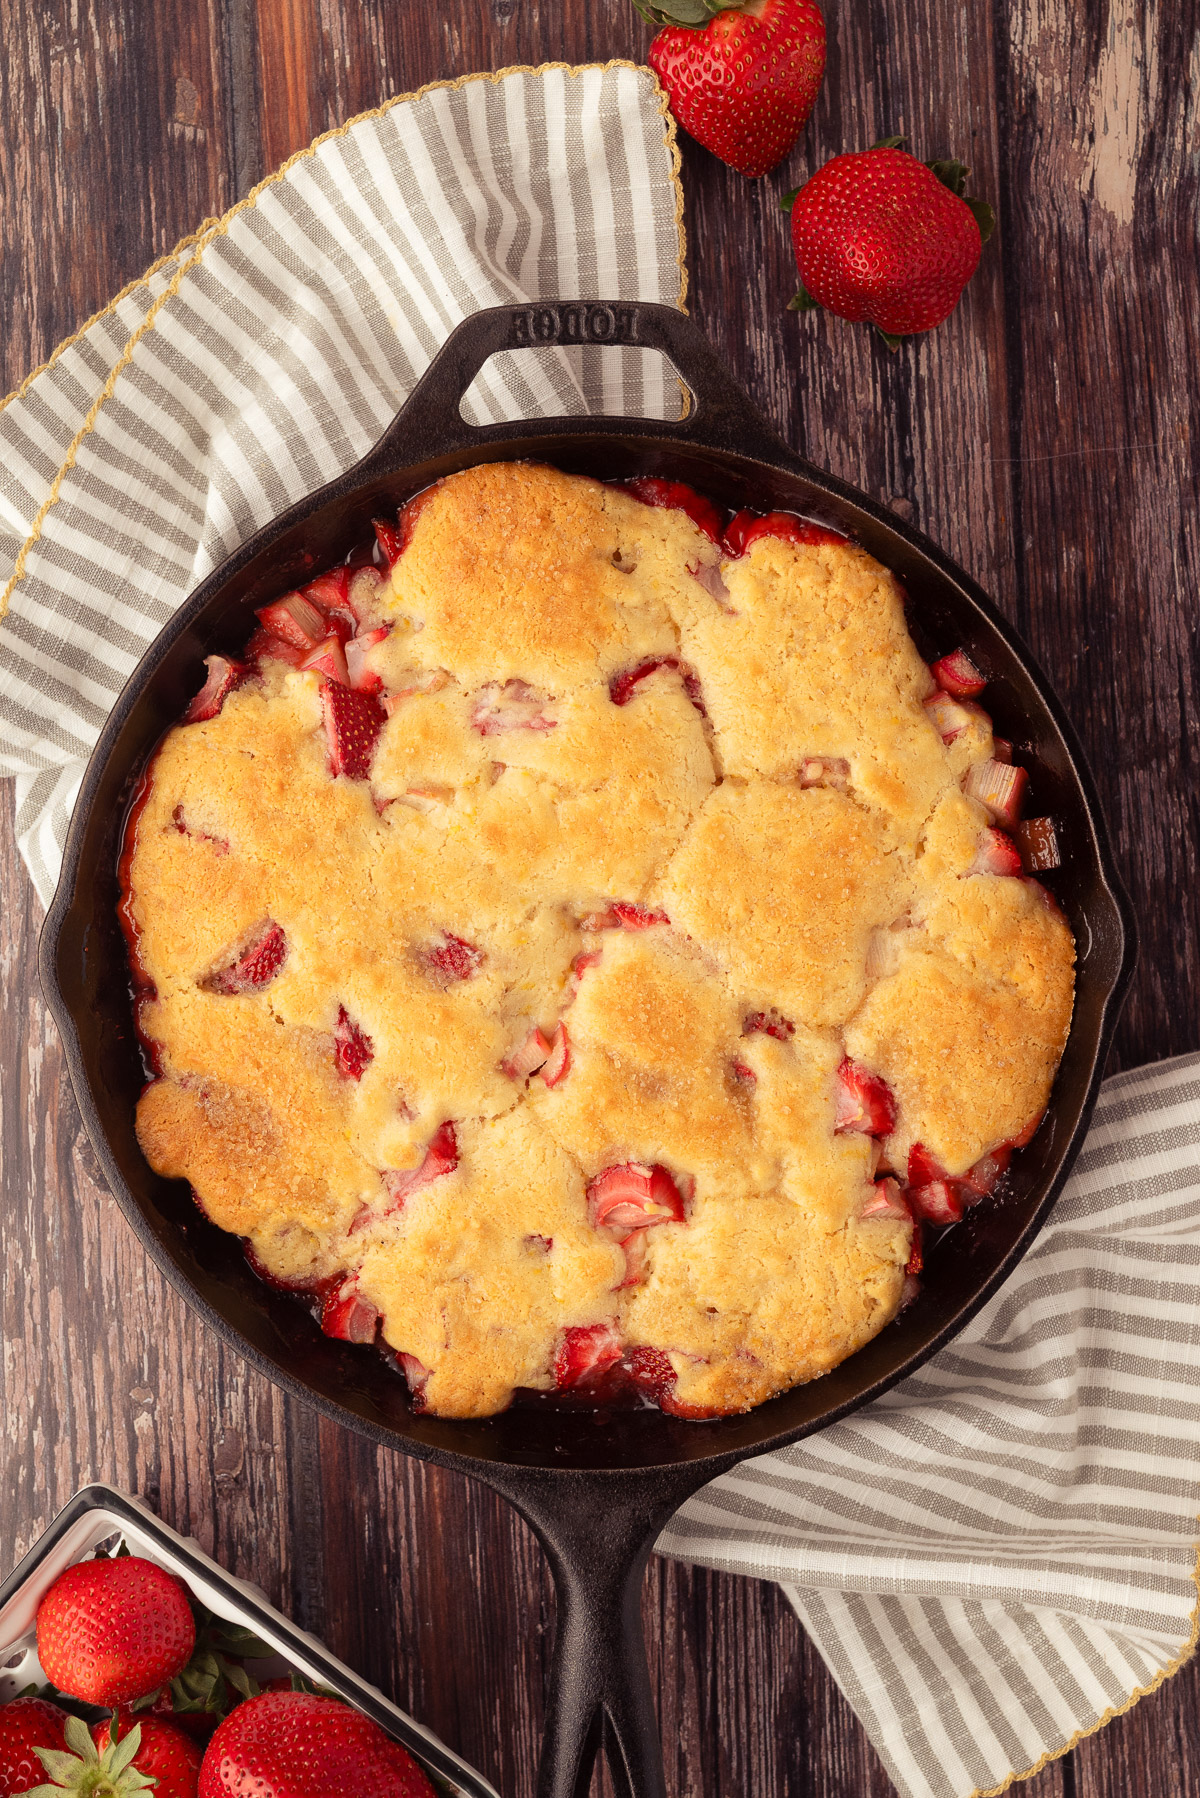
- Step 5: Bake until golden. Bake at 375°F for 30-35 minutes until the topping is golden brown and the fruit is bubbling around the edges.
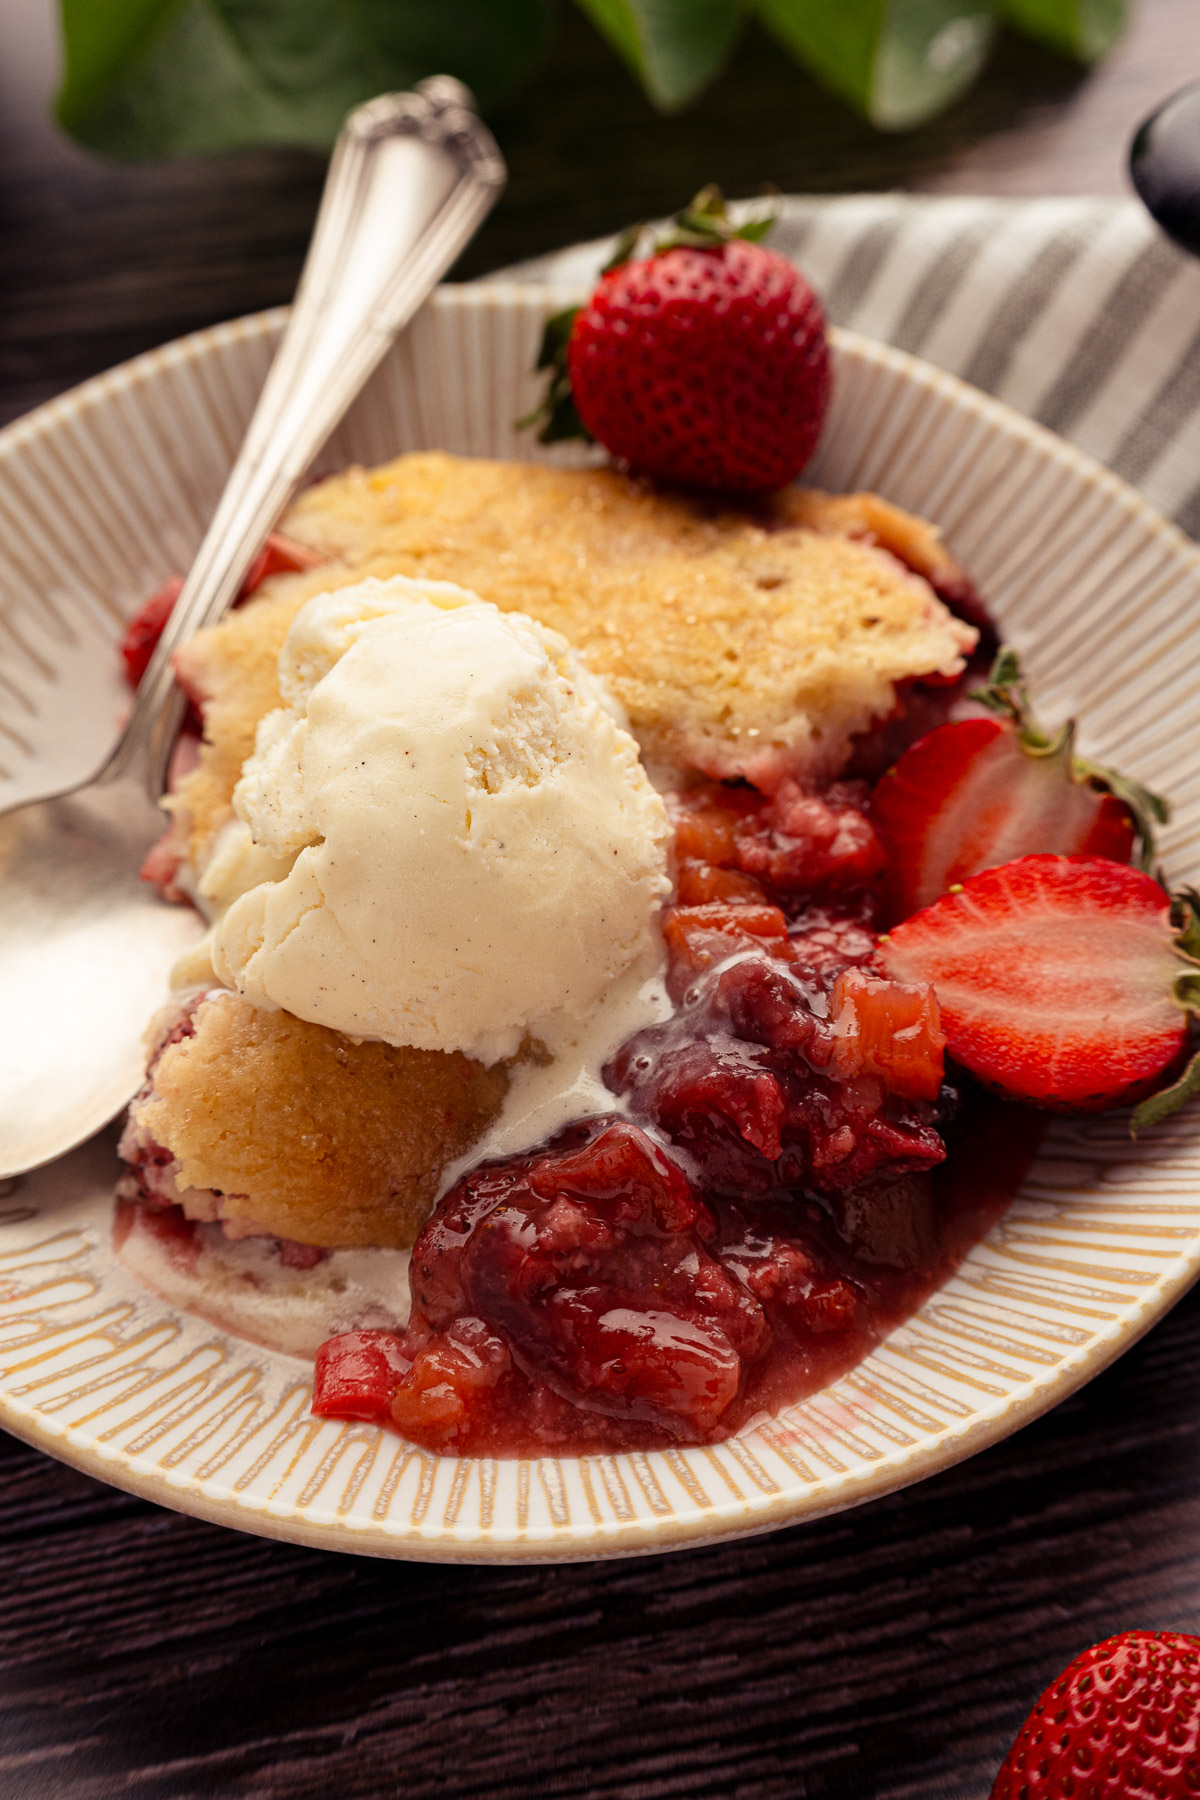
- Step 6: Rest and serve. Let cool 10-15 minutes, then serve warm with vanilla ice cream.
Variations
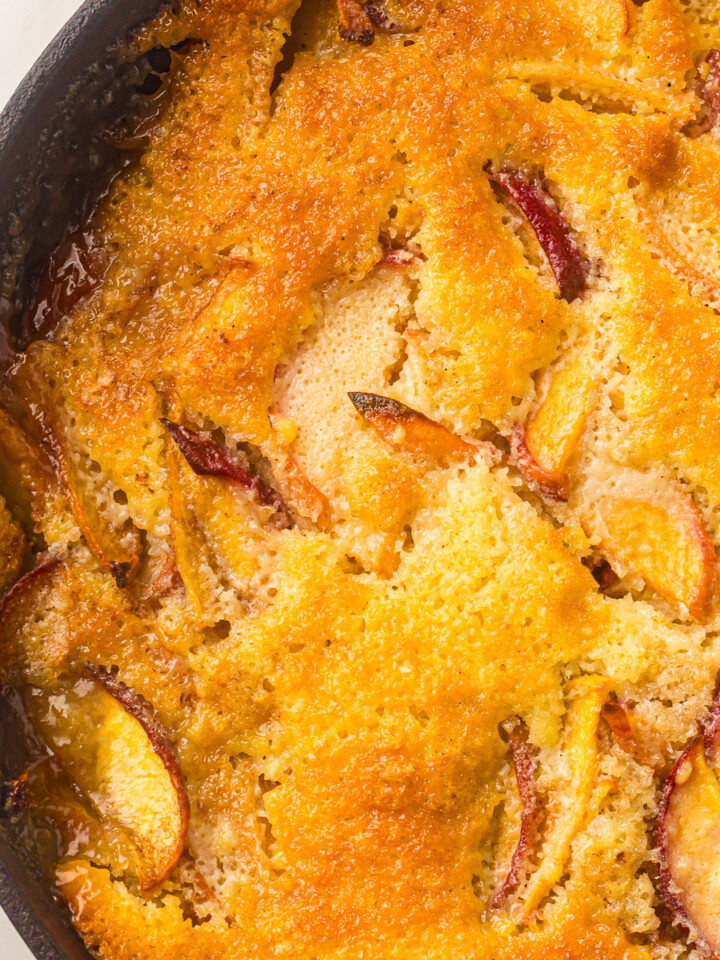
- Fruit swaps. Peaches, blueberries, blackberries, or mixed berries all work with this batter topping. When omitting rhubarb, reduce the sugar slightly and add a squeeze of lemon for tartness.
- Spice additions. Try ½ teaspoon cinnamon or a pinch of cardamom in the filling for warmth. Ginger works well if you want something a little more unexpected.
- Gluten-free. Swap the all-purpose flour 1:1 with a gluten-free blend that includes xanthan gum. The texture will be slightly different but still tender.
- Dairy-free. Use oat milk and melted coconut oil in place of milk and butter. The result is slightly less rich but still very good.
- Topping upgrade. Fold ¼ cup chopped pecans or sliced almonds into the batter for extra crunch.
- Camp oven version. This cobbler works beautifully in a camping Dutch oven over coals. Use a 10- or 12-inch camp oven with 8-10 coals underneath and 14-16 coals on the lid to approximate 375°F. Bake 30-35 minutes, rotating the oven and lid a quarter turn every 10-15 minutes for even heat. For more on coal placement and heat control, check out my guide on why you should stop using a Dutch oven temperature chart. If you enjoy cooking over coals, try my Camp Oven Peach Dump Cake next.
Expert Tips for the Best Strawberry Rhubarb Cobbler
- Don't overmix the batter. Overmixing develops gluten, which makes the topping dense and chewy instead of soft and tender. Stir until the dry ingredients are just incorporated. A few small lumps are perfectly fine and actually help create a better texture.
- Leave gaps in the topping. Dollop the batter in spoonfuls rather than spreading it edge to edge. The fruit bubbles up through the gaps as it bakes, which is the hallmark of a good cobbler. The topping will spread and fill in on its own.
- Use a baking sheet underneath. Fruit juices can bubble over, especially with juicy strawberries. A sheet pan catches drips and saves your oven from a sticky mess.
- Wait before you serve. 10-15 minutes of resting lets the cornstarch finish setting up. If you dig in immediately, the filling will be loose and runny. This is the single most common cause of watery cobbler.
- Watch the edges, not the center. The cobbler is done when the fruit is actively bubbling around the edges and the topping is golden brown. A toothpick in the center of the thickest biscuit section should come out clean.
- Adjust sugar to your rhubarb. Rhubarb tartness varies widely by season and variety. Taste a piece raw before mixing. If it makes you pucker hard, add 1-2 extra tablespoons of sugar to the filling.
What to Serve with Strawberry Rhubarb Cobbler
A scoop of vanilla ice cream is classic for a reason: the cold cream melts into the warm fruit and creates something better than either one alone. Fresh whipped cream with a touch of vanilla is another great option, or just a simple drizzle of heavy cream poured straight from the carton. This cobbler is also perfectly good on its own, still warm from the oven. It does not need embellishment to be satisfying.
How to Store and Reheat Leftovers
Cover and refrigerate leftovers for up to 4 days. The filling will continue to thicken as it sits, which is normal. Reheat in a 350°F oven for 15-20 minutes until warmed through. Microwave works for individual portions, but you will lose the crispy topping edges.
You can freeze baked cobbler in an airtight container for up to 2 months. Thaw overnight in the fridge, then reheat in the oven. You can also freeze the assembled but unbaked cobbler: cover the skillet tightly, freeze, then bake from frozen and add 15-20 minutes to the bake time. To get ahead without freezing, prep the fruit filling up to a day in advance and refrigerate it. Mix the batter fresh right before baking for the best texture.
Cobbler vs. Crisp vs. Crumble
A cobbler has a biscuit or batter topping dolloped over fruit. A crisp uses an oat-based streusel with butter. A crumble is similar to a crisp but typically without oats, just flour, butter, and sugar rubbed together. This recipe is a true cobbler: batter topping, no oats, no streusel. The name comes from the way the batter looks after baking, cobbled and uneven with fruit peeking through the surface.
Frequently Asked Questions
Yes. Use them straight from frozen without thawing. Increase the cornstarch by 1-2 teaspoons to account for the extra moisture, and expect a slightly longer bake time (add 5-10 minutes). The filling may look looser when you pull it from the oven but will thicken as the cobbler cools.
A 10-inch cast iron skillet is ideal. A 12-inch skillet works too, but the fruit layer will be thinner and the topping will spread more. If you don’t have cast iron, use a 9x9 or 8x8 baking dish and expect slightly softer edges without the crisp that cast iron provides.
Look for three signs: the topping is golden brown, the fruit filling is actively bubbling around the edges (not just in the center), and a toothpick inserted into the thickest part of the topping comes out clean or with a few tender crumbs. The bubbling at the edges is the key indicator that the cornstarch has activated and the filling will set properly.
The most common causes are underbaking or not letting it rest. The fruit filling needs to reach a full, active bubble so the cornstarch can do its job. Let the cobbler rest for at least 10-15 minutes after baking. The filling thickens significantly as it cools. Using very juicy, ripe strawberries or thawed frozen fruit without extra cornstarch can also cause excess liquid.
Yes. Use a 10- or 12-inch camp oven. Prepare the filling and batter the same way, then set the camp oven over 8-10 coals with 14-16 coals on the lid to reach roughly 375°F. Bake for 30-35 minutes, rotating the oven and lid a quarter turn every 10-15 minutes so the heat stays even. The cobbler is done when the topping is golden and the fruit is bubbling around the edges.
You can prep the fruit filling up to a day ahead and store it covered in the refrigerator. Mix the batter fresh right before baking for the best texture. You can also bake the cobbler a few hours in advance and reheat at 350°F for 15-20 minutes before serving.
Rhubarb provides the tart counterpoint to sweet strawberries, so if you leave it out, add a squeeze of lemon juice and reduce the sugar by 1-2 tablespoons. Peaches, blueberries, blackberries, and mixed berries all work well with this batter topping. For the best balance, pair a sweet fruit with a tart one.
More Delicious Recipes


If you tried this Skillet Strawberry Rhubarb Cobbler, please leave a 🌟 star rating and let me know how it turned out in the 📝 comments below. I read every single one!
Get the Recipe

Strawberry Rhubarb Cobbler
Equipment
- 1 10-inch cast iron skillet
- 1 Large mixing bowl
- 1 whisk
Ingredients
Fruit Filling
- 1 lb strawberries hulled and sliced
- 3 stalks rhubarb sliced ½ inch thick (about 2 cups)
- ½ cup cane sugar
- 1 tablespoon lemon juice
- 1 teaspoon vanilla extract
- 2 tablespoons cornstarch
- 1 teaspoon lemon zest from about half a lemon
- 1 pinch salt
Cobbler Topping
- 1 cup all-purpose flour
- ½ cup milk
- 4 tablespoons unsalted butter melted
- ⅓ cup cane sugar
- 1 teaspoon baking powder
- ¼ teaspoon baking soda
- 1 teaspoon vanilla extract
- 1 teaspoon lemon zest from about half a lemon
- ¼ teaspoon salt
- 1 tablespoon turbinado sugar for topping
Instructions
- Toss the sliced strawberries and rhubarb with sugar, cornstarch, lemon juice, vanilla extract, lemon zest, and salt in a large bowl. Stir gently until everything is evenly coated.
- Transfer the fruit mixture to a 10-inch cast iron skillet and spread into an even layer.
- In a large mixing bowl, whisk together the flour, sugar, baking powder, baking soda, salt, and lemon zest. In a separate bowl, stir together the melted butter, milk, vanilla extract, and remaining sugar. Pour the wet ingredients into the dry and stir just until combined. Do not overmix.
- Spoon the batter over the fruit in large dollops, leaving gaps so the fruit can bubble through during baking. Sprinkle turbinado sugar evenly over the top.
- Bake at 375°F for 30 to 35 minutes until the topping is golden brown and the fruit filling is bubbling around the edges.
- Remove from the oven and let cool for 10 to 15 minutes. Serve warm with a scoop of vanilla ice cream.
Notes
- Don't overmix the batter. Overmixing develops gluten, which makes the topping dense and chewy instead of soft and tender. Stir until the dry ingredients are just incorporated. A few small lumps are perfectly fine.
- Leave gaps in the topping. Dollop the batter in spoonfuls rather than spreading it edge to edge. The fruit bubbles up through the gaps as it bakes, which is the hallmark of a good cobbler.
- Use a baking sheet underneath. Fruit juices can bubble over, especially with juicy strawberries. A sheet pan catches drips and saves your oven from a sticky mess.
- Wait before you serve. 10-15 minutes of resting lets the cornstarch finish setting up. If you dig in immediately, the filling will be loose and runny.
- Watch the edges, not the center. The cobbler is done when the fruit is actively bubbling around the edges and the topping is golden brown. A toothpick in the center of the thickest biscuit section should come out clean.
- Adjust sugar to your rhubarb. Rhubarb tartness varies widely by season and variety. Taste a piece raw before mixing. If it makes you pucker hard, add 1-2 extra tablespoons of sugar to the filling.
Nutrition
Dutch Oven Daddy is not a dietician or nutritionist, and any nutritional information shared is only an estimate. We recommend running the ingredients through an online nutritional calculator if you need to verify any information.
Naomi says
So good! Perfect balance of sweet and tart. The cobbler topping was nice and light and moist. No dry biscuit topping here!
Edward says
What an amazing dessert! Thank you!