
How to season cast iron is one of those skills that sounds harder than it actually is. Three rounds of oil and heat in the oven, and you've got a nonstick, rust-proof workhorse that gets better every time you cook. This guide covers the full process: choosing the right oil, the step-by-step oven method, troubleshooting common problems, and the maintenance habits that keep your cast iron performing for decades.

Jump to:
- Quick Look at this Guide
- Why Seasoning Your Cast Iron Matters
- What is Cast Iron Seasoning?
- Best Oil for Seasoning Cast Iron
- What You'll Need
- How to Clean Cast Iron Before Seasoning
- How to Season Cast Iron in the Oven
- Signs You Need to Reseason Your Cast Iron
- Pro Tips for Maintaining Cast Iron Seasoning
- What to Cook First in a Freshly Seasoned Skillet
- Frequently Asked Questions
- Cast Iron Cooking Recipes to Try
Quick Look at this Guide
- ✅ What You'll Learn: How to season cast iron in the oven, step by step
- 🕒 Active Time: About 15 minutes hands-on
- ⏱️ Total Time: 3 to 4 hours (including oven time and cooling)
- 🛢️ Best Oil: BuzzyWaxx or grapeseed oil (high smoke point, durable finish)
- 🔧 You'll Need: Cast iron skillet, oil, paper towels, oven, baking sheet
Why Seasoning Your Cast Iron Matters
- Prevents Rust and Extends Life: Seasoning creates a barrier between the raw iron and moisture. Without it, cast iron rusts quickly. With it, your skillet can last generations.
- Builds a Nonstick Surface: A properly seasoned pan releases food cleanly and makes cleanup simple. No special coatings required.
- Improves Flavor Over Time: Each time you cook with oil or fat, you add another thin layer of seasoning. Over months and years, those layers build a cooking surface that adds subtle depth to everything you make.
What is Cast Iron Seasoning?
Cast iron seasoning is a thin layer of oil that has been baked onto the metal surface through a process called polymerization. When you heat oil past its smoke point on cast iron, the fatty acid molecules break apart, oxidize, and then rebond to each other and to the iron itself. The result is a hard, slick coating that protects the metal and gives you a natural nonstick finish.
Here is why this matters for choosing the right oil: unsaturated fats (like those in grapeseed and canola oil) are more chemically reactive than saturated fats (like coconut oil or lard). That reactivity means they break down and rebond more readily at high heat, creating a stronger, more durable polymerized layer. Saturated fats can work, but they polymerize less efficiently and may leave a softer coating.
This also explains why thin coats beat thick ones. A thick layer of oil cannot polymerize all the way through. The outer surface hardens while the inner layer stays soft and sticky. Thin coats polymerize completely, and stacking three or more of those fully hardened layers gives you a strong, smooth finish that only gets better with use.
Best Oil for Seasoning Cast Iron
I have tested many oils across hundreds of skillets, both for personal use and while developing BuzzyWaxx. The key factor is a high smoke point (400°F or above) combined with a high percentage of unsaturated fat for effective polymerization. Here are my top picks, ranked:
- BuzzyWaxx (Top Pick): A blend of high smoke point oils and beeswax that creates a durable, polymerized layer and leaves a beautiful sheen. The beeswax component adds an extra protective barrier that pure oils alone do not provide. Smoke point: 450°F+.
- Grapeseed Oil (Best Grocery Store Option): High in polyunsaturated fats, which makes it excellent for polymerization. Neutral flavor, affordable, and versatile enough to use for everyday cooking too. Smoke point: 420°F.
- Canola Oil (Budget Pick): Widely available, inexpensive, and produces a solid seasoning layer. A reliable choice if you want something you probably already have in the pantry. Smoke point: 400°F.
- Crisco Shortening (Traditional Pick): The classic choice that generations of cast iron cooks swear by. Does not impart any flavor and creates a durable finish. Smoke point: 490°F.
Avoid butter, unrefined coconut oil, and extra virgin olive oil for seasoning. Their low smoke points mean they will burn before polymerizing properly.
Disclosure: I am a part owner in BuzzyWaxx, a company that offers cast iron seasoning and care products. While I have shared my personal experiences with BuzzyWaxx, I encourage you to explore all options to find the one that best suits your cooking and maintenance needs.

What You'll Need
- Cast Iron Skillet: New or used. If your pan has old, damaged seasoning, you will want to strip it back to bare metal first (see the cleaning section below).
- High Smoke Point Oil: BuzzyWaxx, grapeseed oil, canola oil, or Crisco. Choose the one that fits your budget and preference.
- Paper Towels or Clean Cloths: For applying oil in a thin, even coat and wiping away the excess.
- Oven Mitts and Baking Sheet: The skillet gets hot. The baking sheet catches any oil drips.
How to Clean Cast Iron Before Seasoning
- New or Lightly Used Skillet: Wash with warm soapy water, rinse, and dry completely. That is all you need before seasoning.
- Rusty or Heavily Used Skillet: Soak in equal parts white vinegar and water for 30 minutes, then scrub with a non-scratch pad or steel wool to remove old seasoning and rust. Rinse thoroughly and dry completely. For stubborn buildup, try the Oven Cleaner Method or build an E Tank for Cast Iron Restoration.
- After Cooking (Daily Maintenance): While the pan is still warm, scrub away food residue with a non-abrasive sponge under hot water. Dry immediately with a paper towel, then apply a thin coat of oil before storing.
Note: Avoid soaking cast iron in water, as this can damage the seasoning. Using soap is perfectly fine since modern dish soap no longer contains lye.
How to Season Cast Iron in the Oven
Learning how to season cast iron in the oven is a three-step process that you will repeat three times for the best results. Start with a clean, dry skillet and preheat your oven to 250°F.
- Step 1: Warm the Skillet. Place the skillet in the 250°F oven for 20 minutes. This opens the pores of the metal and evaporates any remaining moisture. After 20 minutes, remove the skillet (use oven mitts) and increase the oven temperature to 475 to 500°F.

- Step 2: Apply Oil and Wipe Until Dry. Using a paper towel or clean cloth, spread a thin layer of oil (or BuzzyWaxx) over the entire skillet, inside and out. Then take a clean towel and wipe off the excess. Keep wiping until the pan looks completely dry. Then wipe it one more time. This step is critical: if any visible oil remains, the seasoning will turn sticky instead of smooth.
Note: If using BuzzyWaxx in the metal can, rub a small amount onto a rag using a circular motion, then wipe the cast iron as described above.

- Step 3: Bake for 1 Hour. Place the skillet upside down in the 475 to 500°F oven with a baking sheet on the rack below to catch any drips. Bake for 1 hour. The high heat triggers polymerization, bonding the oil to the metal. After an hour, let the pan cool enough to handle.
Repeat steps 2 and 3 two more times. Three thin, fully polymerized coats build a much stronger base than one thick coat. Once complete, your cast iron is seasoned and ready to cook.

You can also season on the stovetop over medium-high heat, but oven seasoning gives more even coverage across the entire pan. I recommend the oven method for the best results.
Signs You Need to Reseason Your Cast Iron
Cast iron seasoning is durable, but it does wear down over time. Here is how to tell when it is time for a full oven reseasoning:
- Dull, Matte Patches: If you notice areas that used to be dark and shiny but now look dry or grayish, the seasoning in those spots has worn thin.
- Food Sticking Where It Did Not Before: When eggs or meat start grabbing in spots that used to release cleanly, the seasoning layer has eroded.
- Visible Rust Spots: Light orange or brown discoloration means moisture has reached the bare iron. Scrub the rust away with steel wool, then reseason immediately.
- Seasoning Flaking Off: If you see black chips or flakes coming off the surface, the old seasoning layer was not properly bonded. Strip it and start fresh.
A full oven reseasoning is typically needed only a few times a year. Between those sessions, regular cooking with oil builds and maintains the seasoning naturally.
Pro Tips for Maintaining Cast Iron Seasoning
- Thin Oil Layers Only: Too much oil leads to a sticky, tacky surface because the excess cannot fully polymerize. Wipe until the pan looks dry.
- Full Bake Time: Keep the pan in the oven for the full hour. Cutting it short means incomplete polymerization, which leads to sticking and faster wear.
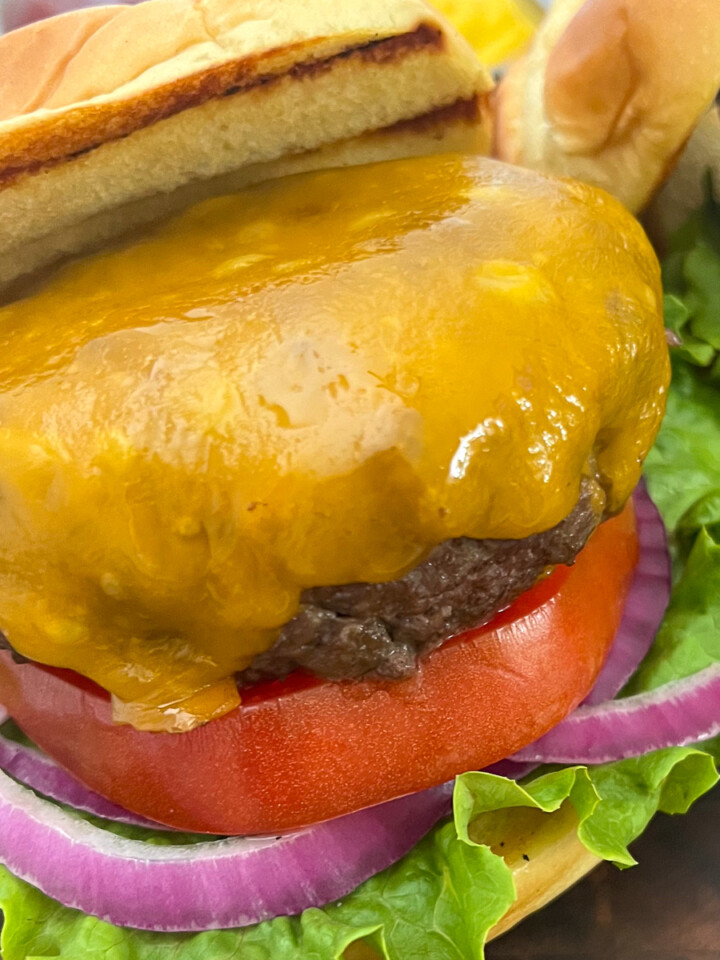
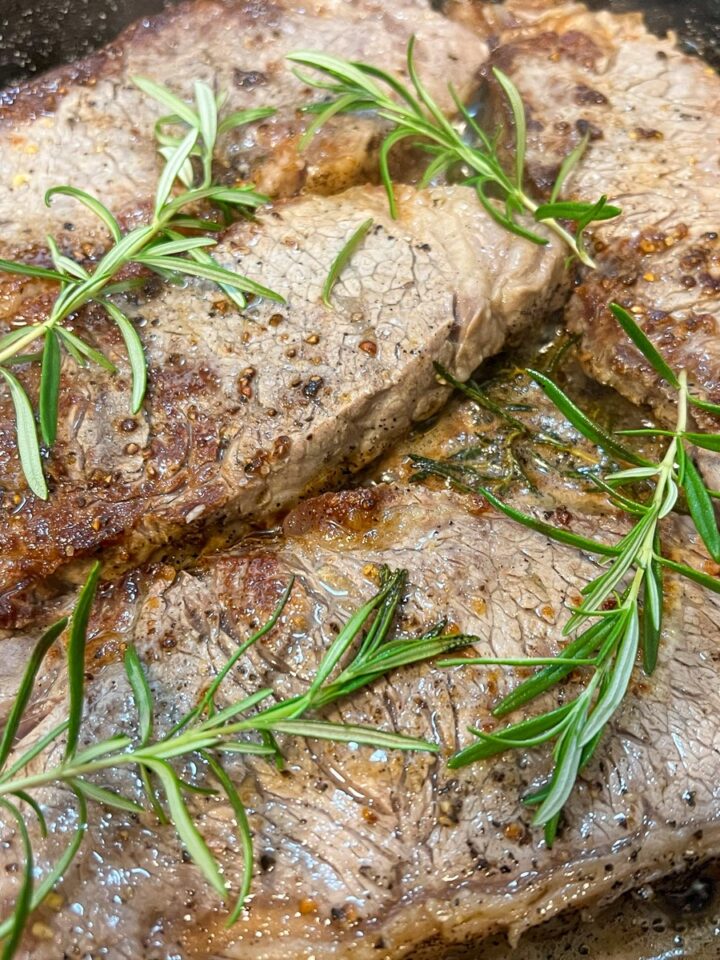
- Cook Fatty Foods First: Your first 5 to 10 cooks should be oil-heavy: bacon, fried chicken, cast iron burgers, or cast iron steak. These naturally build seasoning with every use.
- Avoid Acidic Foods Early: Tomato sauces, citrus, and vinegar-based dishes can strip new seasoning. Wait until you have built several layers before cooking acidic recipes.
- Heat Before You Store: After washing, heat the skillet on the stovetop for 2 minutes to evaporate any remaining moisture. Apply a thin coat of oil, then store in a dry place.
- Separate When Stacking: If you stack cast iron with other cookware, place a paper towel between pieces to prevent scratches on the seasoning.
What to Cook First in a Freshly Seasoned Skillet
The best first meals for a freshly seasoned skillet are simple, oil-heavy dishes that reinforce the seasoning rather than challenge it. Avoid anything acidic or heavily sauced until you have a few cooks under your belt. Here are a few of my favorites for breaking in a fresh pan:

Frequently Asked Questions
A full oven seasoning is only needed a few times a year, or whenever food starts sticking or dull spots appear. Day to day, cooking with oil builds seasoning naturally. If the surface looks dry or patchy, it is time for a round in the oven.
Yes. Modern dish soap does not contain lye, so it will not damage your seasoning. Wash with warm soapy water, dry immediately, and apply a thin coat of oil before storing. The old advice to avoid soap comes from a time when soap formulas were much harsher.
A sticky surface means too much oil was left on the pan before baking. The excess did not fully polymerize. To fix it, place the skillet upside down in a 475 to 500°F oven for one hour to finish the process. Next time, wipe the oil until the pan looks completely dry before baking.
Flaking usually happens when the oil had a low smoke point, the oven temperature was not hot enough, or the oil layer was too thick. Strip the flaking area with a scrub pad, then reseason from scratch using a high smoke point oil like grapeseed oil or BuzzyWaxx.
Not as long as each coat is thin. Thick coats of oil create problems like stickiness and flaking, but many thin layers of properly polymerized oil only make the surface smoother and more nonstick over time.
Oils with a high smoke point (above 400°F) work best because they polymerize more completely. Grapeseed oil, canola oil, and BuzzyWaxx (a blend of high smoke point oils and beeswax) are all excellent choices. Avoid butter, unrefined coconut oil, and olive oil for seasoning.
Yes. New seasoning starts as a light brown or bronze color and gradually darkens to a deep black with use. This darkening is called patina, and it means the seasoning is building properly. Uneven color in the early stages is completely normal and fills in over time.
Cast Iron Cooking Recipes to Try
Now that you know how to season cast iron, put that freshly seasoned skillet to work with some of my most popular cast iron recipes:


Aaron J McClaire says
Can you do all the seasoning on a gas grill?
Ned Adams says
Hi Aaron! Yes, that is a great question. You can absolutely use a gas grill. Just make sure it doesn't get too hot. You may need to adjust the time because of that.
D says
A great product for cast iron seasoning!!!
Ali says
I have a cast iron skillet that is just sitting around because I don't know how to season it. I'm saving this post, you have motivated me to finally season the pan!
Julie says
I haya few cast iron pomans so I absolutely love the advice given here, especially on the best oils to use.
Lima Ekram says
A great and useful guide! I certainly got some good tips today!
Suja md says
This looks amazing and such a treat! Thank you!
MJ says
Love my cast iron pans, and this is a helpful guide! Thanks!
Sigmund Labhart says
How long of time do you leave in oven in step 3
Ned Adams says
Great question. It will be in the oven upside down for one hour. Hope that helps clarify?
Sheila Copeland says
I need more cast iron in a dutch oven and some wax. Please take me when you have sales I do not want to miss them
Ned Adams says
I hope you find the Dutch ovens that you want! Good luck with the hunt! BuzzyWaxx has sales from time to time so stay tuned!