
How To Build an E-Tank
Restoring Cast Iron can be challenging at times. You can save yourself a lot of work by creating an E-Tank to remove the rust safely.
Supplies
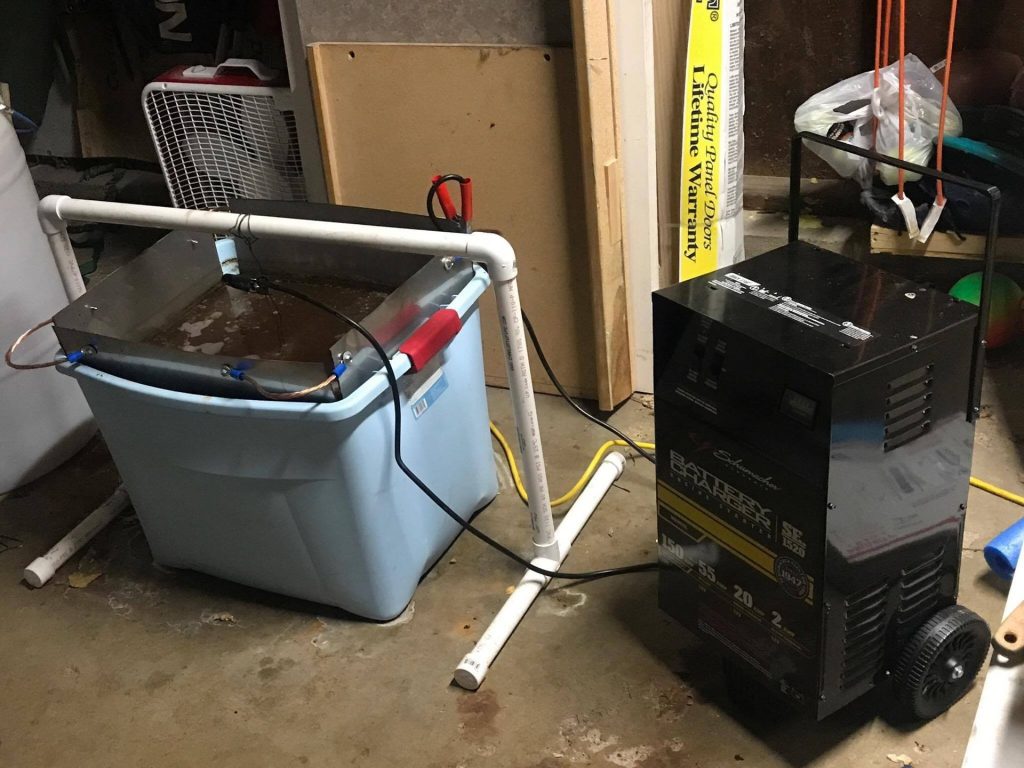
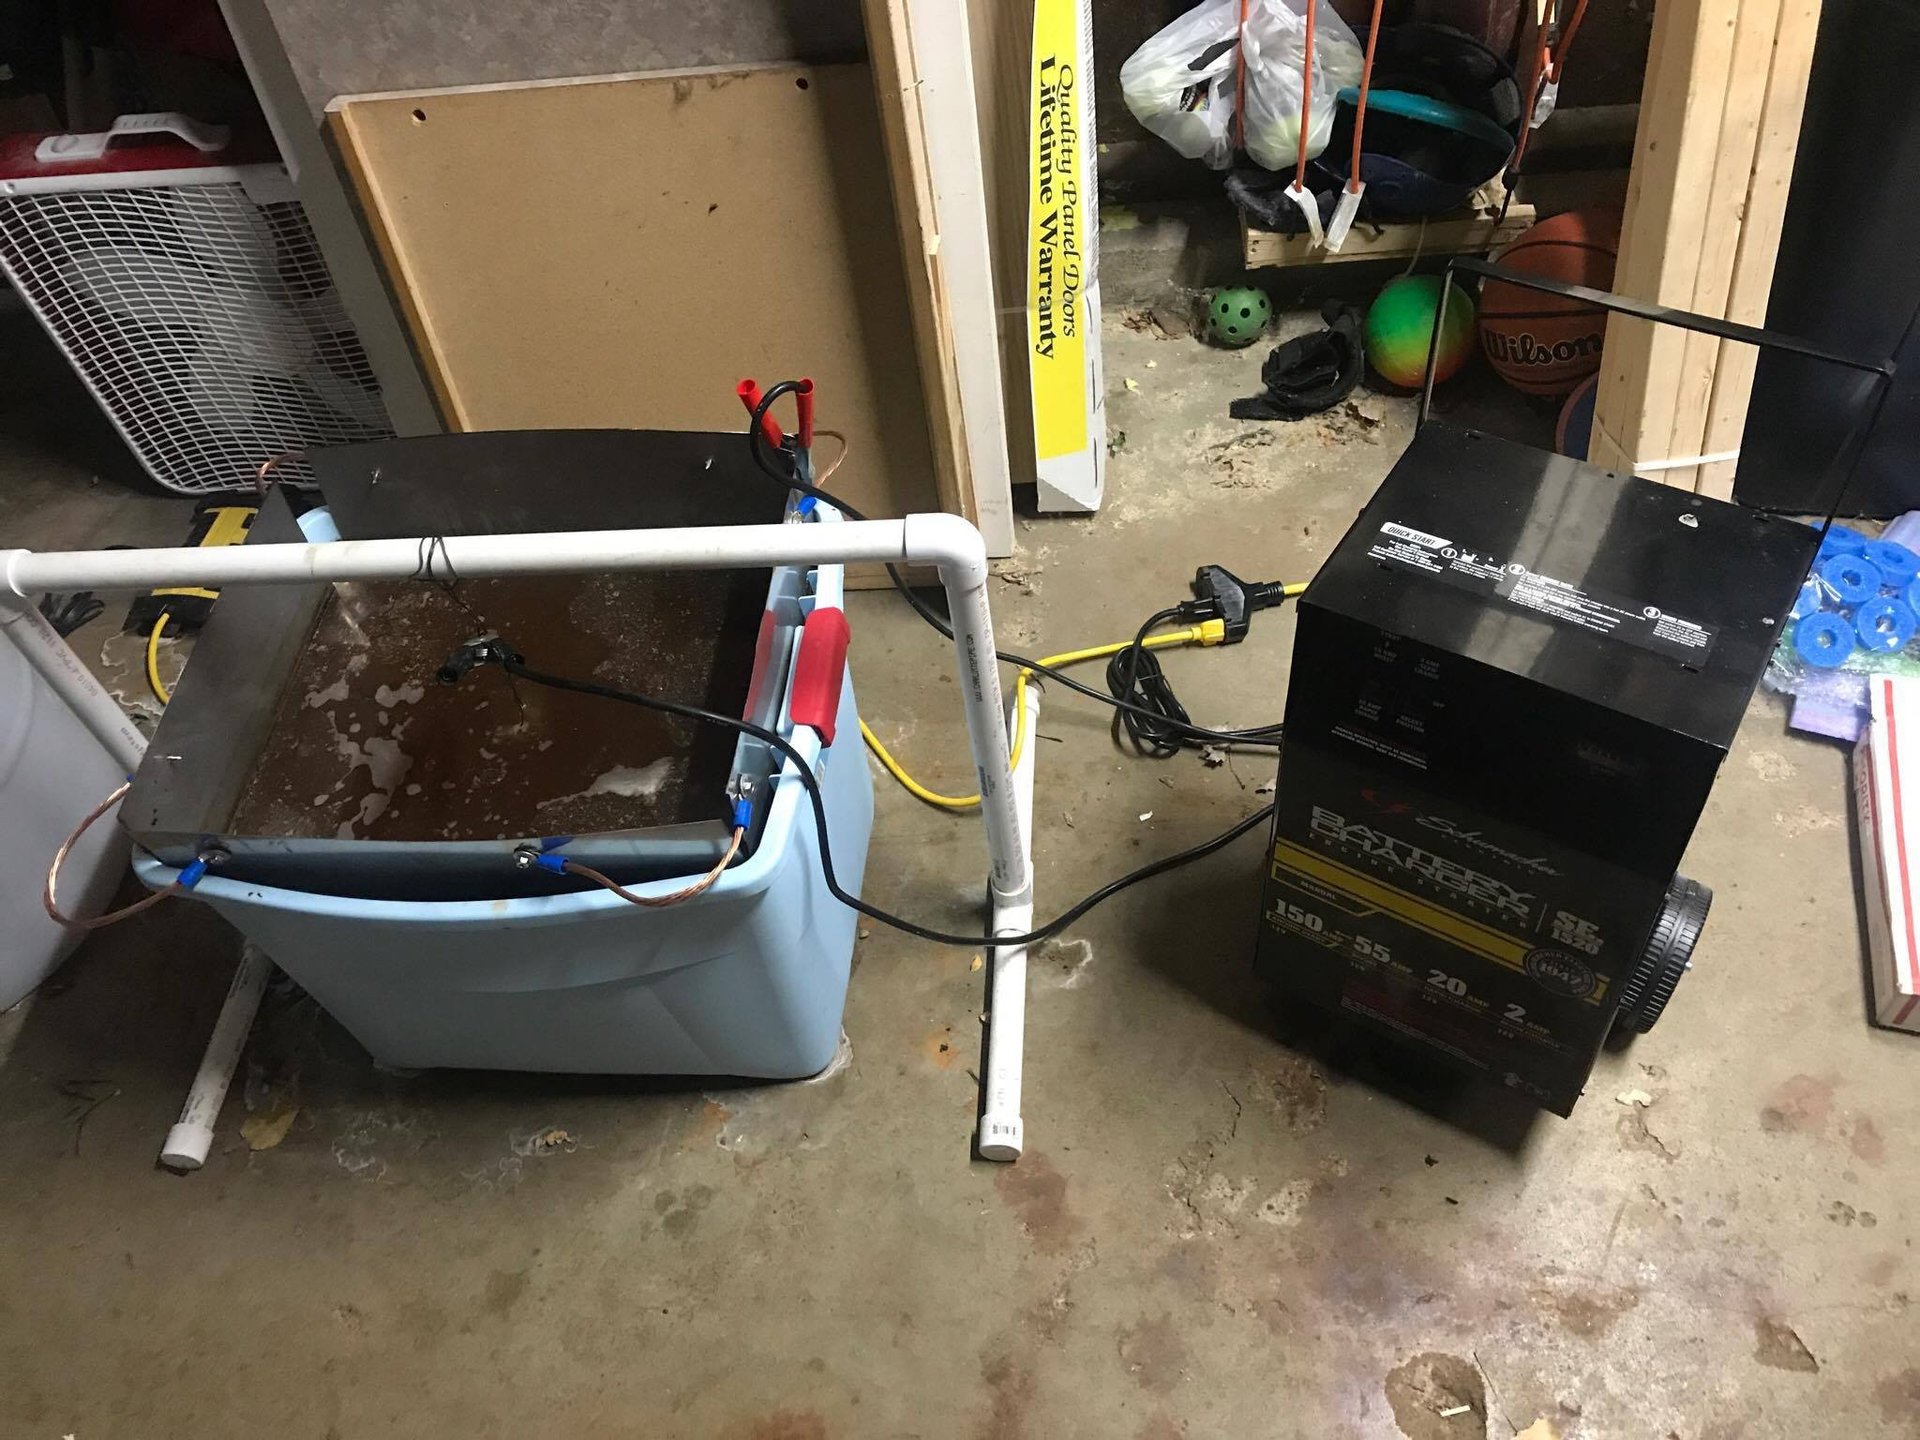
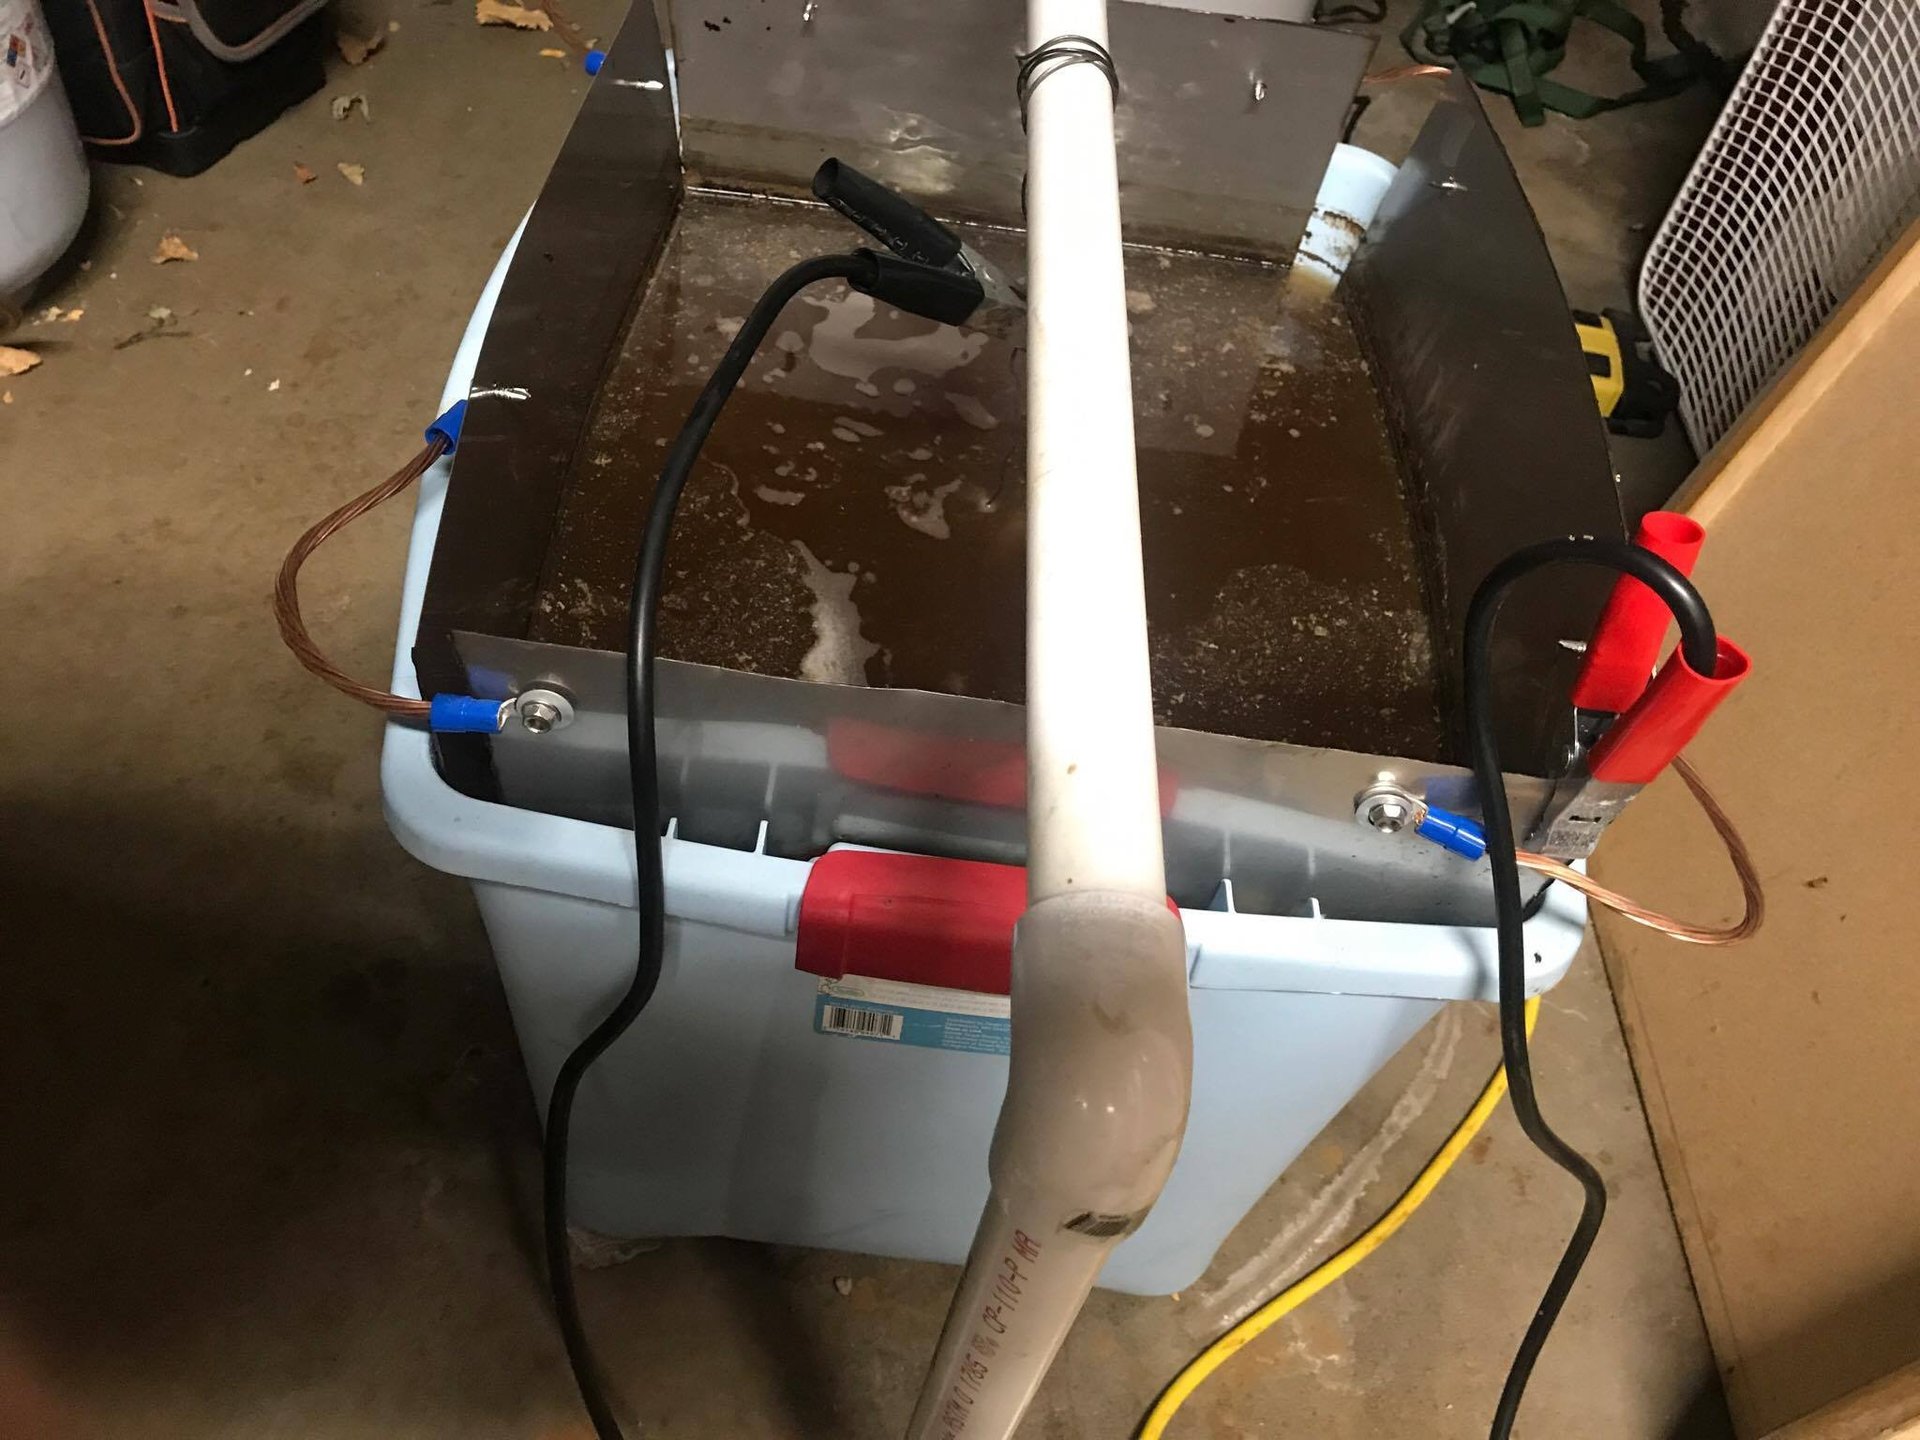
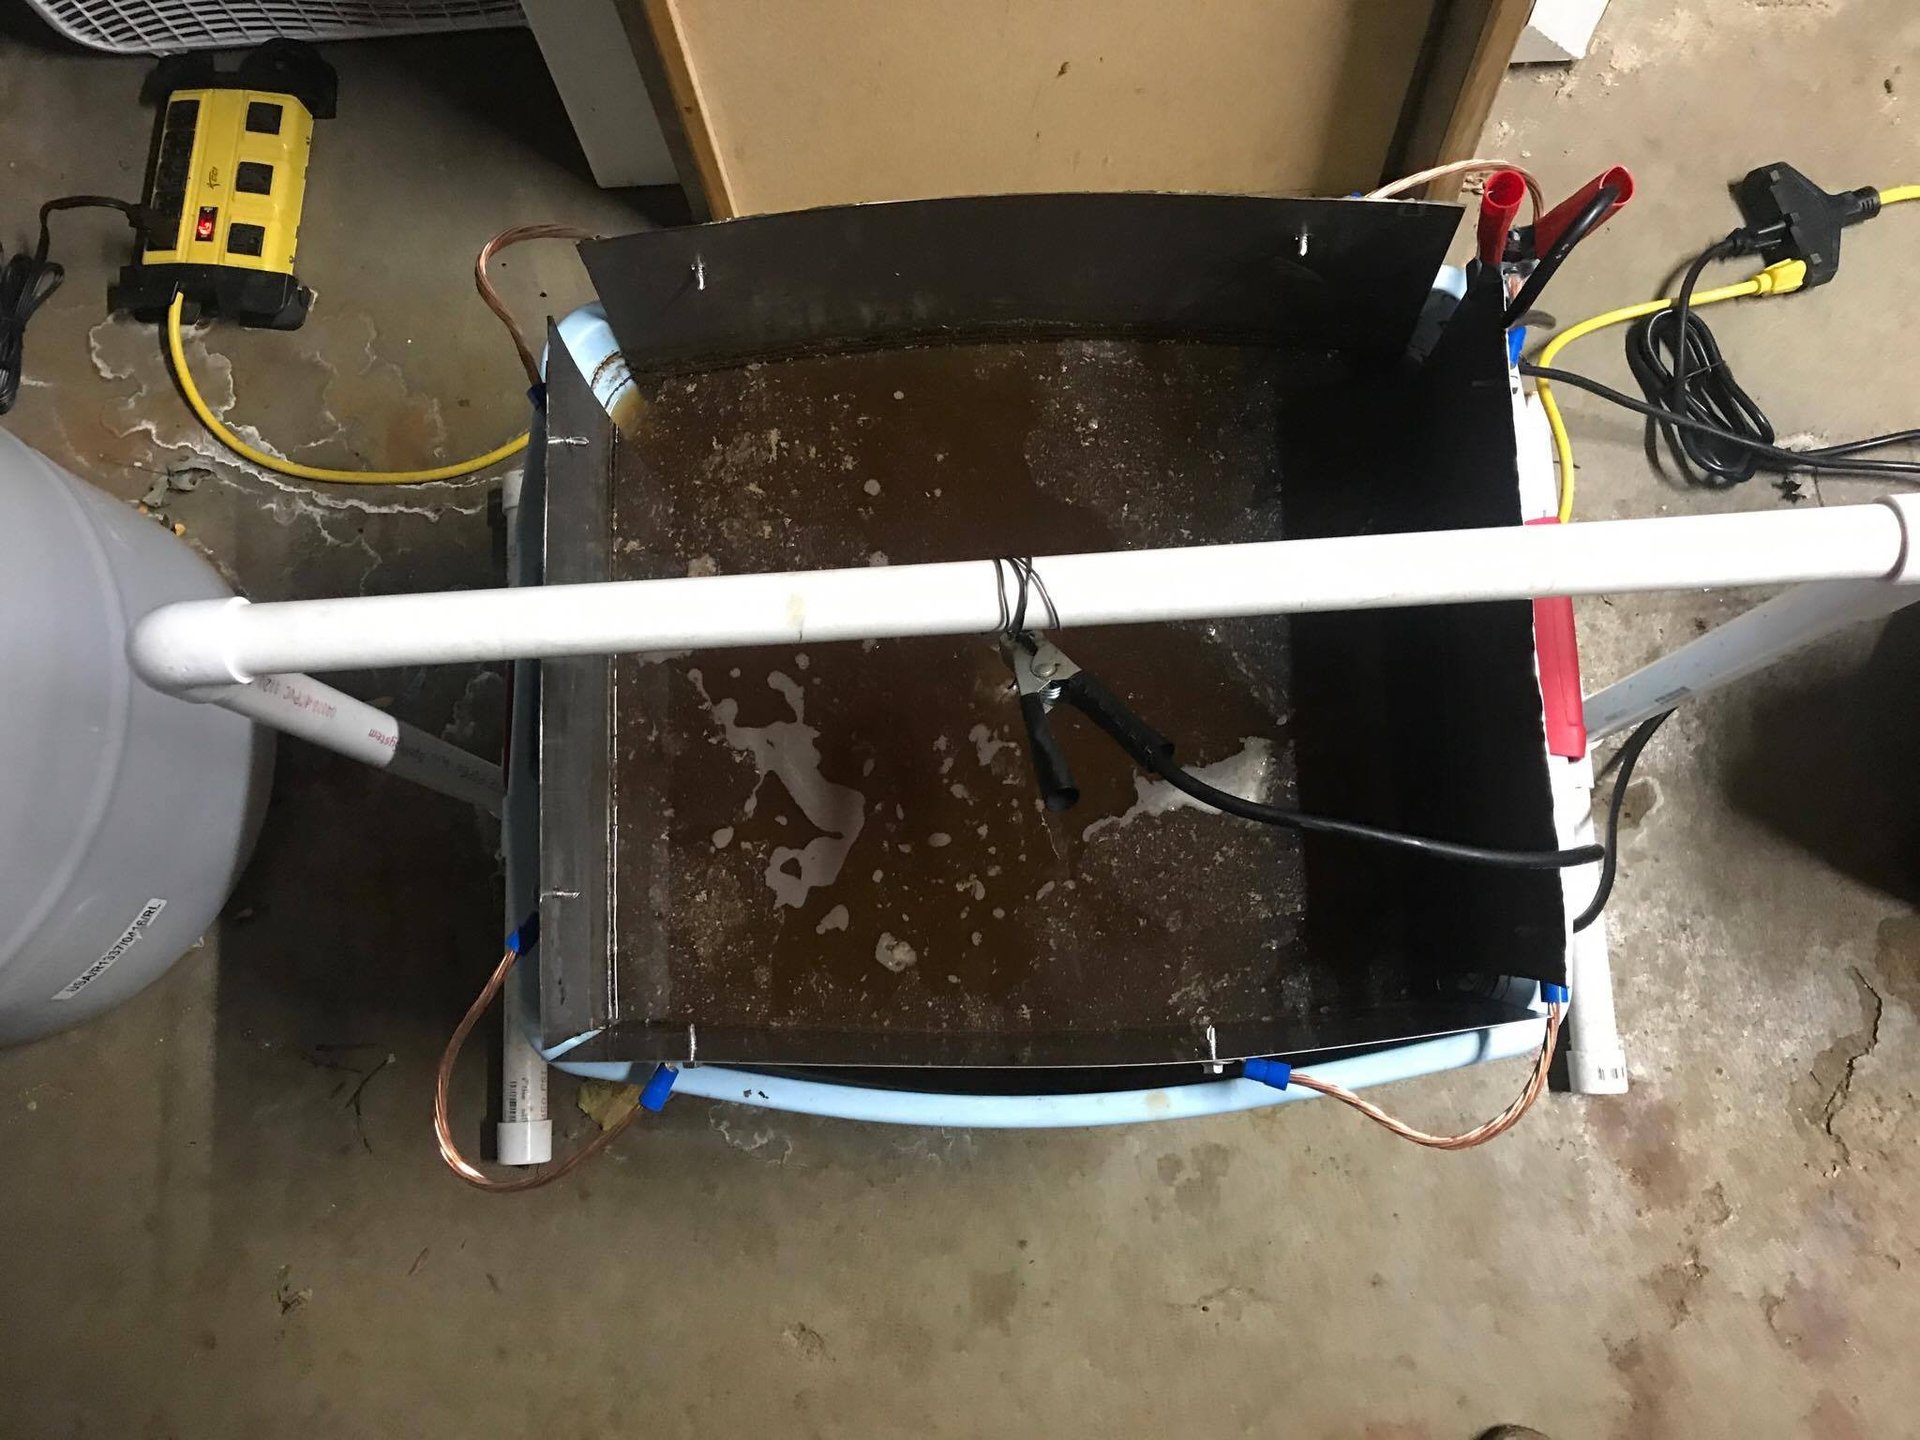
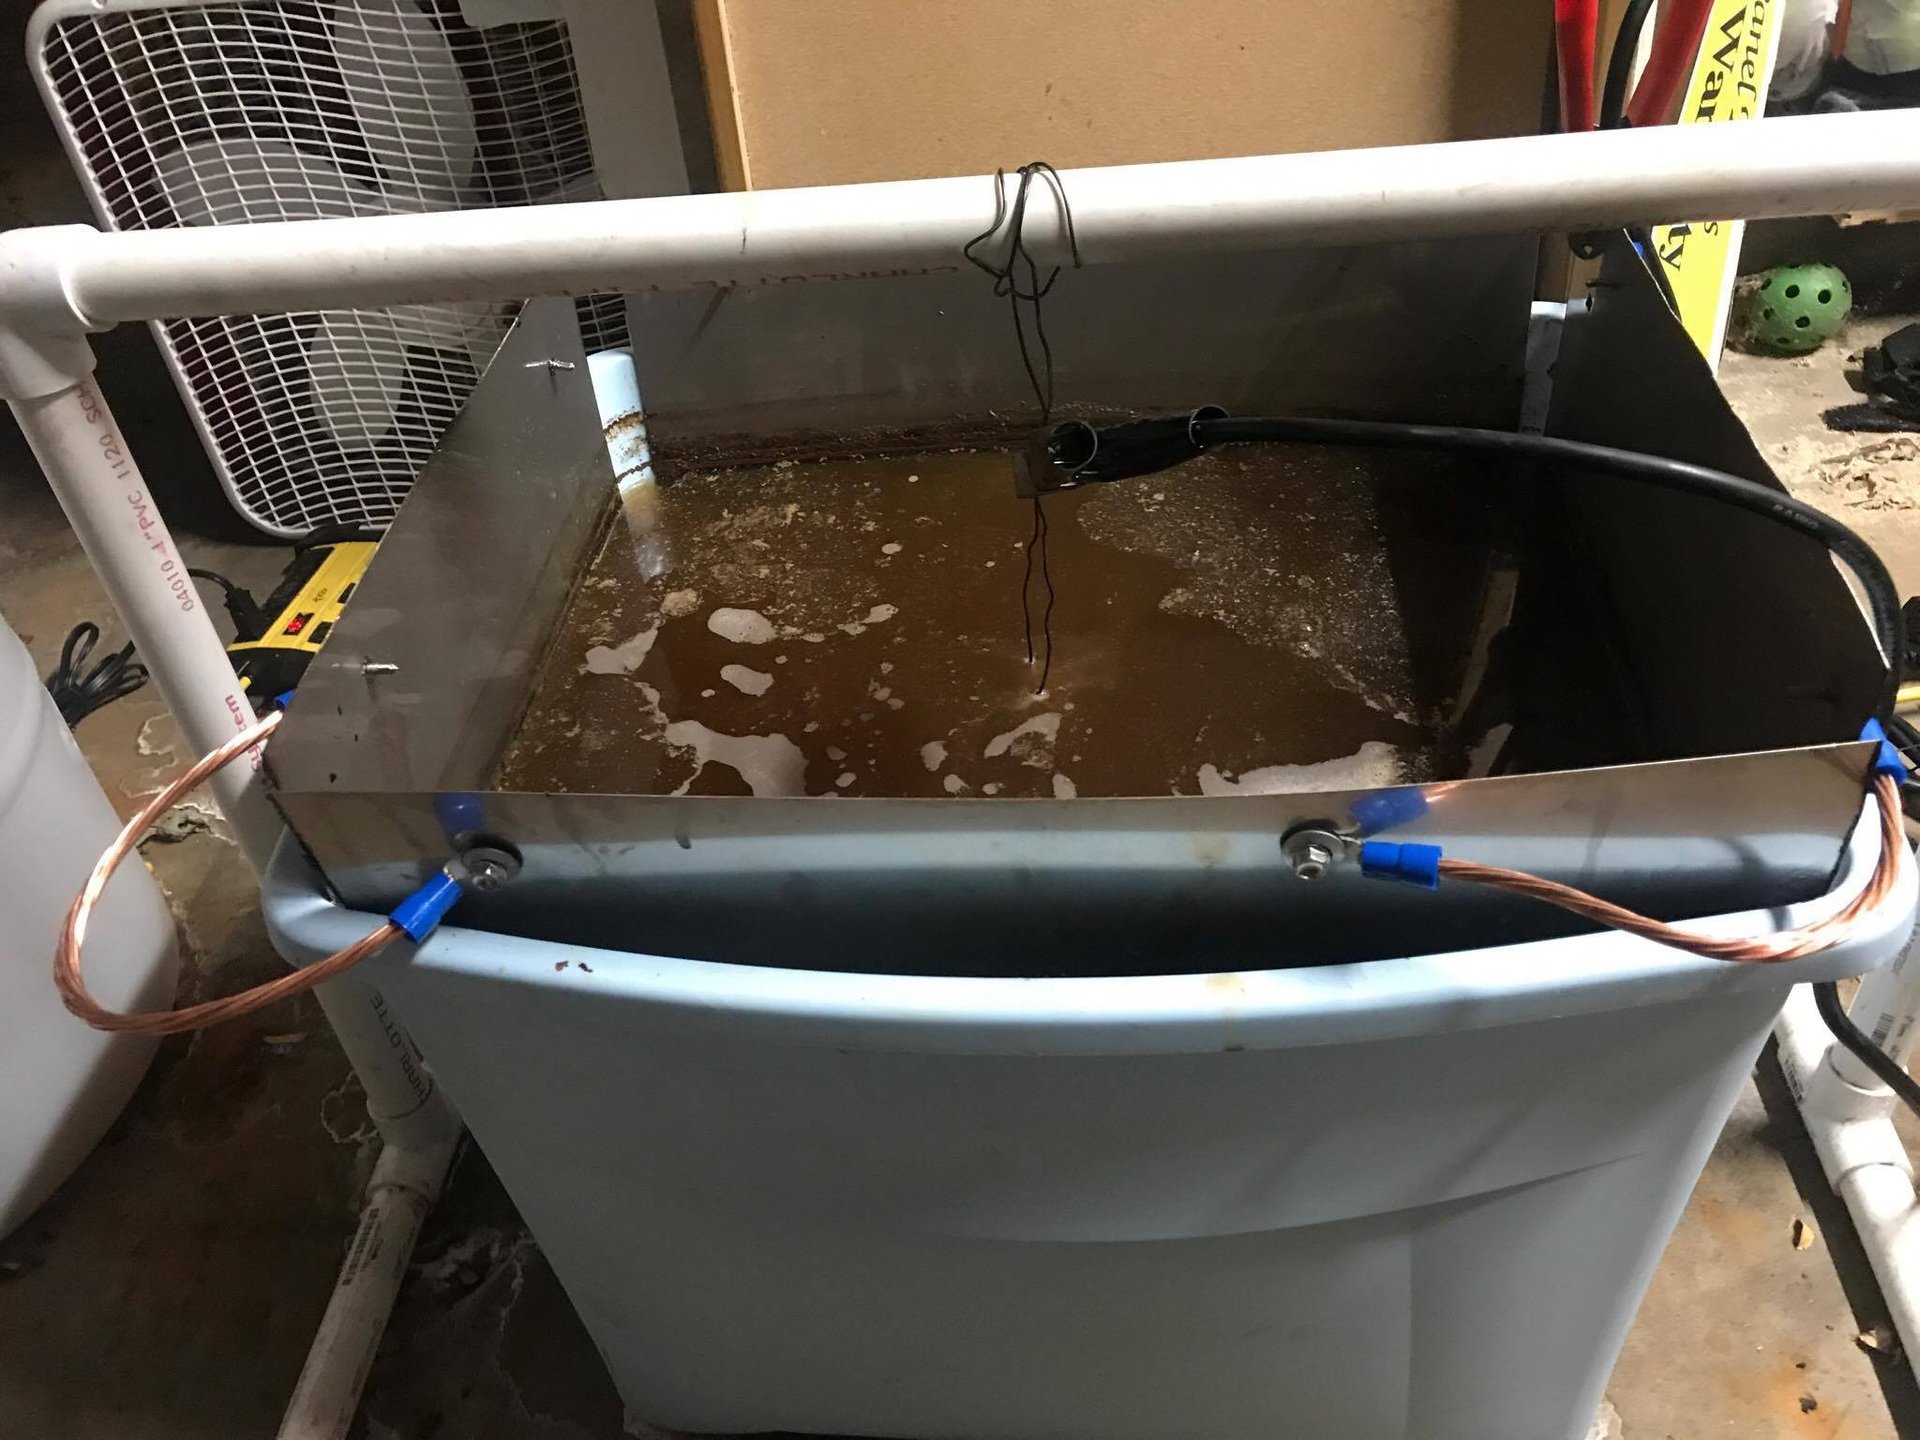
22 gallon plastic bin or drum
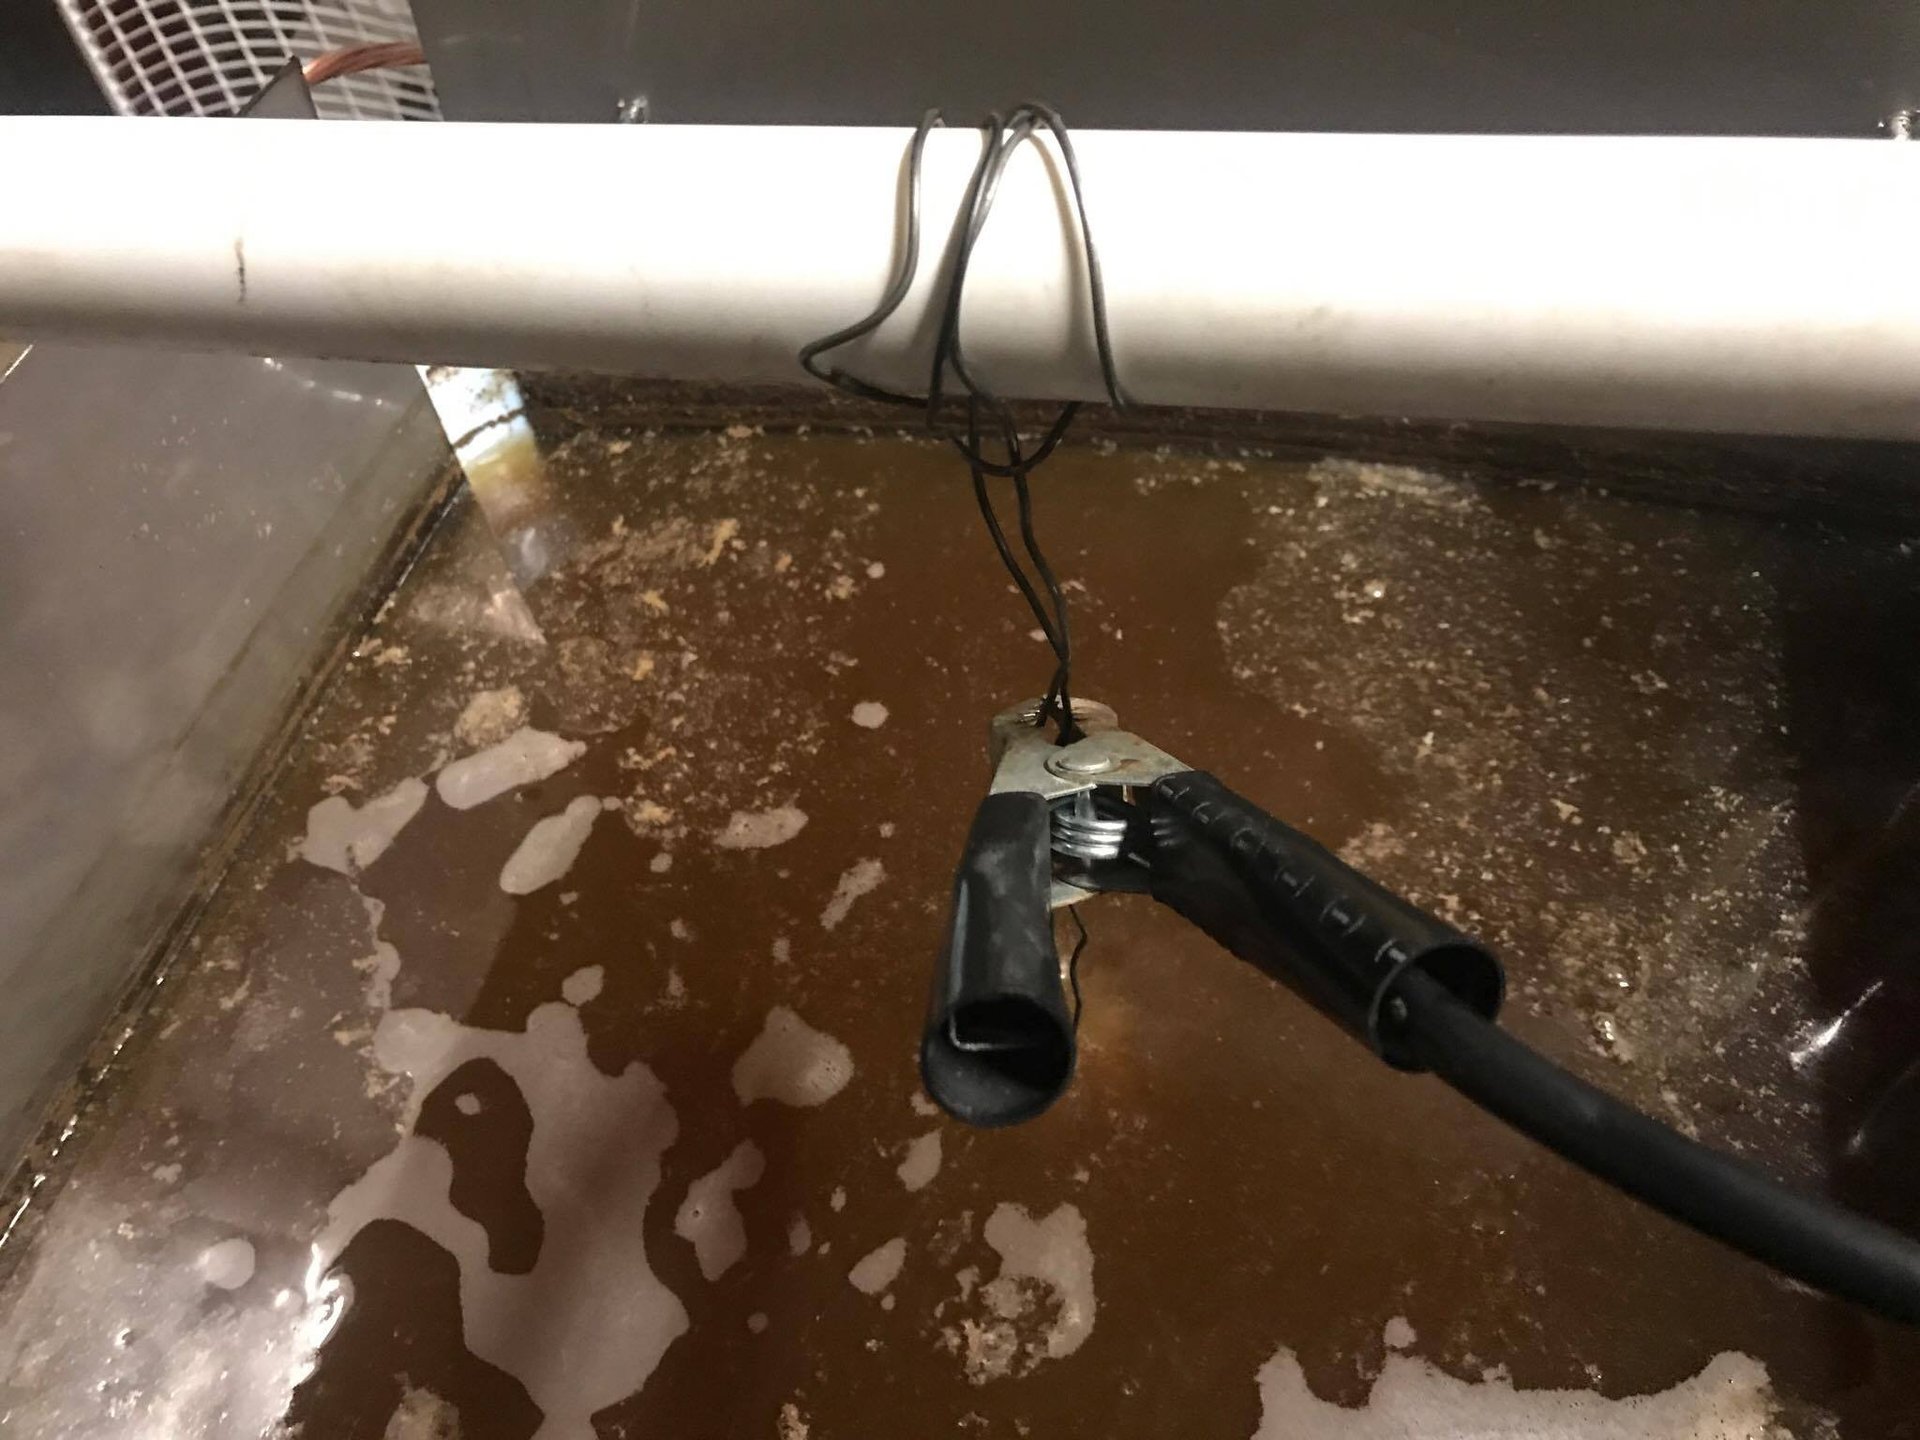
6-8 gauge copper wire
Anode (regular scrap steel, i.e. lawn mower blades or any regular non metallic, non galvanized steel)
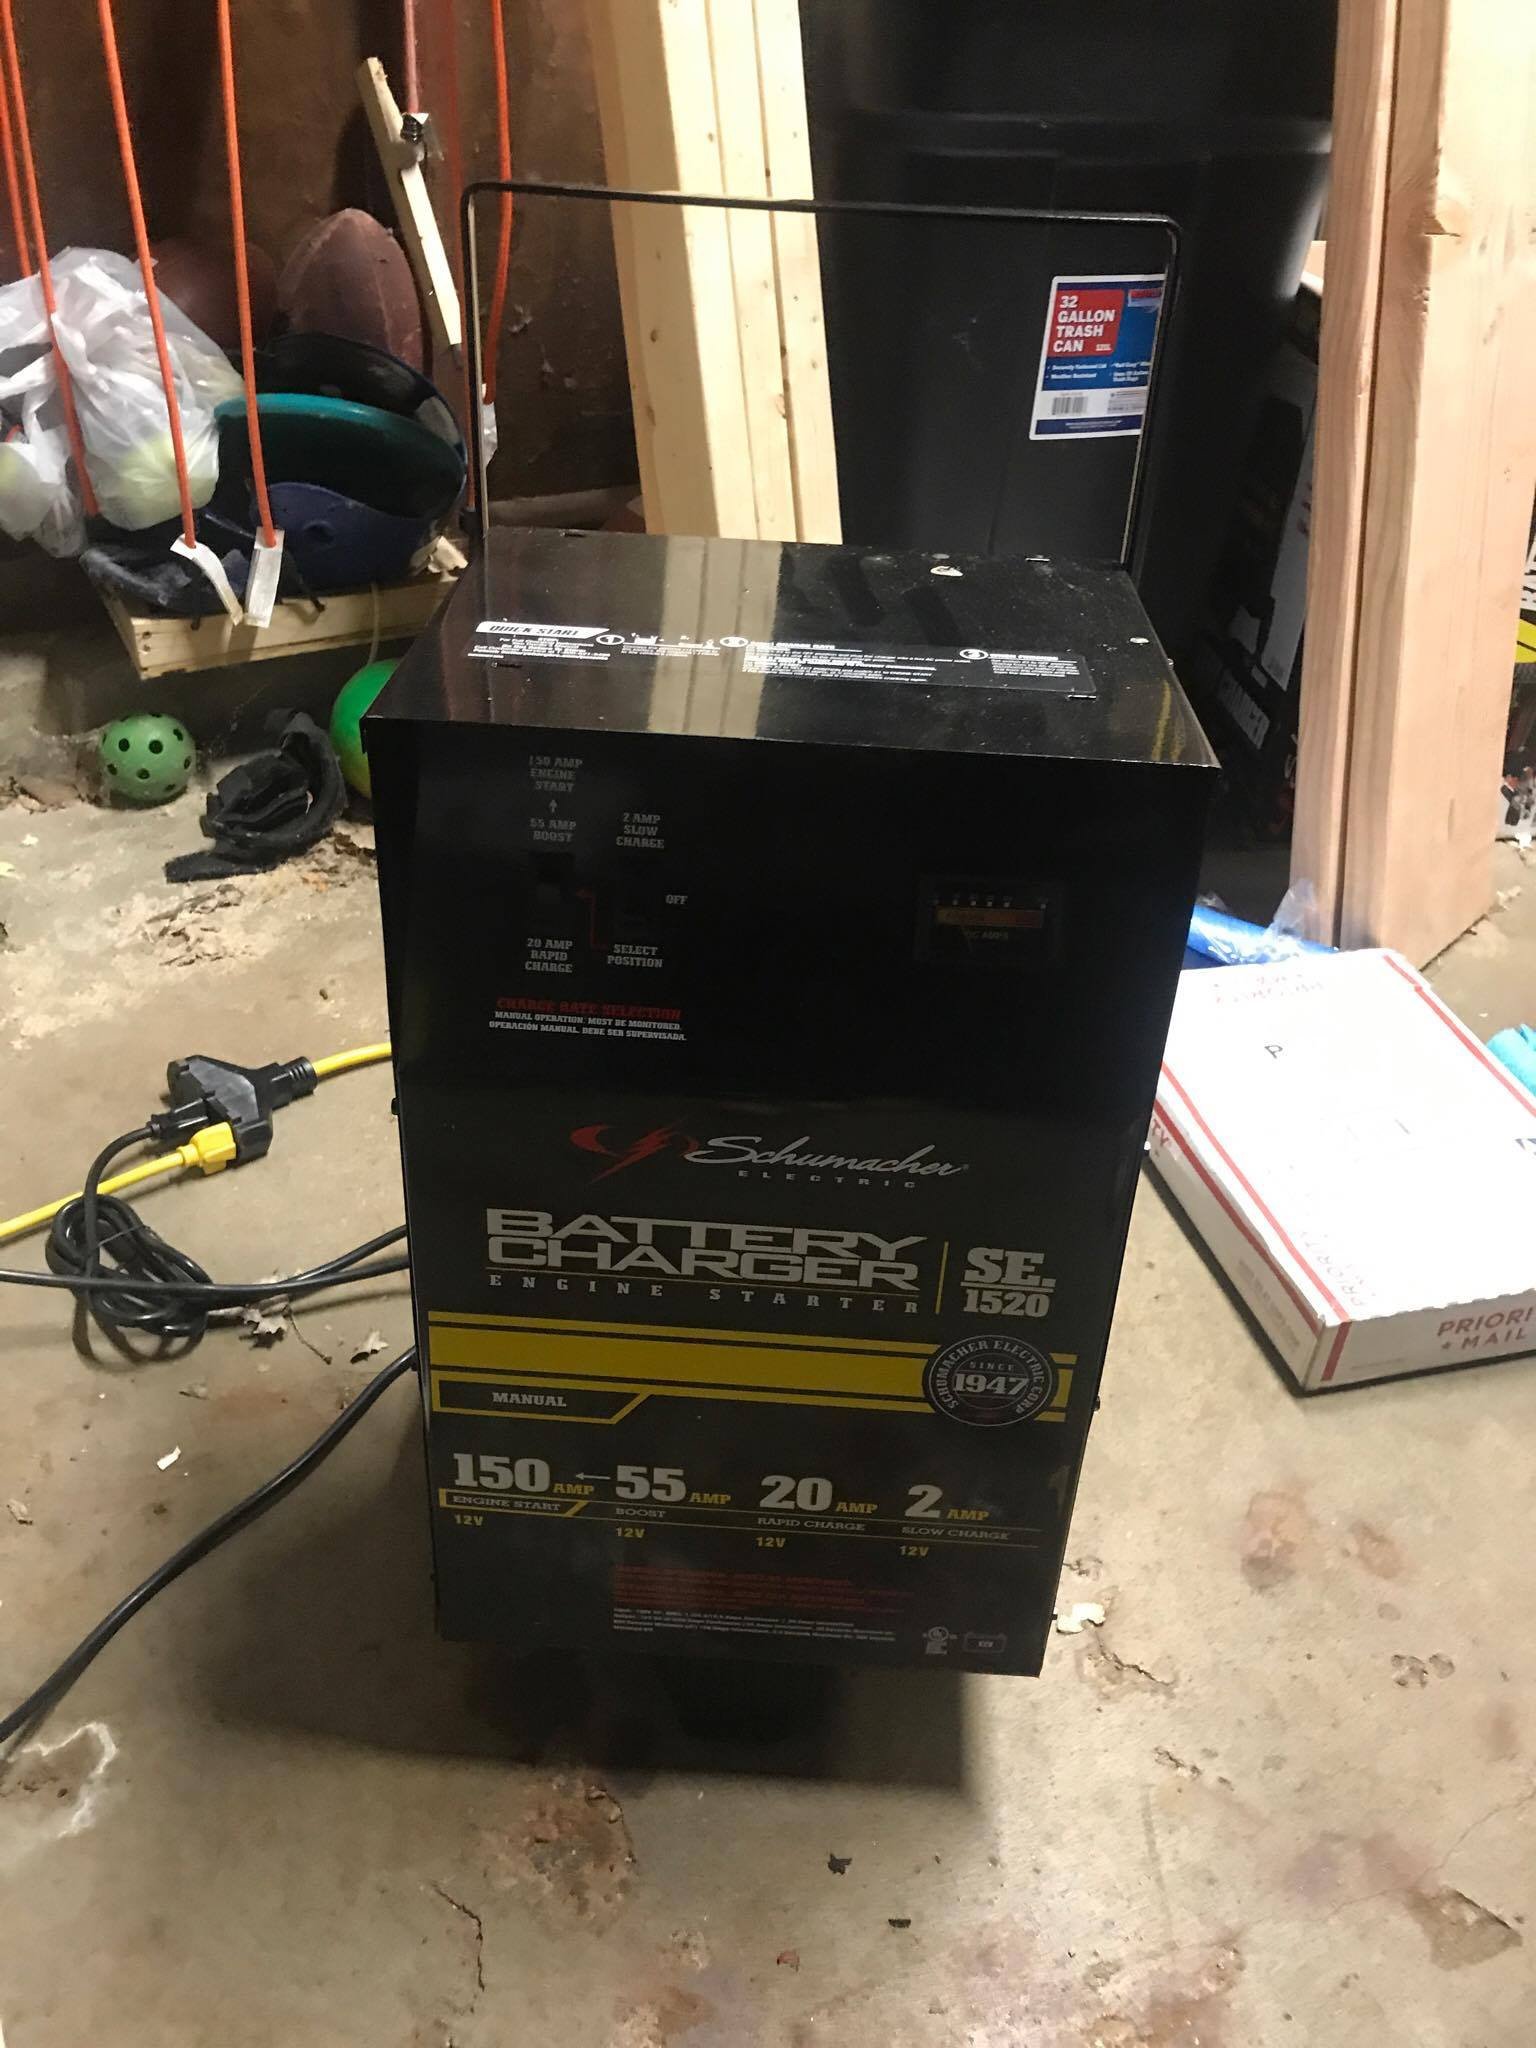
Manual operating battery charger
PVC pipe
Coat hanger
Laundry booster (1.5 cups per 10 gallons)
Instructions
Put metal inside of plastic container. Secure the copper wire to the metal weather its wrapping around metal or fastening with screws. Fill container until its almost to top. Place PVC pipe on top with a bent coat hanger to be able to hang the cast iron piece from the top. Mix your wash into water. Connect the hot (red) lead to metal and negative (black) to wire holding piece. Turn on charger. Keep cast iron piece in the tank for 24 hours. Other cast iron pieces that need more work may need 48 hours. Keep checking back to see if the crud and gunk is all fallen off into the water mixture. If it is, its ready to be scrubbed.


Hey can you send me more detailed pics on the build.I have an absolute treasure trove of antique cast iron that needs restoring
There are pretty detailed step by step images in the post currently. If you have a particular question about a step, feel free to reach out again.
Can you completely submerge the handle of the cast iron skillet being cleaned where the coat hanger attaches to the handle or does it need to be out of the solution a little? Most of the pics I’ve seen show the tip of the handle out of solution a little. Just wanting a uniform clean. Thank you
Since it is very low voltage, you can submerge the handle completely.
What setting are you using on the charger?
Hi Todd. I use mine on 2 amps.
What amperage is the charger set at?
I use mine on 2 amps.
Mr. Adams, are you on Facebook. May I ask where you are located? Thanks so much.
You can find me on Facebook via the following URL, or there’s a link to this url at the top of my website. https://www.facebook.com/dutchovendaddy
I built it as you described and the first time it worked like a dream!! But the second time my power supply keeps tripping like it is shorting out. I am not sure what I am doing wrong. The pan isnt touching the steel sheets, there is no short anywhere. Is it something to do with the resistance the liquid solution is presenting? The only thing I did differently was I diluted the washing soda in hot water first.
Great question, David. I’ve seen the same thing from time to time. What I’ll do is turn the power amperage down. 2amps should work great. I’ve also noticed that over time the steel will start to get chewed up, so I have to replace that. I also don’t dilute the washing soda in hot water first. You could also try using less washing soda and see if that helps. Over all it sounds like the battery charger might be pulling higher amount of power than it needs. Hopefully that gives you some ideas and things to check. Hope you have a great day!
After years of wanting to do it, I have just built my e-tank and begun to use it. It’s working amazingly well! Just one question for the expert… I’m using a piece of 10 gauge Cooper wire to hang my cast iron piece in the tank. Is there any problem with that? I know only a tiny bit about unlike metals and galvanic corrosion, and I’m wondering if I’m introducing a problem. Please let me know your thoughts about this. Thanks!
Great question, you could do that, however I typically just use a wire coat hanger since it’s generally cheaper than copper wire.
Hello and Thanks for allowing me here.
This is my first tank ever never seen one built never seen one in use before and it seems to be very scary.
I have bought a 40 gallon plastic barrel with a lead that fits it properly. I have bought connecting valve for the bottom to drain out the liquid so that it can be emptied easily. I have also bought a heater that some people use for chicken waters to keep them from freezing during the winter time, I have not yet started to put this together due to coming down sick with the Covid. So as soon as that’s over with I will get started. I’m understanding that I am to use a heavy wire, such as a coat hanger wire or copper wire to attach the Skillet to the board OK to submerge it in the liquid. I bought a converter from 1:10 to 12 V instead of a battery charger and I’m hoping this will be fine to use. It was recommended through another website so I ordered it was not that expensive. I have purchased about 35 rusty skillets that needs to be cleaned. Some are have crud some just rust now if I need to just remove the crud I can use that in a lye tank or if it’s rust and crud I should use that in the etank. Thanks for any advice and any help that you can give me putting my etank together.
You got this! The best thing is that it is low voltage. I think you are on the right track with what you mentioned.